insertParkingSpaces
Syntax
Description
The insertParkingSpaces function inserts a grid of parking
spaces into a parking lot at a specified position or along specified edges.
To insert spaces at a specified position, use the
Positionname-value argument.To insert spaces along specified edges, use the
Edgename-value argument.
To use this function, you must specify either Position or
Edge, but you cannot specify both.
Insert Spaces at Specified Position
insertParkingSpaces(___,
sets options using name-value arguments, in addition to the input arguments from the
previous syntax. You can specify Name=Value)Position and the other name-value
arguments in any order after the other input arguments.
Example: insertParkingSpaces(lot,space,8,Rows=2,Position=[25 25])
inserts a 2-by-8 grid of parking spaces into a parking lot at position (25, 25) in meters
from the scenario origin.
Insert Spaces Along Specified Edges
insertParkingSpaces(___,Edge=
sets options using name-value arguments, in addition to any combination of input arguments
from previous syntaxes. You can specify edge,Name=Value)Edge and the other name-value
arguments in any order after the other input arguments.
Example: insertParkingSpaces(lot,space,Edge=[1,3],Offset=5) inserts
a row of parking spaces along edges 1 and 3 of a parking lot and offsets each row from its
edge by 5 meters.
Examples
Create a driving scenario containing a short road that enters into a parking lot that is 50 meters long and 20 meters wide. Plot the parking lot and display the edge numbers along which you can insert parking spaces. Because edge 3 forms a junction with the road, its edge number does not display on the plot, but you can still insert spaces along it.
scenario = drivingScenario;
roadcenters = [25 30; 25 15];
road(scenario,roadcenters);

vertices = [0 0; 50 0; 50 20; 0 20];
lot = parkingLot(scenario,vertices);
plot(scenario,ParkingLotEdges="On")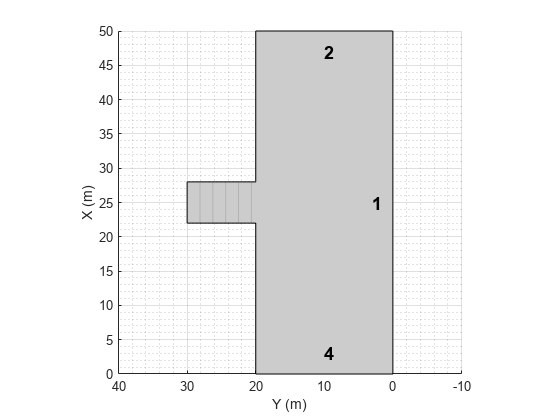
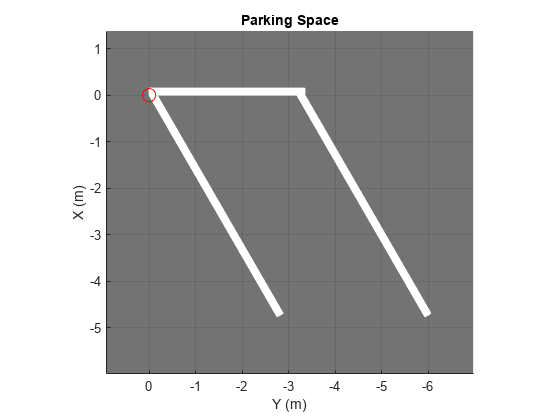
Define the parking space type to add along one of the edges. Set an angle of 60 degrees. Plot the parking space.
space = parkingSpace(Angle=60);
plot(space)
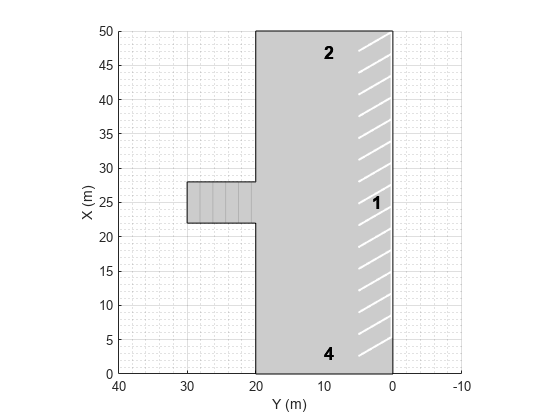
Insert the angled spaces along edge 1 of the parking lot.
insertParkingSpaces(lot,space,Edge=1)
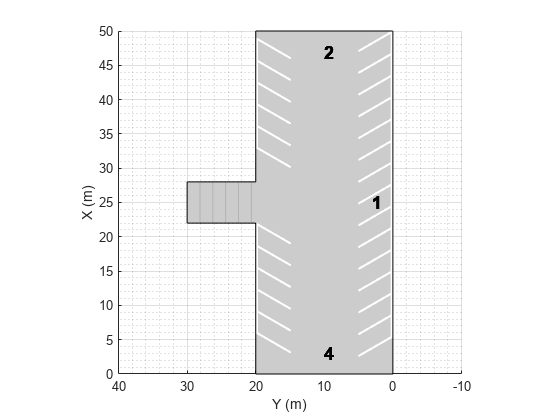
Insert angled spaces along edge 3: five above the junction and five below the junction. Offset these spaces by 3 meters and 30 meters from the bottom of edge 3, respectively. Reverse the angle of the spaces used along edge 1.
numSpaces = 5;
space = parkingSpace(Angle=120);
insertParkingSpaces(lot,space,numSpaces,Edge=3,Offset=3)
insertParkingSpaces(lot,space,numSpaces,Edge=3,Offset=30)
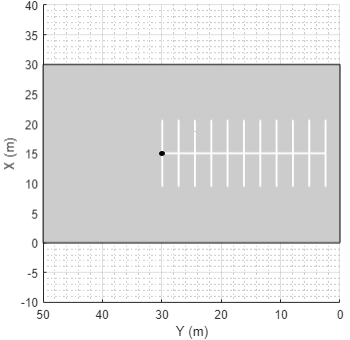
Create a driving scenario containing a 50-meter road and a 20-by-30 meter parking lot. Plot the scenario.
scenario = drivingScenario;
roadcenters = [0 50; 50 0];
road(scenario,roadcenters);

vertices = [40 10; 25 -5; 5 15; 20 30];
lot = parkingLot(scenario,vertices);
plot(scenario)

Insert a parking grid into the lot. Specify a grid with two rows of eight spaces. Use the default parking space dimensions, and place the grid at a 45-degree angle to align it with the road.
space = parkingSpace;
numSpaces = 8;
insertParkingSpaces(lot,space,numSpaces,Rows=2,Position=[15 20],Orientation=45)
Create a parking lot that contains a mixture of parking spaces, no-parking areas, and accessible spaces.
Define the parking space to use in the parking lot. Use the default settings. Plot the space.
space = parkingSpace;
plot(space,Origin="off")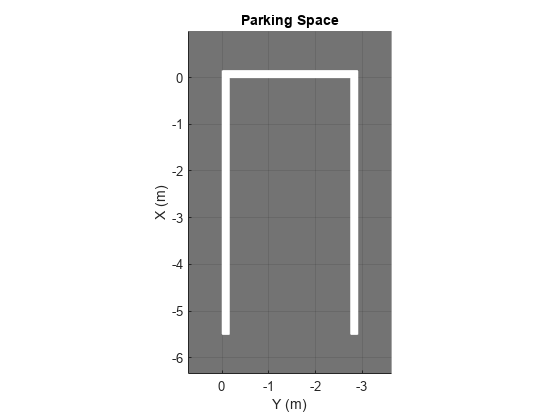
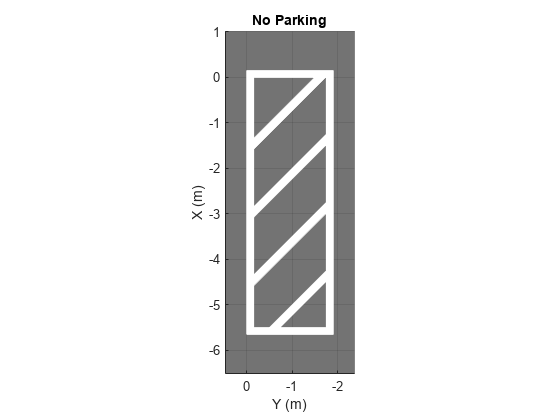
Define the no-parking areas to use in the parking lot. Specify a color of white and a width that is one meter less than the width of the default parking space. Plot the space.
noSpace = parkingSpace(Type="NoParking",Width=(space.Width - 1),MarkingColor="White");
plot(noSpace,Origin="off")
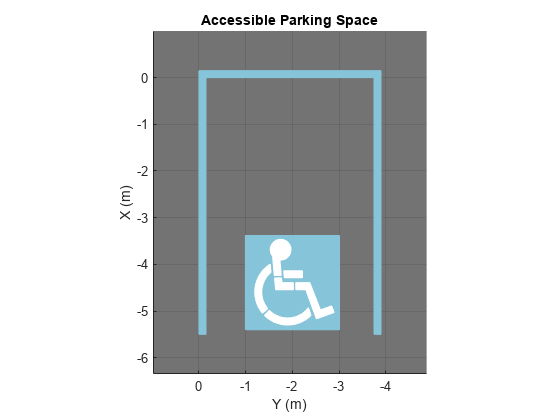
Define the accessible parking space to use in the parking lot. Specify a width that is one meter more than the width of the default parking space. Plot the space.
accessibleSpace = parkingSpace(Type="Accessible",Width=(space.Width + 1));
plot(accessibleSpace,Origin="off")
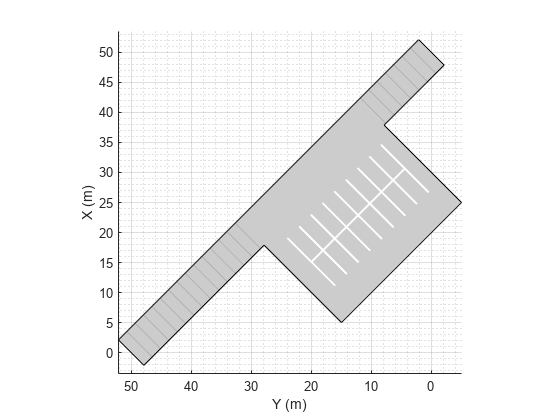
Create a driving scenario containing a parking lot with a nonrectangular layout. Plot the parking lot and display the edge numbers along which you can add parking spaces.
scenario = drivingScenario;
vertices = [0 0; 32 -10.5; 32 -50.5; 25 -57.5; 0 -57.5];
lot = parkingLot(scenario,vertices);
plot(scenario,ParkingLotEdges="on")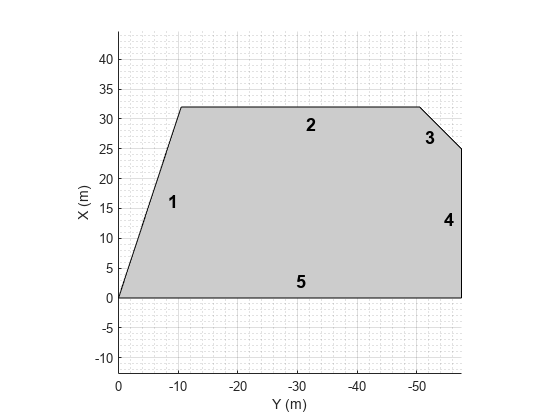
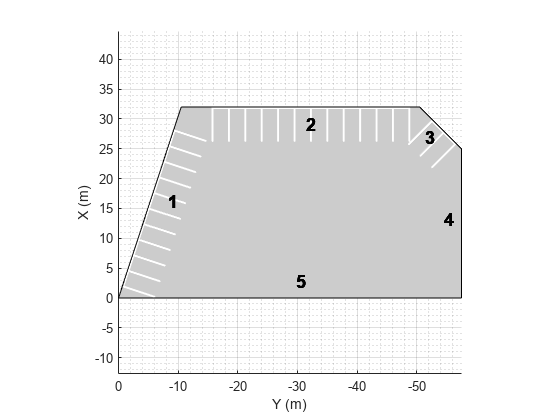
Insert default parking spaces along the first three edges of the parking lot. To avoid overlapping parking spaces, make these adjustments to the insertions:
Along edge 1, insert only 10 spaces.
Along edge 2, offset the spaces by 5 meters from the first vertex of the edge.
Along edge 3, offset the spaces by 3 meters from the first vertex of the edge.
numSpaces = 10;
insertParkingSpaces(lot,space,numSpaces,Edge=1)
insertParkingSpaces(lot,space,Edge=2,Offset=5)
insertParkingSpaces(lot,space,Edge=3,Offset=3)
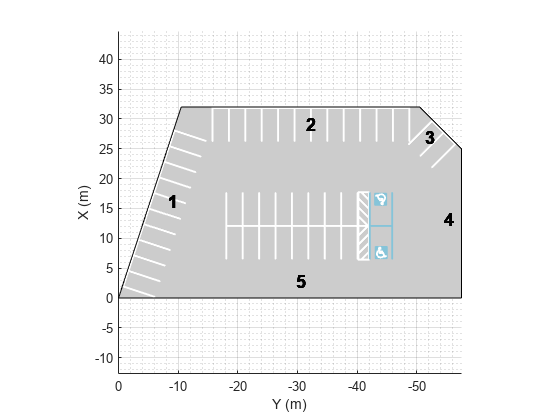
In the center of the parking lot, insert a 2-by-10 grid of parking spaces containing 8 columns of default spaces, 1 column of no-parking areas, and 1 column of accessible spaces.
insertParkingSpaces(lot,[space noSpace accessibleSpace],[8 1 1],Position=[12 -18],Rows=2)
Input Arguments
Parking lot in which to insert spaces, specified as a ParkingLot
object. To create a parking lot, use the parkingLot
function.
Parking spaces to insert, specified as a parkingSpace
object or vector of parkingSpace objects.
space and numSpaces must contain the same
number of elements. Each element of numSpaces specifies the number
of parking spaces, of the type specified in the corresponding position of
space, to include in the parking grid.
Example: [parkingSpace parkingSpace(Type="NoParking")
parkingSpace(Type="Accessible")]
Number of spaces in the parking grid, specified as a positive integer or vector of positive integers.
space and numSpaces must contain the same
number of elements. Each element of numSpaces specifies the number
of parking spaces, of the type specified in the corresponding position of
space, to include in the parking grid.
The inserted parking grid contains sum(numSpaces) parking spaces.
If you specify more spaces than can fit the parking lot, then the inserted parking
spaces extend past the parking lot border.
Example: [5 1 1]
Position at which to insert the parking grid, specified as a row vector of the form
[x y] in meters from the scenario origin. The
insertParkingSpaces function determines the elevation
(z-value) of the parking grid based on the elevation of the input
parking lot lot.
For one-row parking grids (
Rows=1positionspecifies the upper-left corner of the parking grid.For two-row parking grids (
Rows=2positionspecifies the midpoint of the left-most parking lane marking.
This table shows sample positions for one-row and two-row parking grids.
| Position (One-Row Parking Grid) | Position (Two-Row Parking Grid) |
|---|---|
|
|
|

Example: [10 15]
Edges along which to insert a parking grid, specified as a positive integer or
vector of positive integers. Valid edge values are in the range [1,
M], where M is the maximum number of edges in the
parking lot. To view the edges along which you can insert a parking grid, use the
plot function to plot the driving
scenario that contains the parking lot, lot, and turn parking lot
edges on. Sample code:
plot(scenario,ParkingLotEdges="on")Example: [2 4]
Name-Value Arguments
Specify optional pairs of arguments as
Name1=Value1,...,NameN=ValueN, where Name is
the argument name and Value is the corresponding value.
Name-value arguments must appear after other arguments, but the order of the
pairs does not matter.
Example: insertParkingSpaces(lot,space,Orientation=45,Position=[50
35]) inserts a parking grid at a 45-degree angle at position (50, 35) in meters
from the scenario origin.
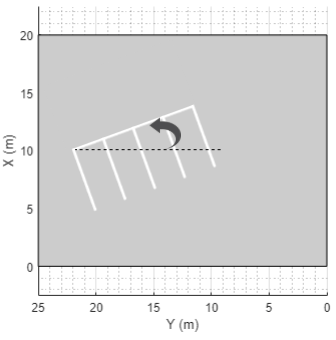
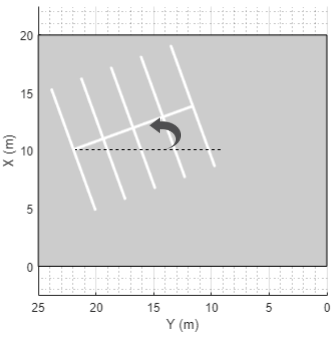
Orientation of the parking grid, in degrees, specified as a nonnegative real scalar. Orientation is measured counterclockwise with respect to the horizontal axis of the parking grid.
For one-row parking grids (
Rows=1For two-row parking grids (
Rows=2
The table shows sample orientations for one-row and two-row parking grids.
| Orientation (One-Row Parking Grid) | Orientation (Two-Row Parking Grid) |
|---|---|
|
|
|
Dependencies
To use this argument, you must specify the position
argument.
Offset of the parking grid from the edges, in meters, specified as a nonnegative
real scalar. Offset is relative to the first vertex of each
specified edge. The same offset applies to all edges.
Dependencies
To use this argument, you must specify the edge
argument.
Version History
Introduced in R2021b