Modelscape Governance
Manage financial model inventory and lifecycles with customizable dashboards and workflows
Since R2025a
Description
Modelscape™ Governance™ is part of Modelscape, a fully-customizable platform for regulation-compliant model risk management and model deployment at scale. Use Modelscape to move your financial models into production faster while reducing costs, increasing automation, and ensuring regulatory-compliance with frameworks such as SS 1/23, SR 11-7, OSFI E-23, and ECB TRIM.
Use Modelscape Governance to govern your financial models with centralized access to models, dependencies, metadata, lineage, audit trails, risk scoring, and model risk reporting. Perform these tasks:
Manage model metadata for any programming language or spreadsheet.
Track metadata for data you use in the model development process.
Analyze and track dependencies for models and data.
Inspect, view, and analyze model and data relationships.
View and report on the model state within the model lifecycle.
Manage the model hierarchy and dependencies.
Customize Modelscape Governance for Your Organization. You can tailor Modelscape Governance for your organization by performing these customizations:
Design workflows and approval procedures.
Generate reports and customized dashboards for model governance.
Score model risk and automate reporting.
Review, comment on, and approve models for state changes across the model lifecycle.
Integrate models with internal or vendor applications.
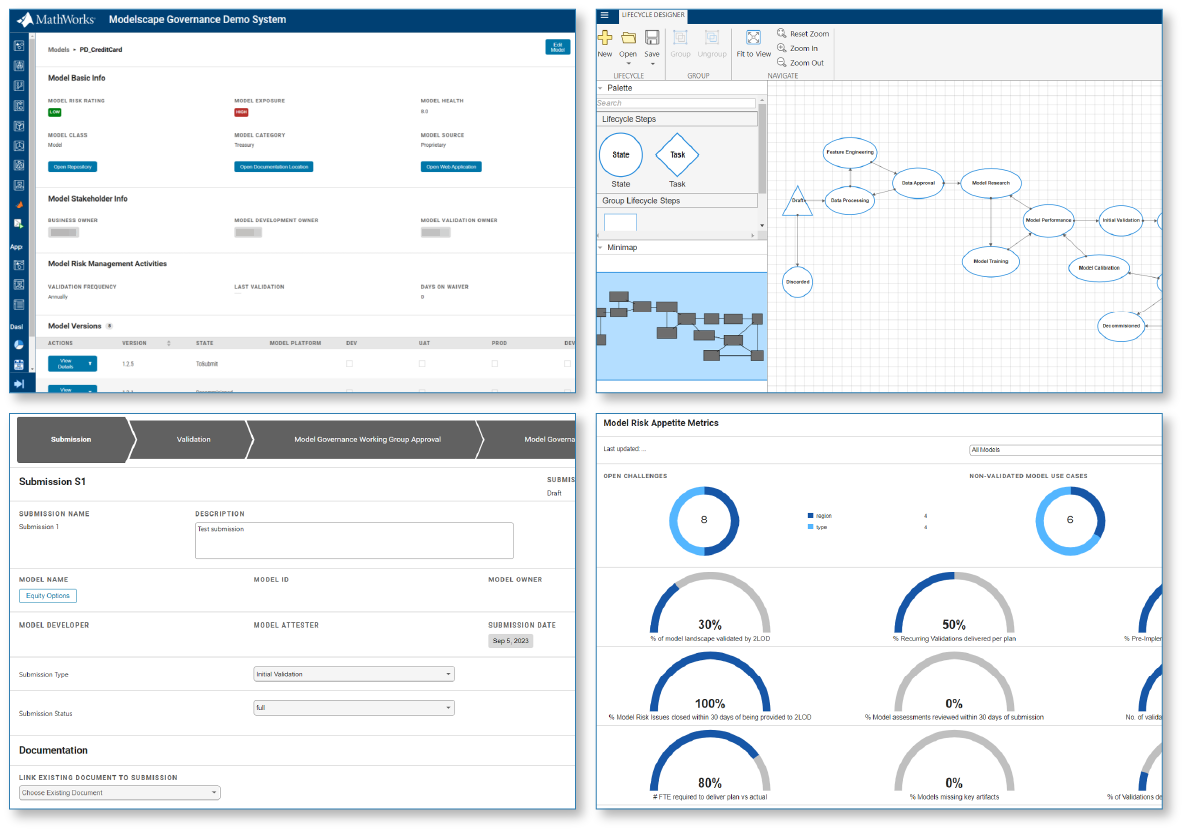
These images show examples of customized dashboards. To explore a customized workflow, see Customize Modelscape.
Modelscape Governance can help you manage your models. Key terms used in Modelscape Governance are:
A Modelscape model is a quantitative method that applies statistical, economic, or other techniques to given inputs to produce an output. You can use these outputs to guide pricing or other business decisions. Your model can be written in any programming language, including MATLAB®, and must have an associated Git™ repository.
Special Git commits to the model repository are called model versions. For example, "Probability of Default for Retail Credit in Europe" is a Modelscape model, and its 2015 and 2020 versions are the model versions.
Each Modelscape model must be associated with a lifecycle. A lifecycle is a set of possible states the model can inhabit and the transitions between them. Each model version must be in one of the states of the lifecycle.
Open the Modelscape Governance App
To host Modelscape Governance for your organization, contact Sales. After you host it, open Modelscape Governance in your browser by using the URL for your organization. To use Modelscape Governance with MATLAB, first set up Modelscape Governance, then download the Modelscape for MATLAB support package using the Add-On Explorer. To open the Add-On Explorer, go to the MATLAB Toolstrip and click Add-Ons > Get Add-Ons.
Examples
You can tailor Modelscape for your organization by customizing your dashboards and workflows. This example shows a workflow with customizations such as email integration and additional model parameters.
Example Workflow
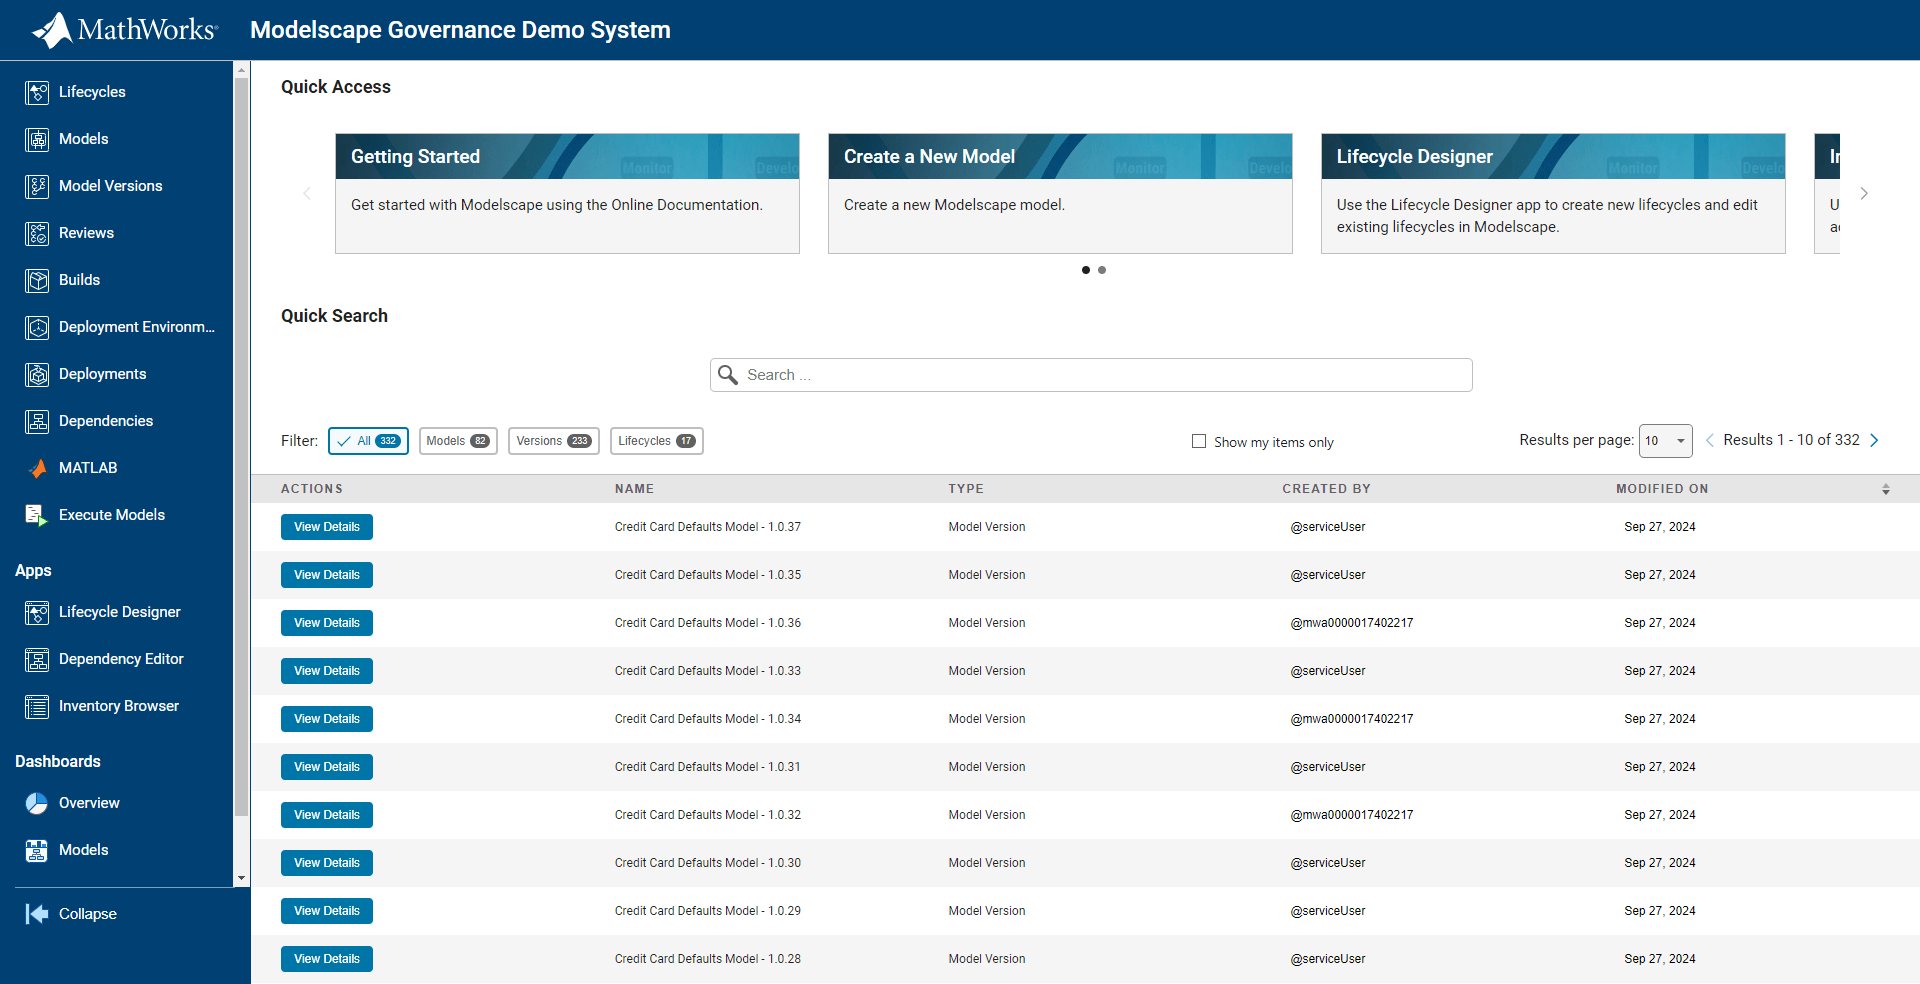
As a model developer, you start at a customized home page where you see a dashboard displaying your models and associated metadata.
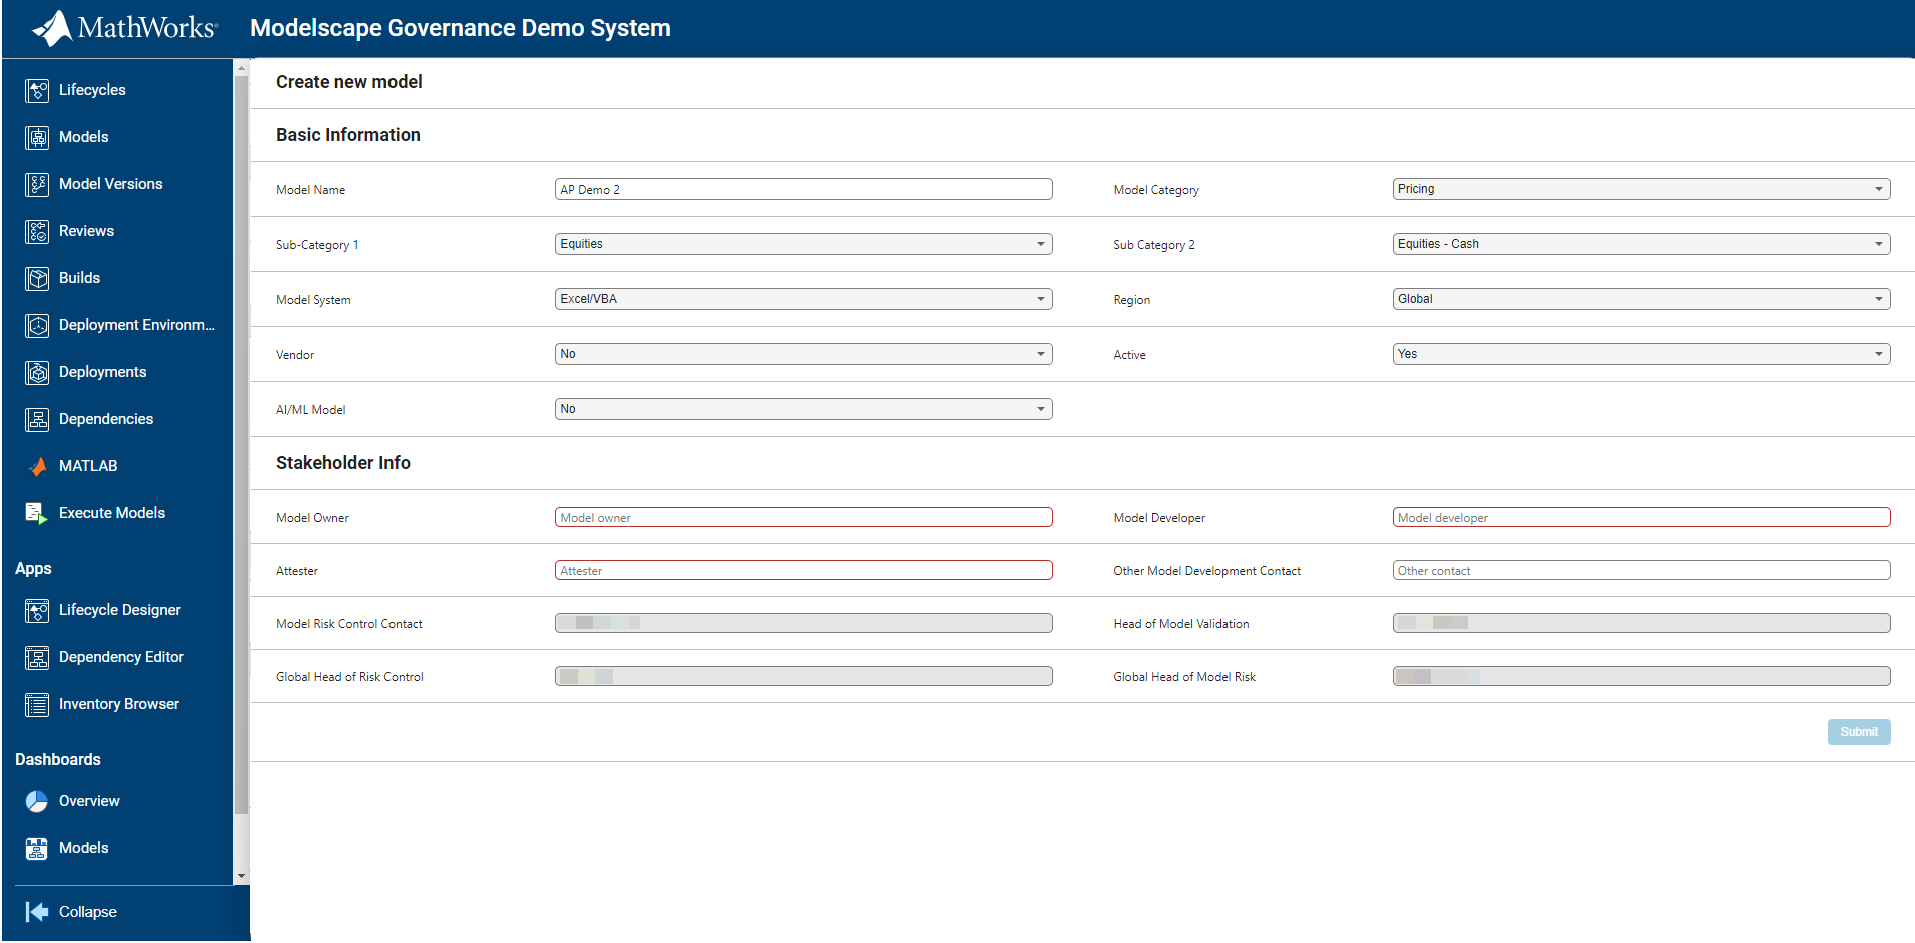
Create a new model by entering basic details like the model name and categories. Specify whether it is a vendor model and whether it is an AI model. Also enter stakeholder information such as the model owner, developer, and attester, then click Submit.
Modelscape generates an email message using your local email client.

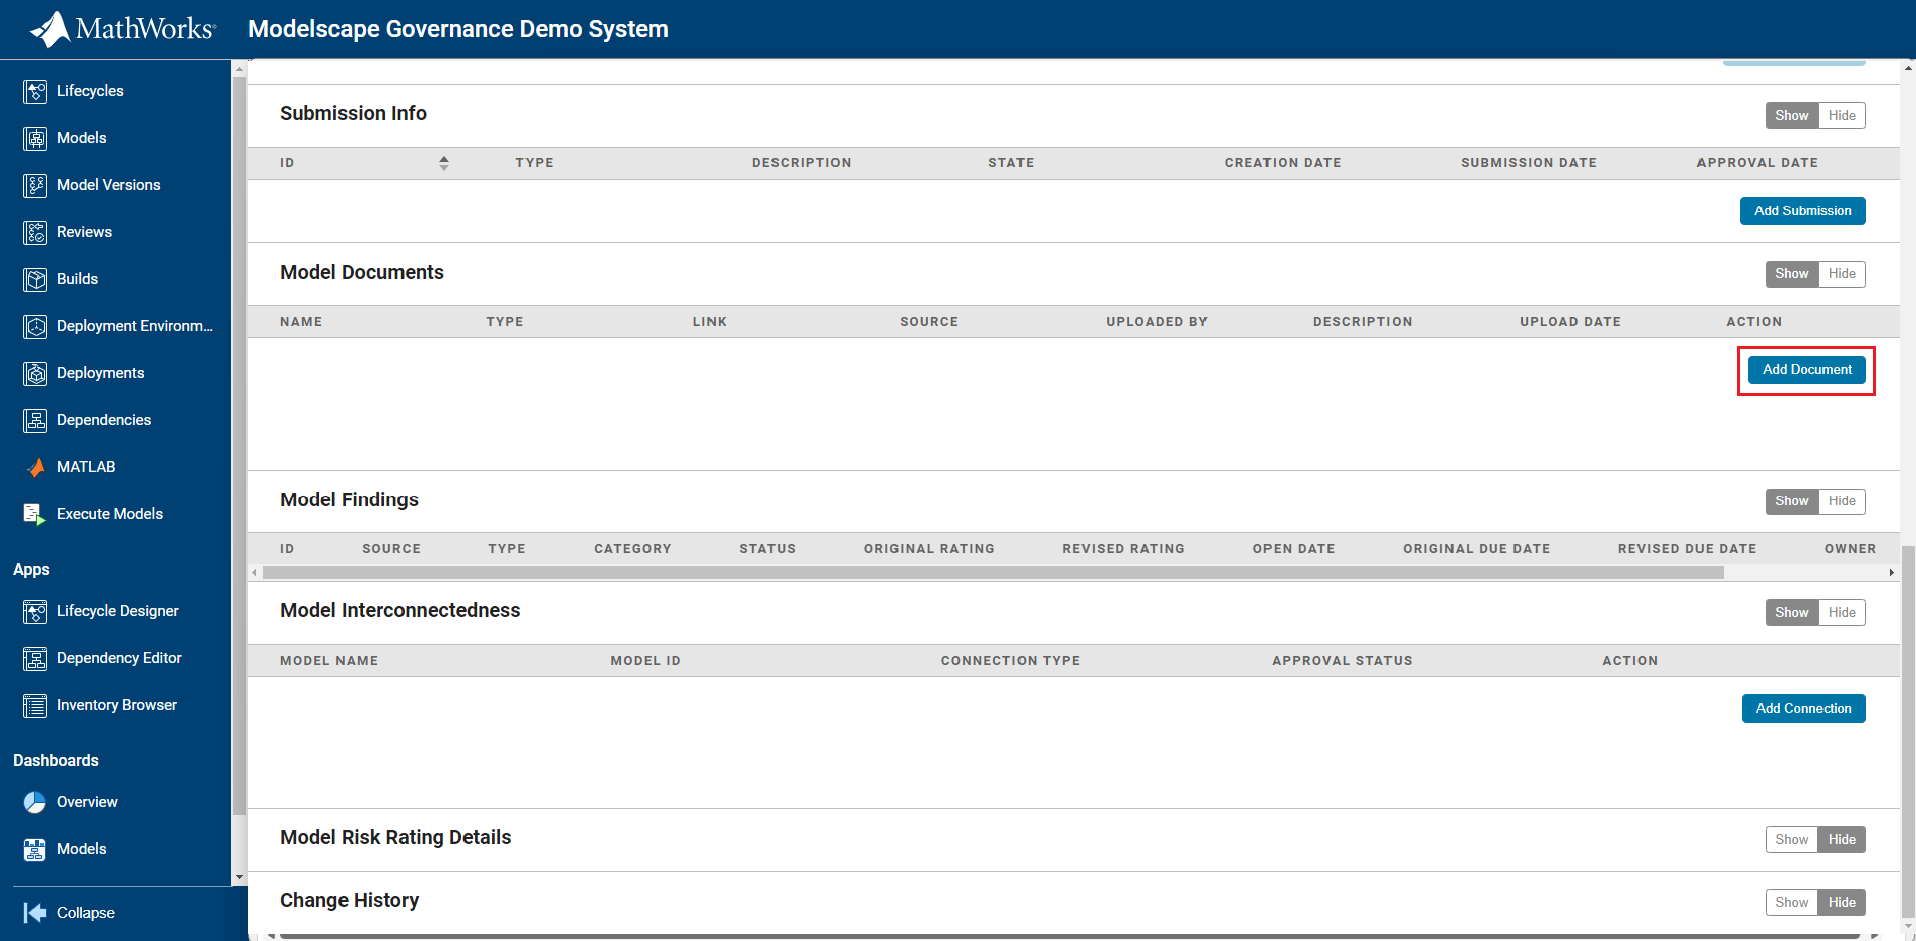
Add documentation to the model to ensure that relevant information is stored and accessible for future reference or audits.
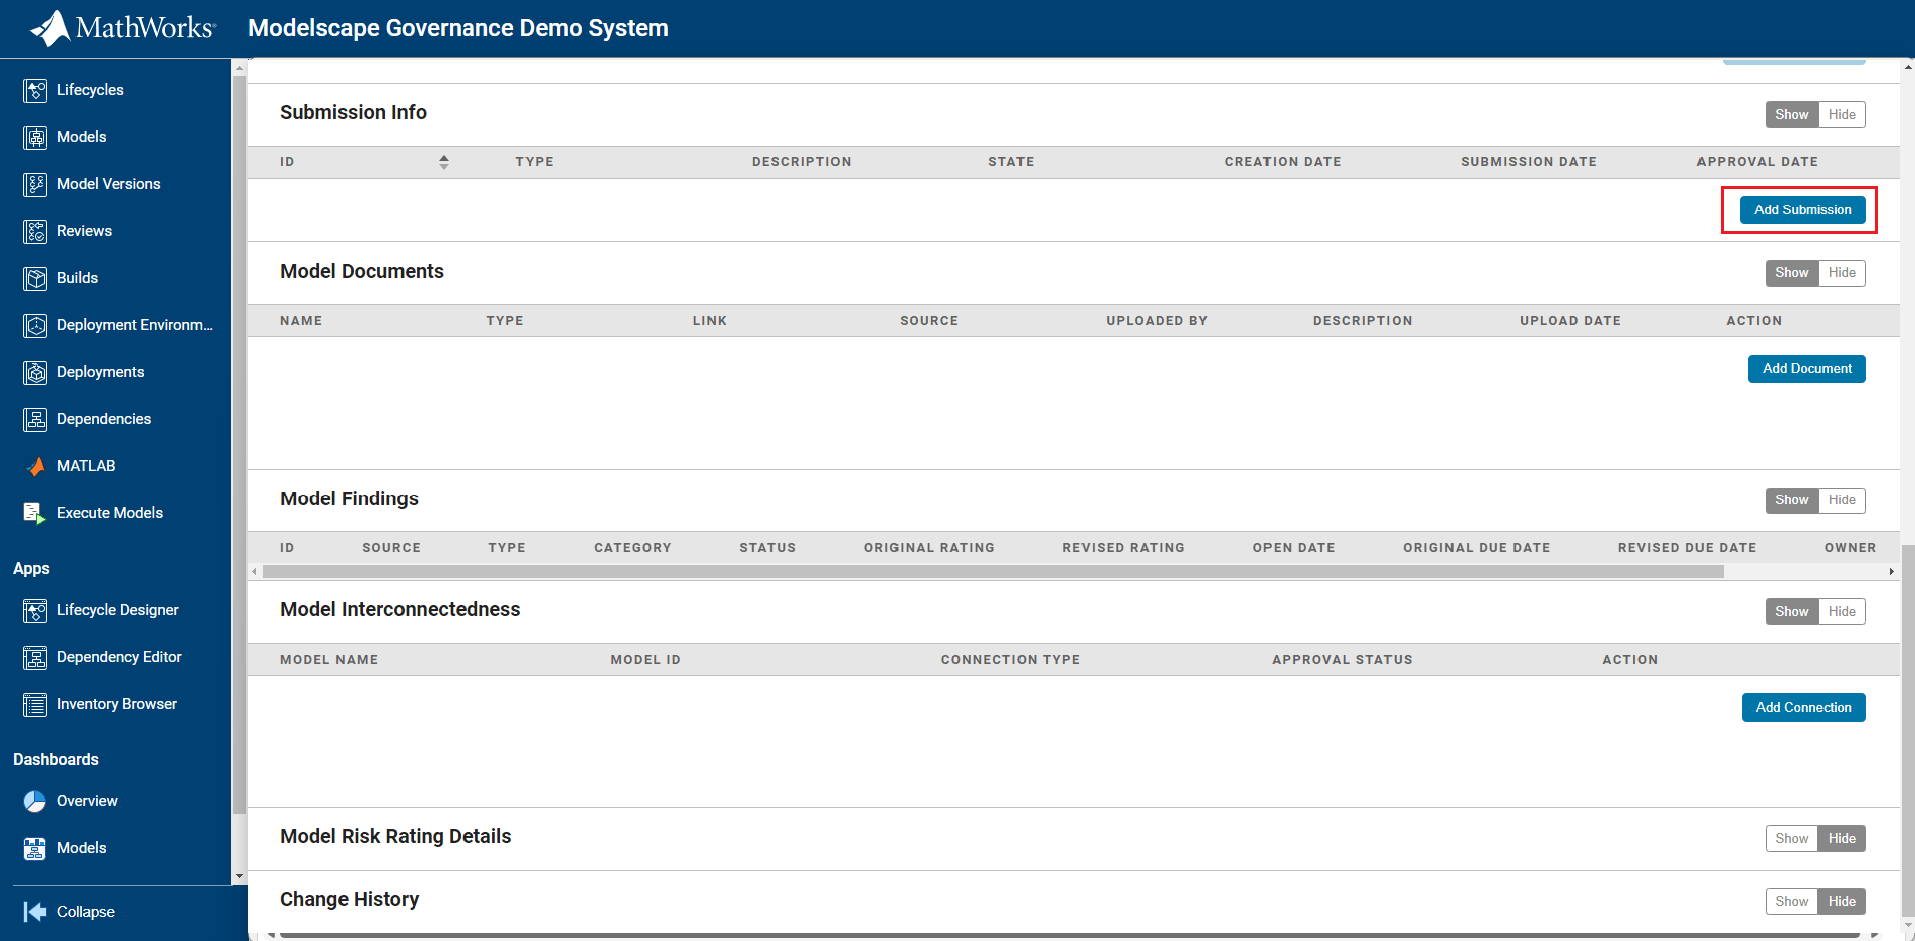
Add a submission to bring the model to the attention of the model validation team. The system will generate an automated email to notify the team.
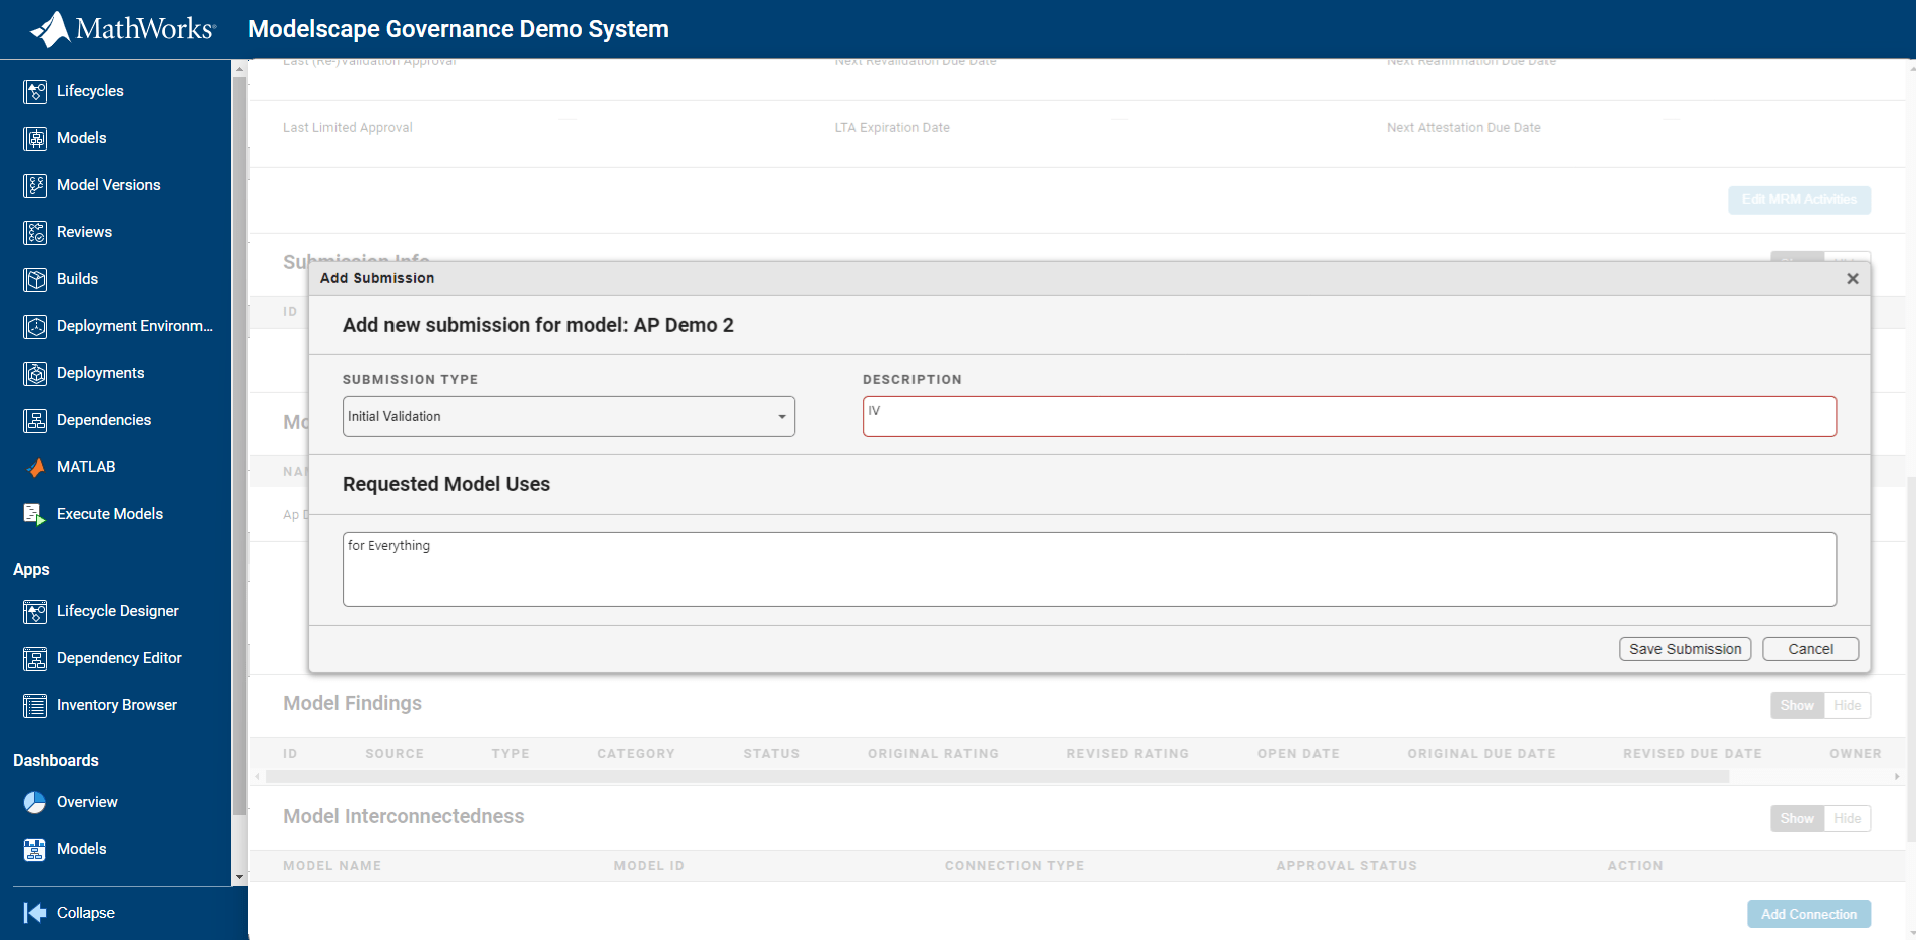
Select the submission type, such as light or full revalidation, ongoing monitoring, or reaffirmation. Then add a description and save the submission.
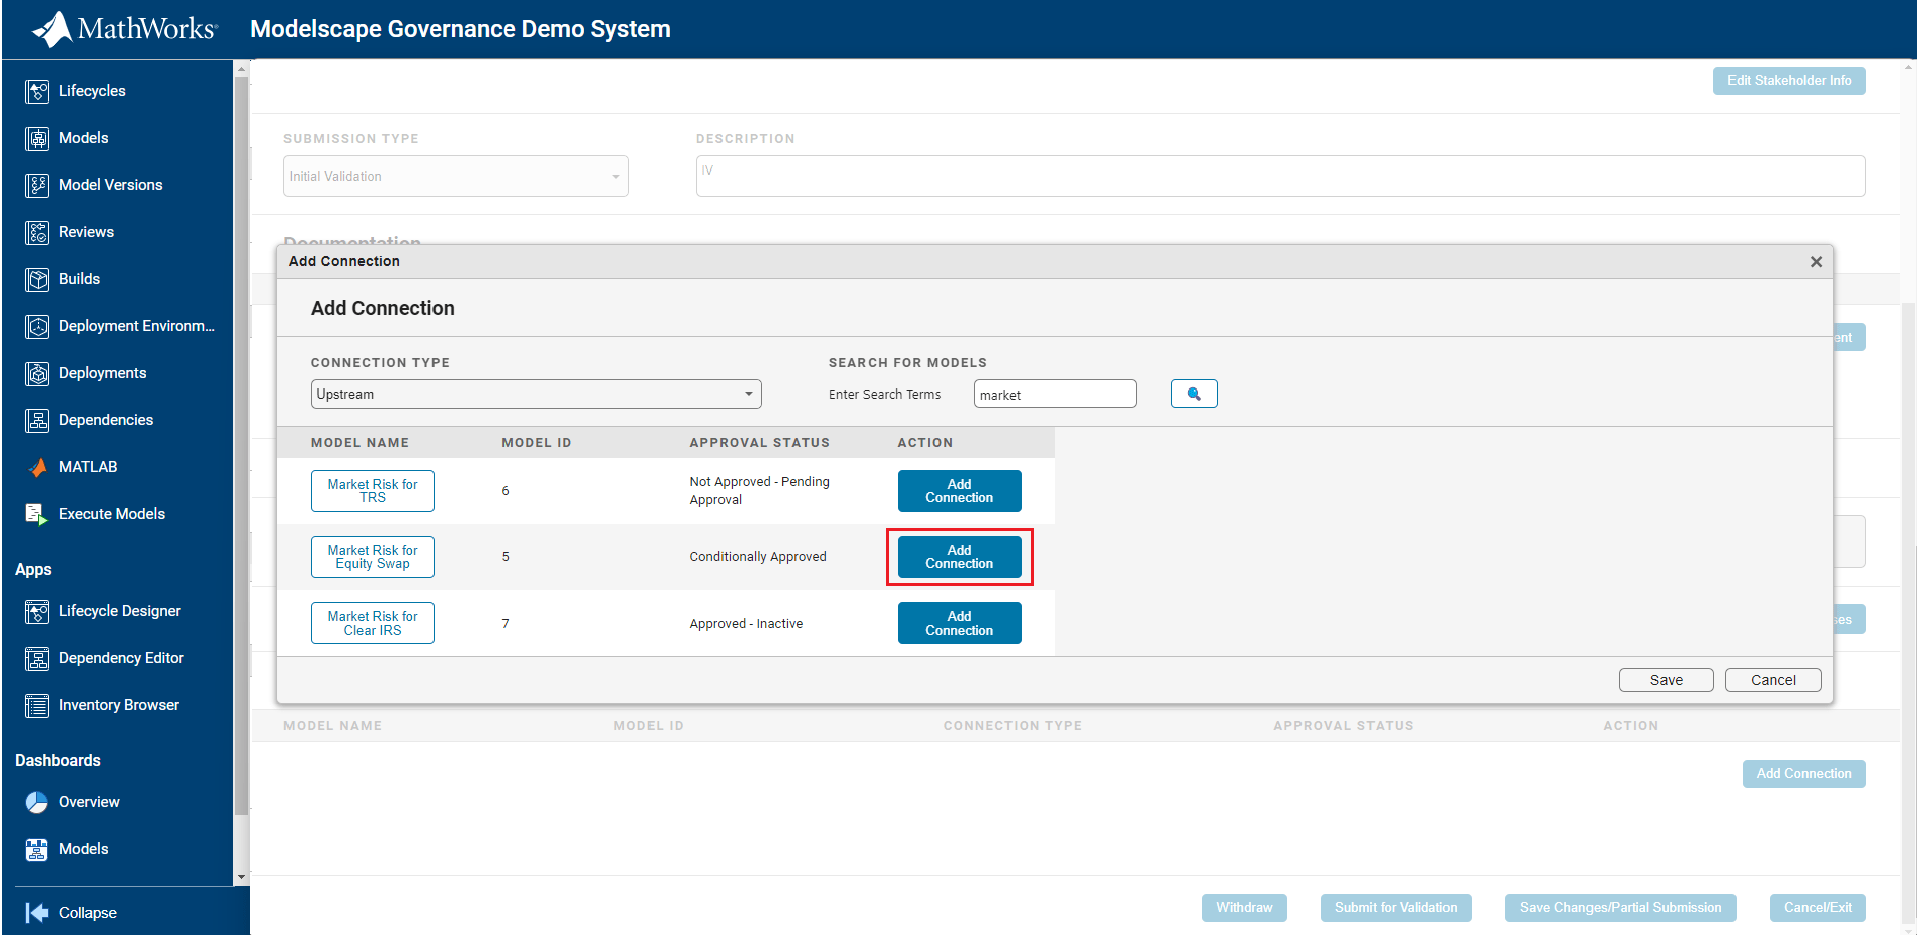
Add a connection to your model to show how it is linked to other models within the organization which helps you to visualize dependencies and manage risks across interconnected systems.
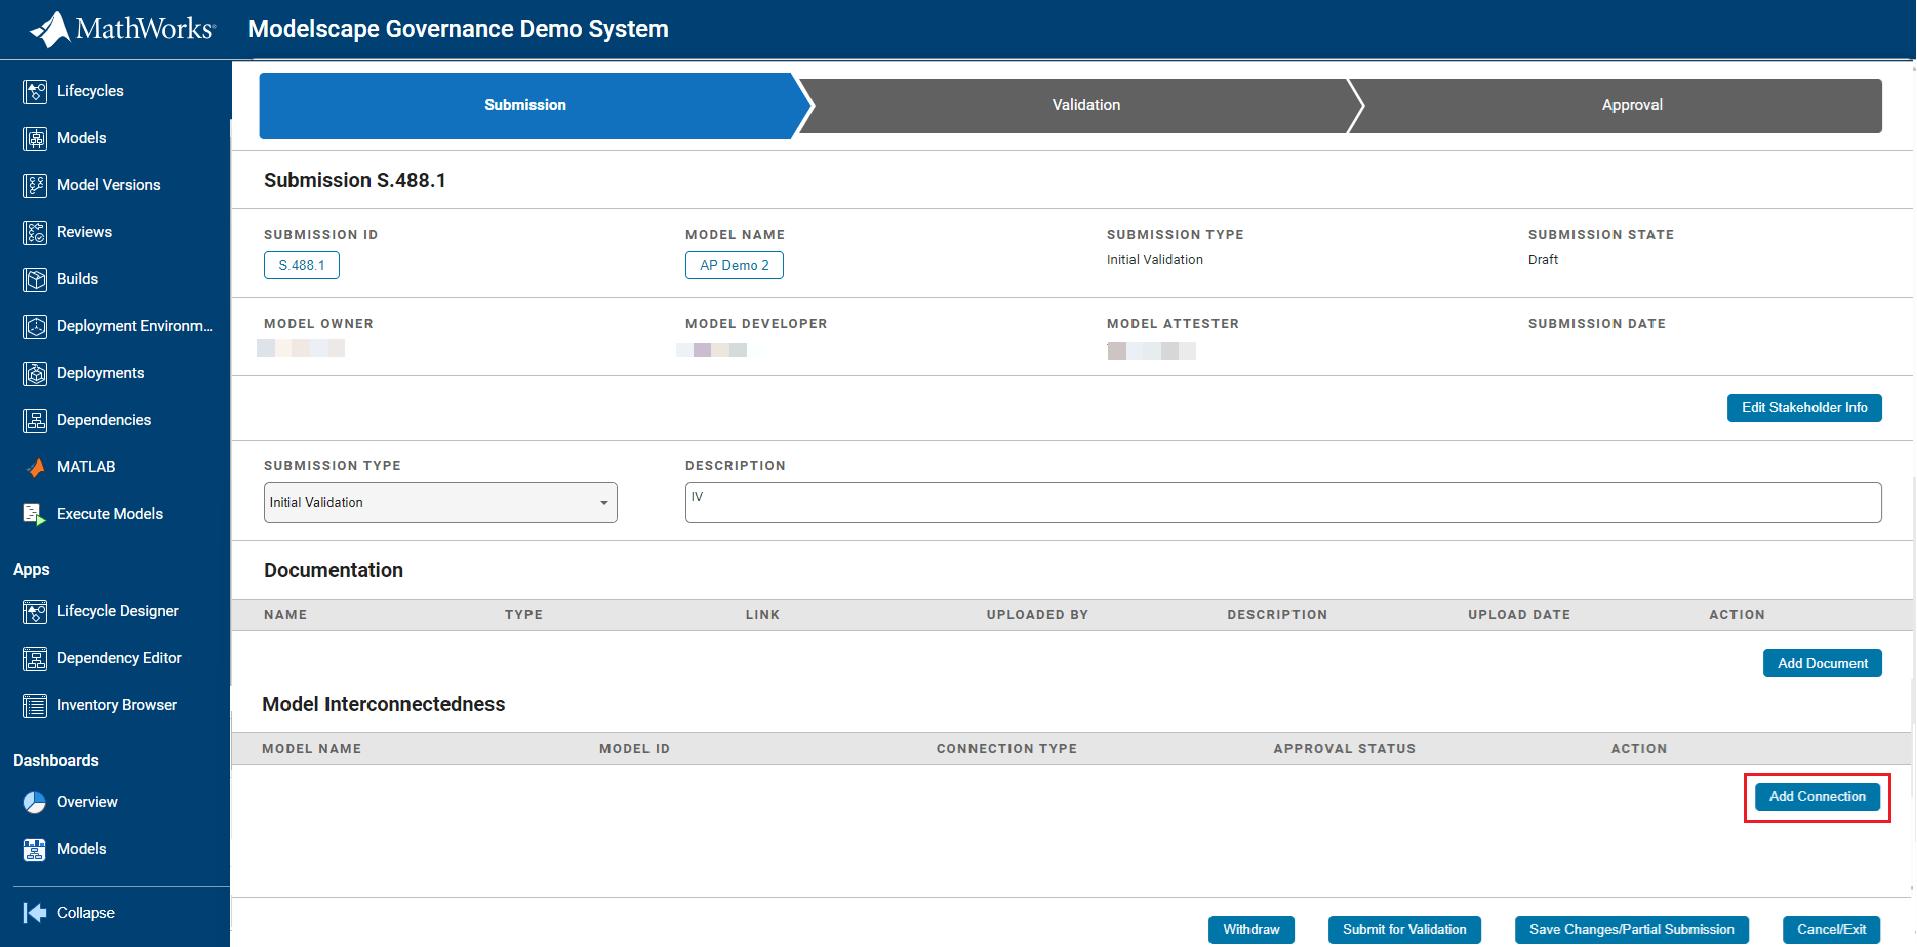
Select a connection type (upstream or downstream), search for the model you want to link, and add the connection.
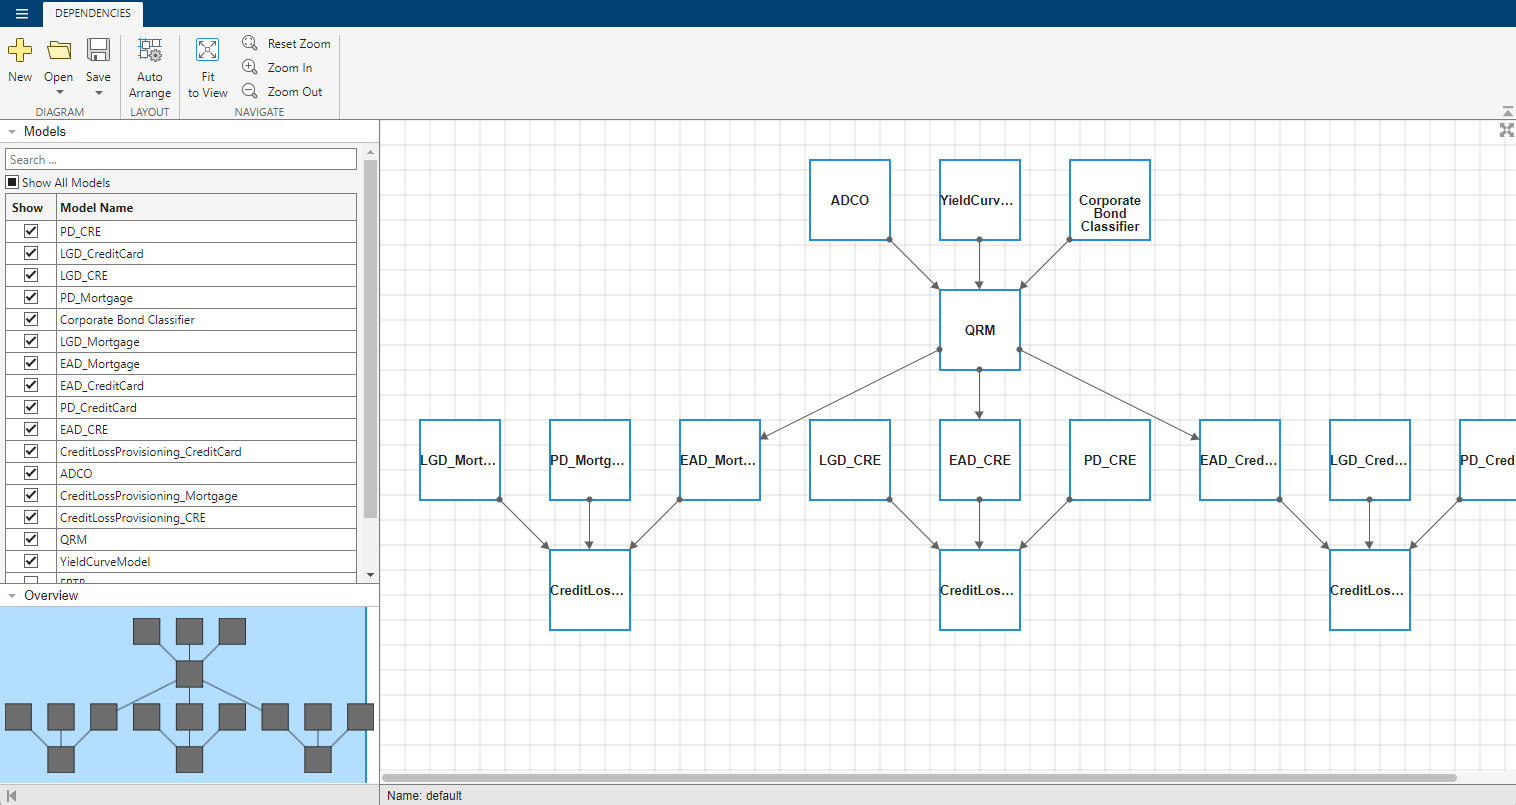
Use graphical views of the model inventory to see how data and models flow through your organization.
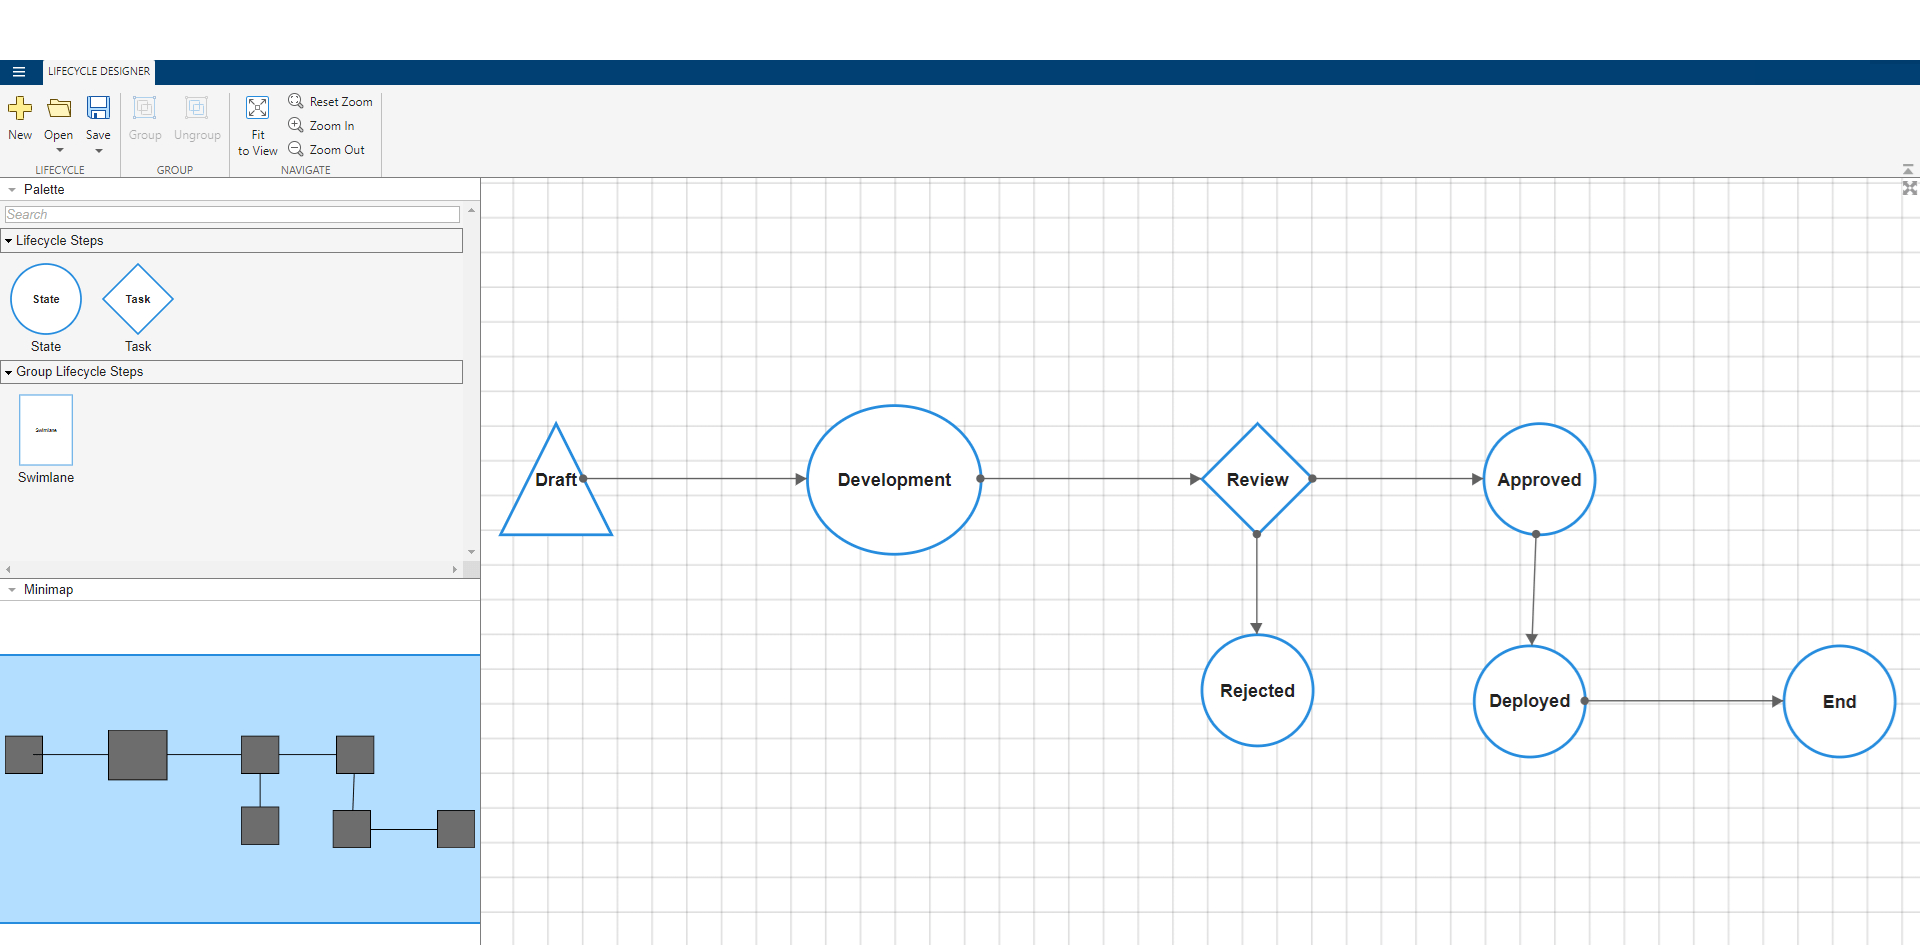
Govern your models with custom lifecycles.
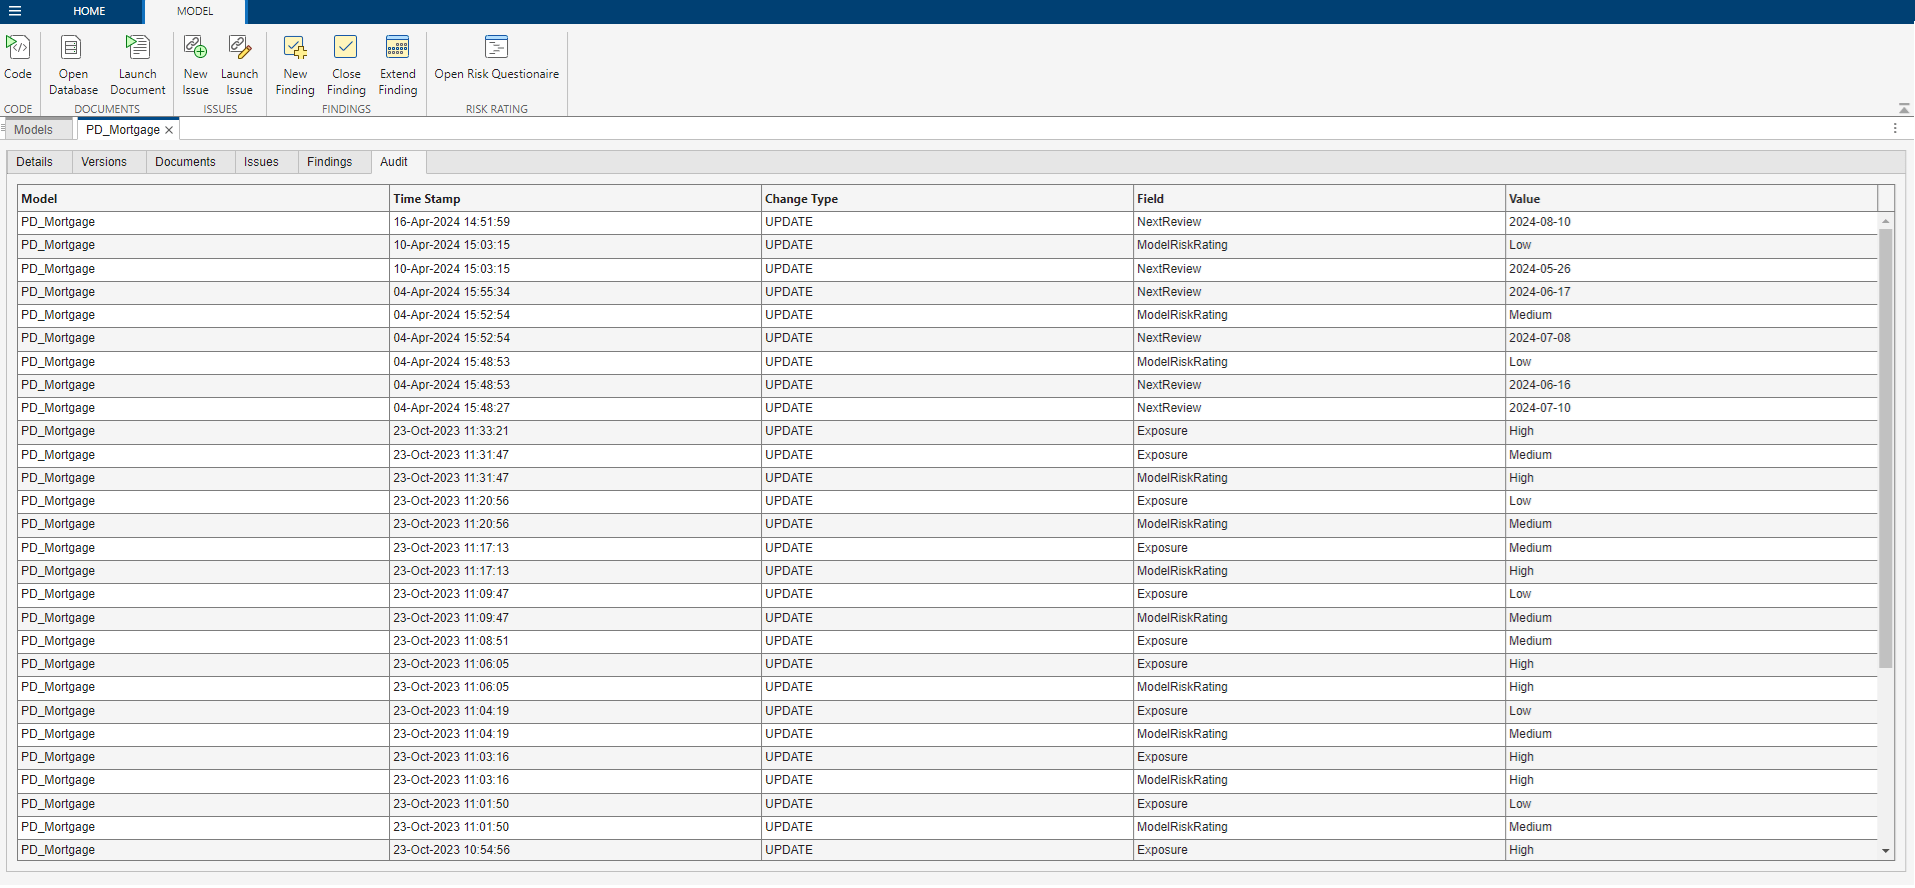
Modelscape logs every user action to ensure complete audit compliance, streamlining your organization's reporting and compliance efforts.
Integrate Modelscape with tools like Microsoft® Power BI® and Tableau® to view data for reporting key business metrics. For individual models, Modelscape can incorporate custom tools like risk tiering calculations into reports.
A Modelscape lifecycle represents the different stages of a model version. At any time, a model version is in one state of the lifecycle.
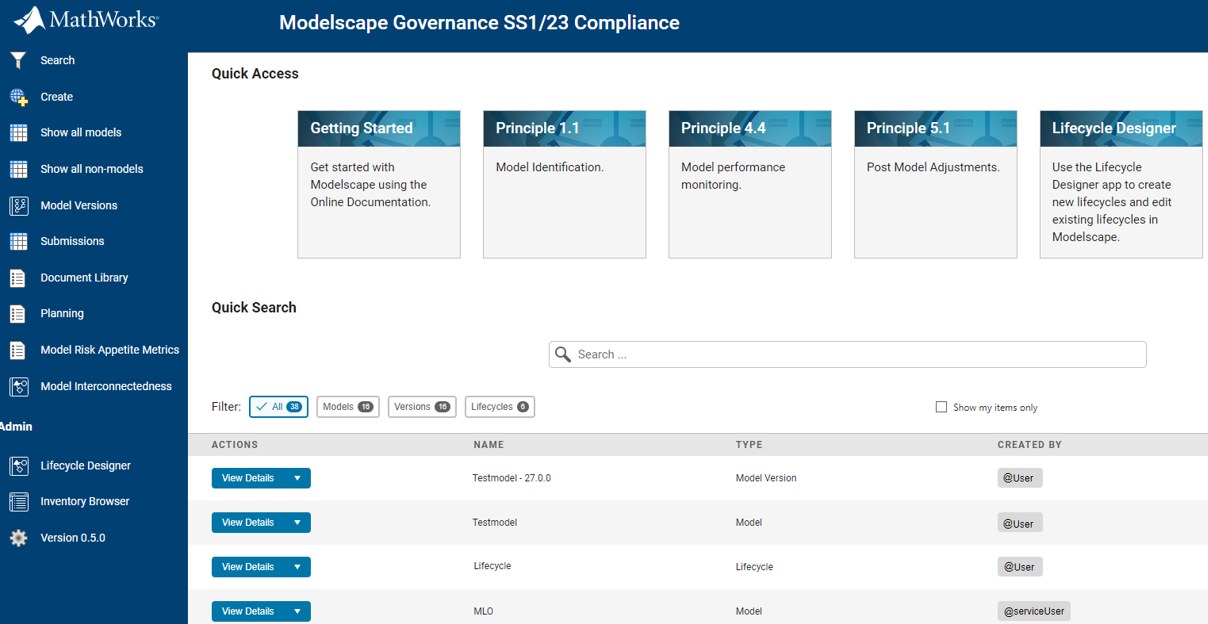
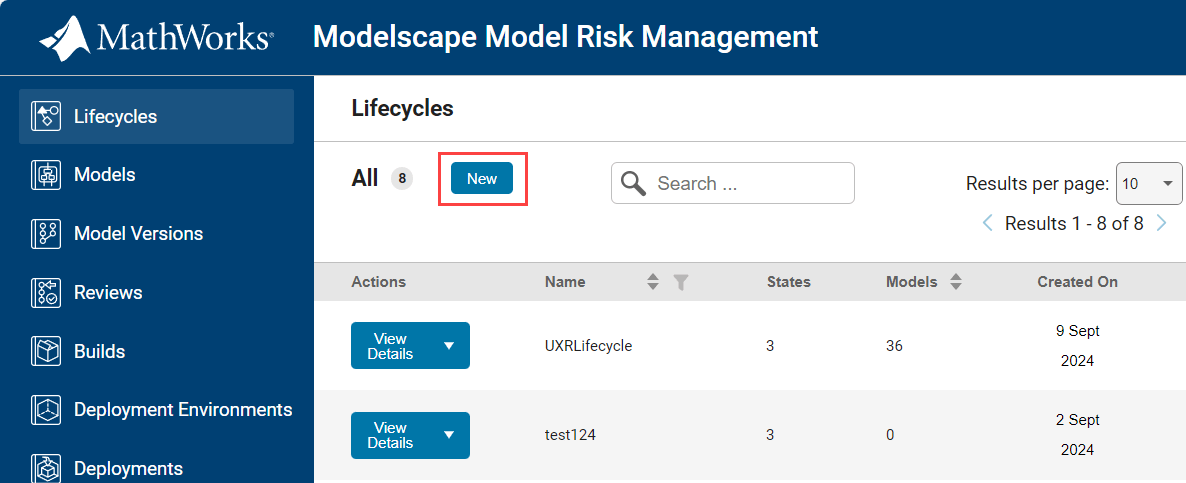
To create a lifecycle, click Lifecycles.

This opens the Lifecycles page, where you see your lifecycles. Click New.
This opens the Lifecycle Designer, where you can create a lifecycle.
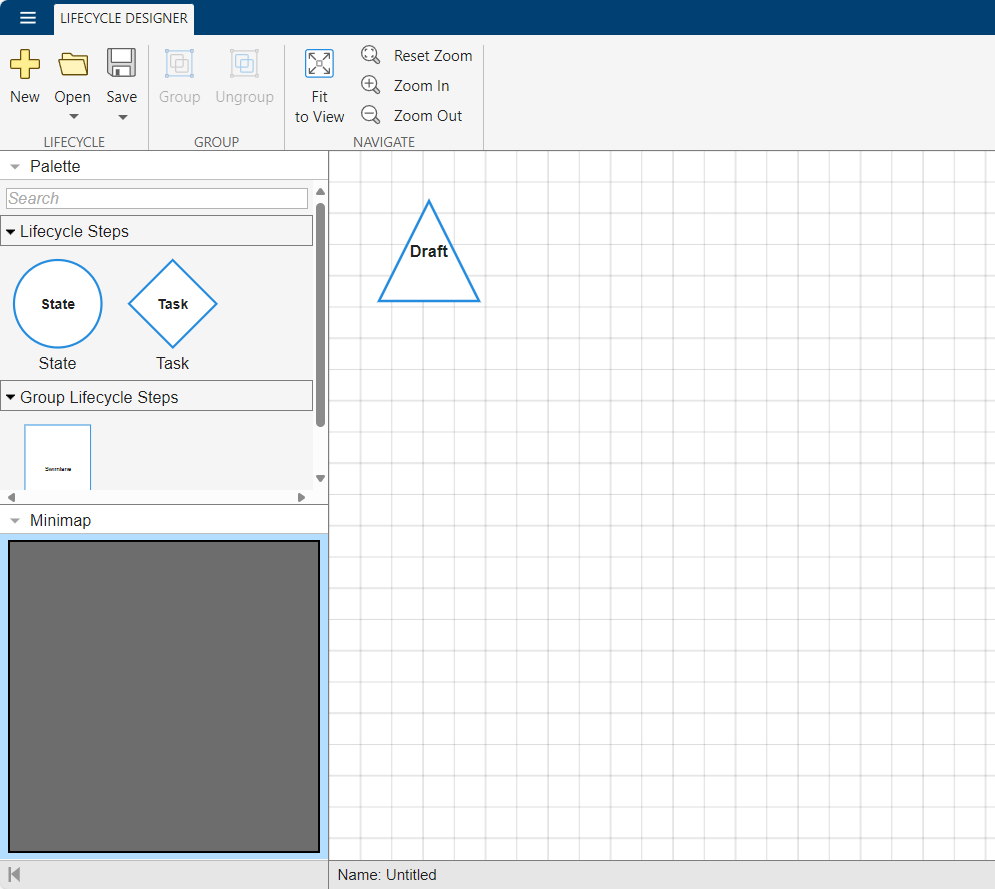
Every lifecycle has a Draft state that you cannot copy or delete. To add a new state or task to the lifecycle, drag the State or Task block to the desired location in the app. You can rename a state or task by double-clicking its text box.

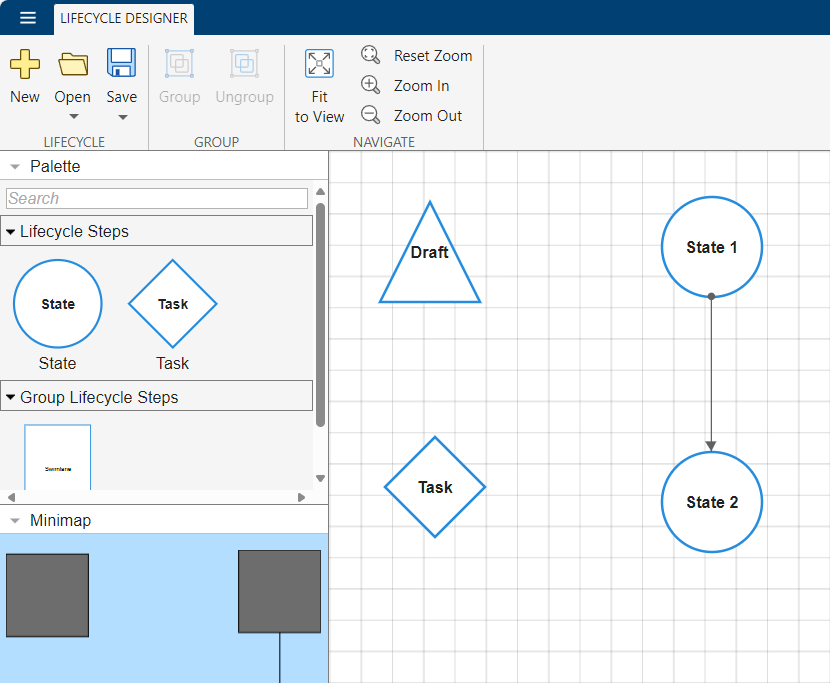
To add a connection from state 1 to state 2, click and hold the edge of state 1, then drag the cursor to state 2. Alternatively, click state 1, then hold Ctrl while you click state 2.
To group different states, drag a Swimlane to cover the states you want to group. You can also click and drag your mouse to select states and click Group on the menu. You can only assign a state to one swimlane at a time.
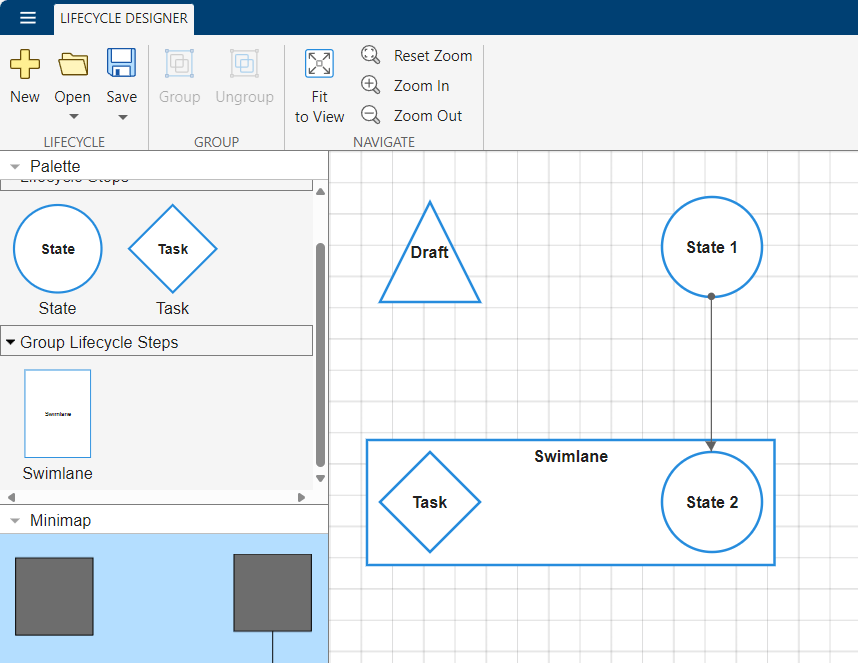
To ungroup states in a swimlane, select the swimlane and click Ungroup on the menu.
To save your lifecycle, click Save.
Open or Edit an Existing Lifecycle
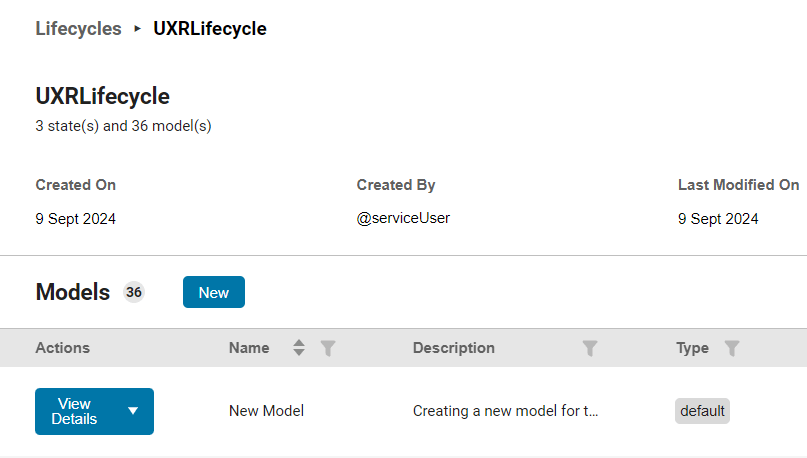
To see details of an existing lifecycle, click View Details. To edit an existing lifecycle, click Open in Lifecycle Designer.
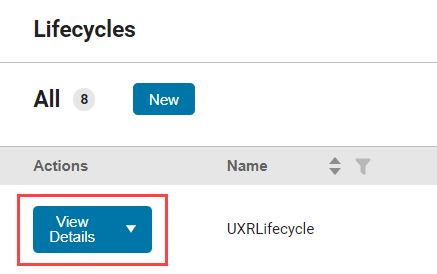
The details page displays more information about this lifecycle, such as the different models that belong to it.
To create a Modelscape model, click Models on the home page.
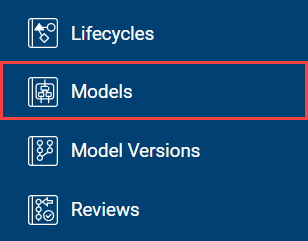
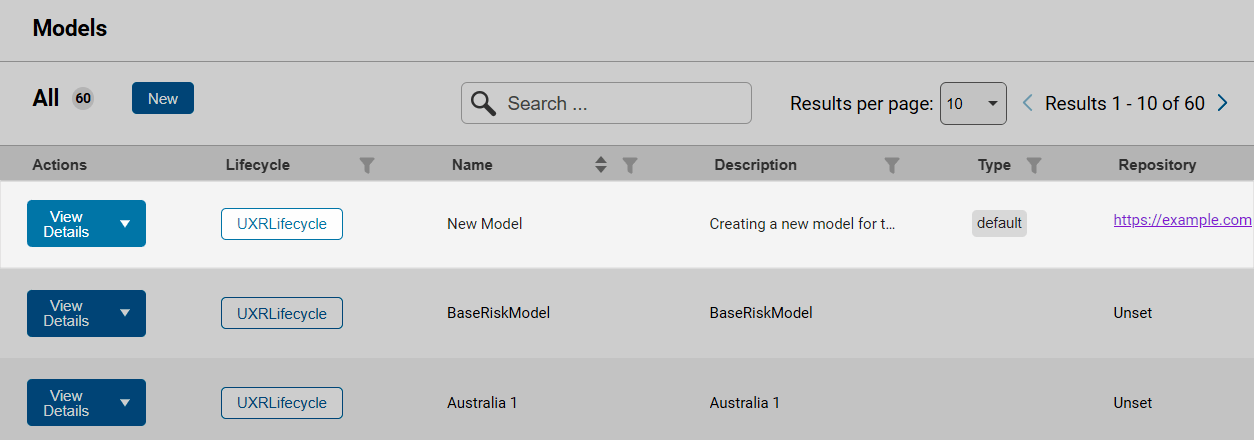
You see your models listed on the Models page. Click New.

Fill out the details of your model, then click Submit.
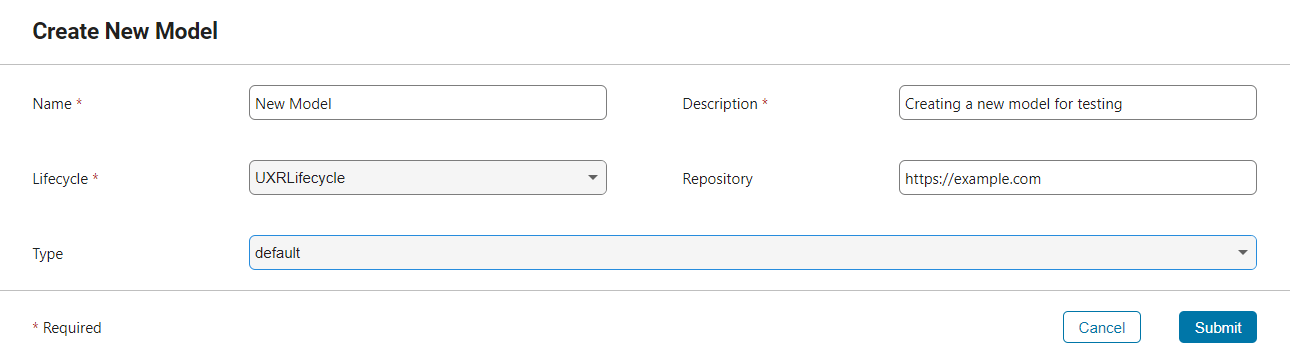
Your new model is displayed on the Models page.
To see the details of your model, click View Details.
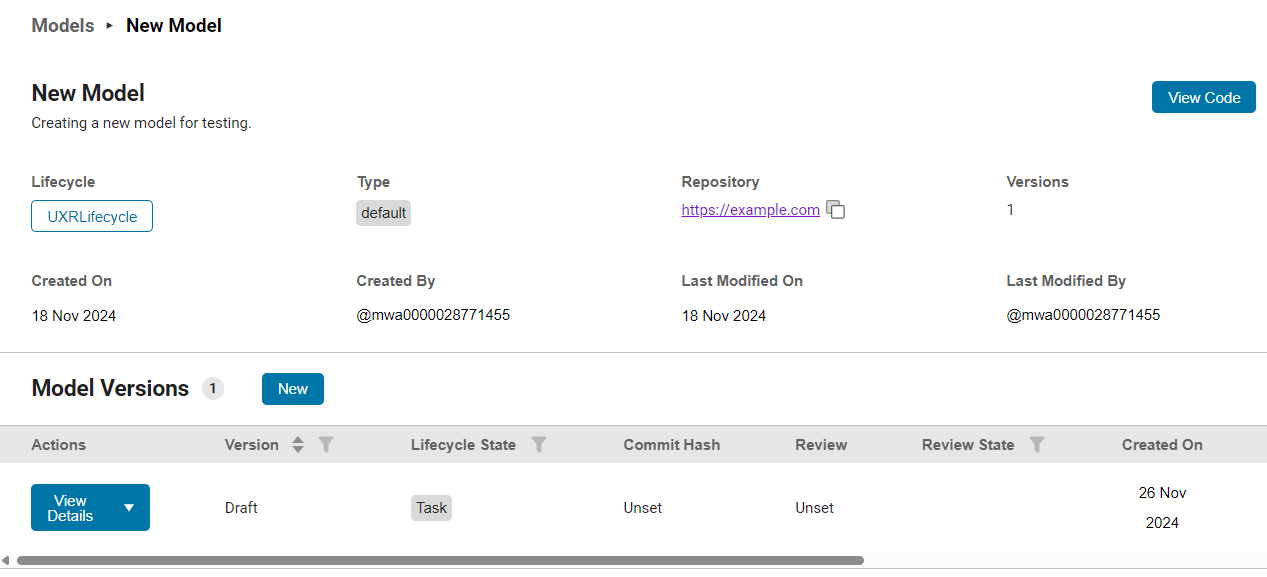
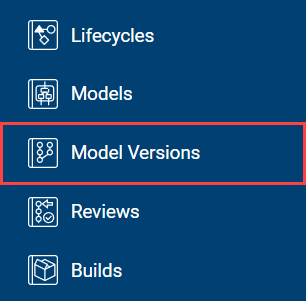
A Modelscape model can have multiple implementations, or model versions. To create a model version from the home page, click Model Versions.
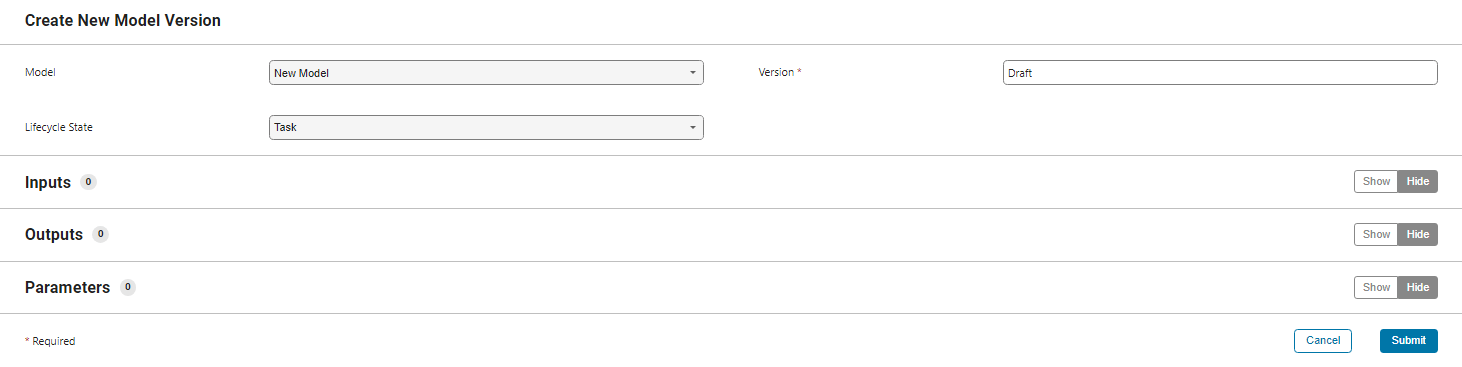
You see your model versions listed. Click New.
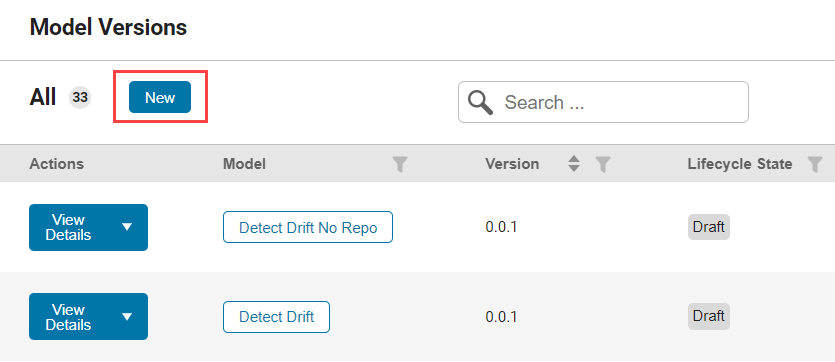
Fill in the details of your model version. Specify the inputs, outputs, and parameters, if any. Then click Submit.
Your new model version appears on the Model Versions page. To see details, click View Details.

Use Modelscape to add dependencies between models. Two models have a dependency when the outputs of one model are inputs to another model.
You can also create dependencies between models and their data, or between models and references. References are the files or information that you can associate with a model, model version, or Review document.
View Model Dependencies
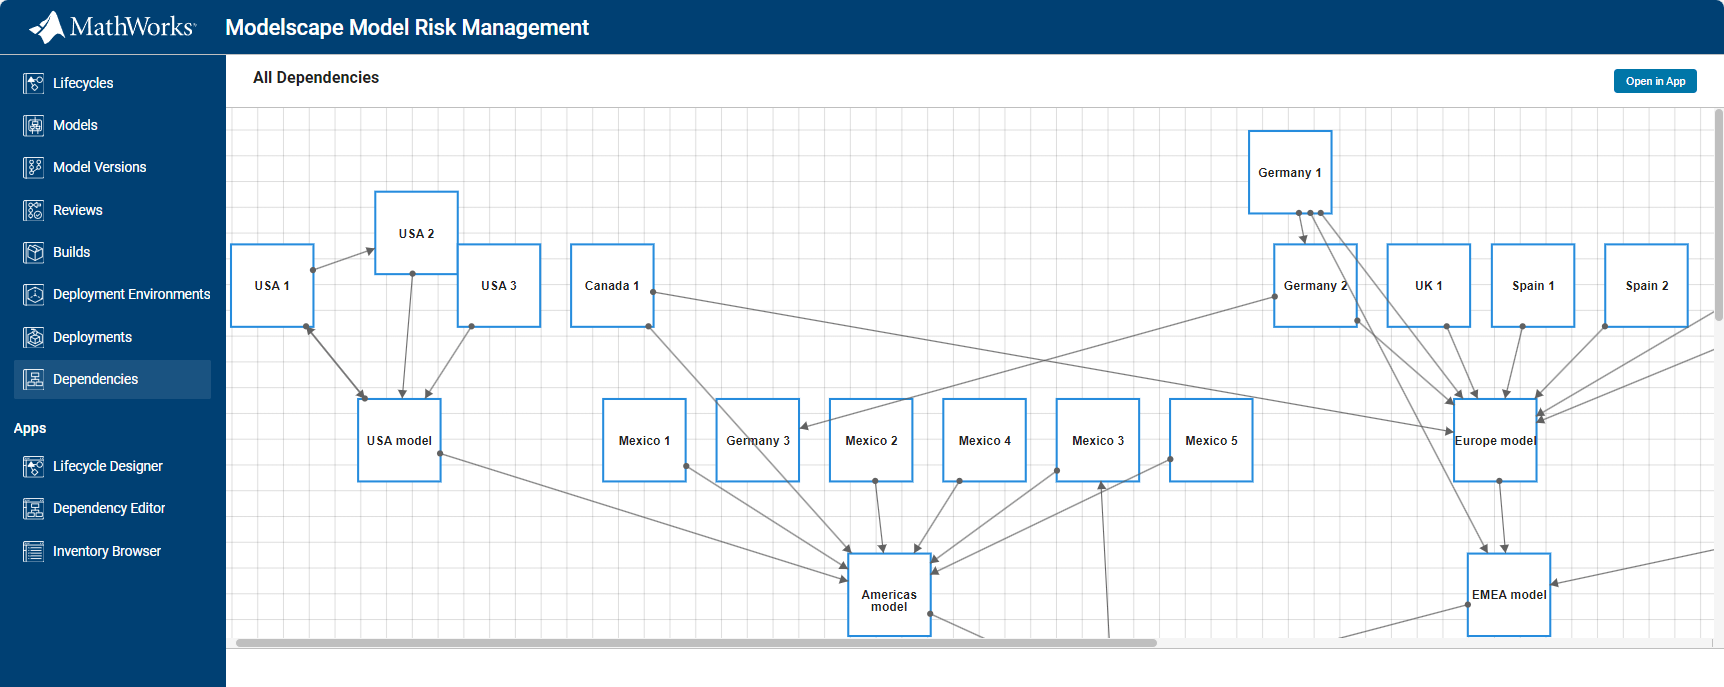
To view dependencies between models, click Dependencies.

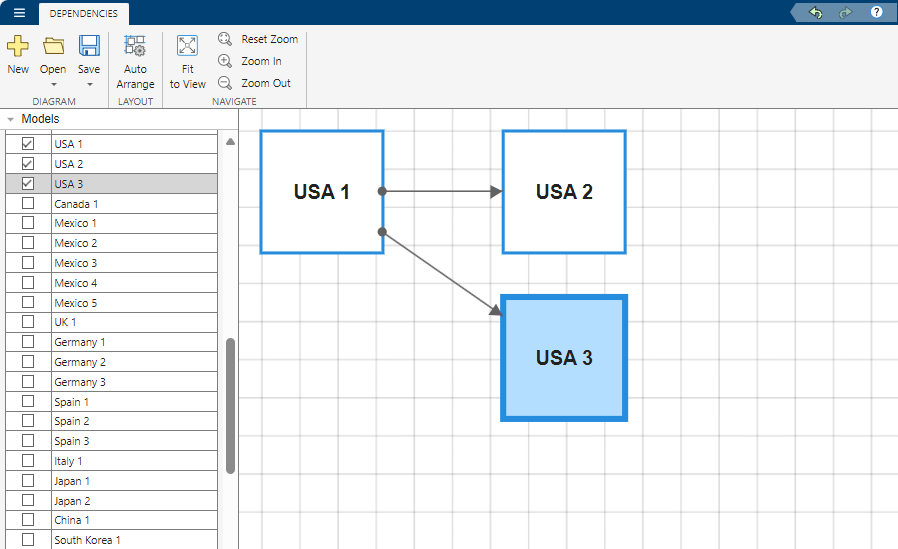
You see a diagram displaying your models and the dependencies between them. For example, an arrow pointing from USA 1 to USA 2 indicates that the outputs from USA 1 are inputs of USA 2.
Add Model Dependencies
To add dependencies between models, click Open in App in the top right corner. This opens the page where you can edit dependencies.
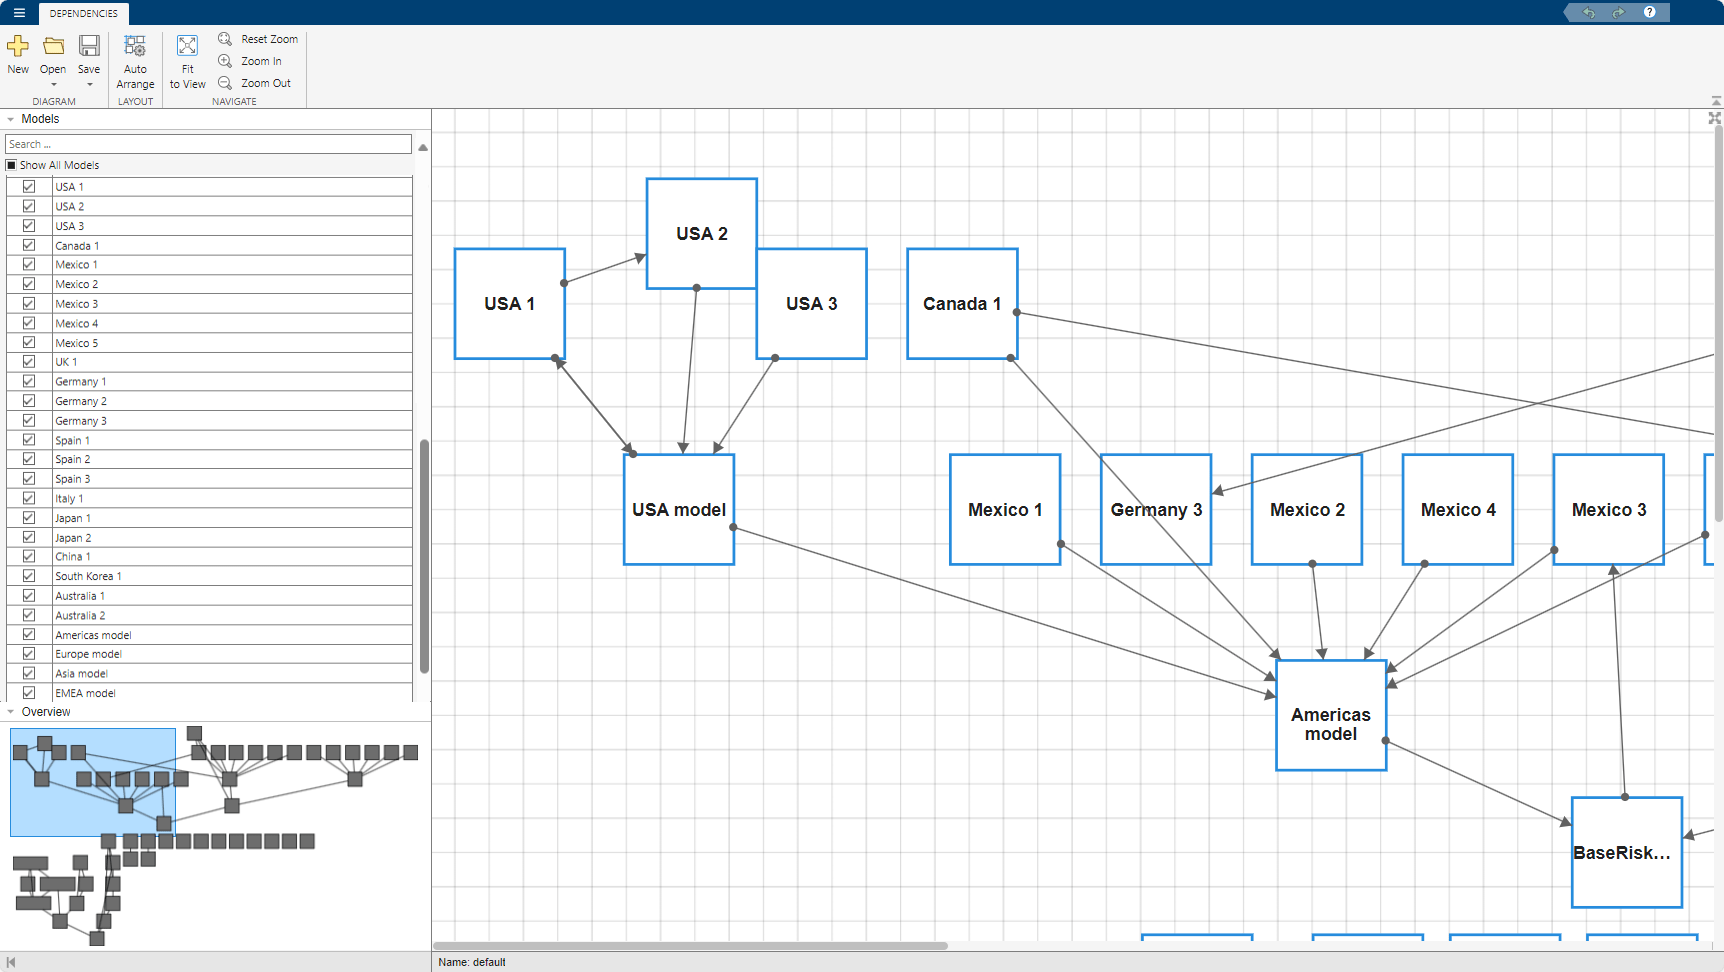
To select the models you want to show, use the checkboxes in the Models pane on the left.
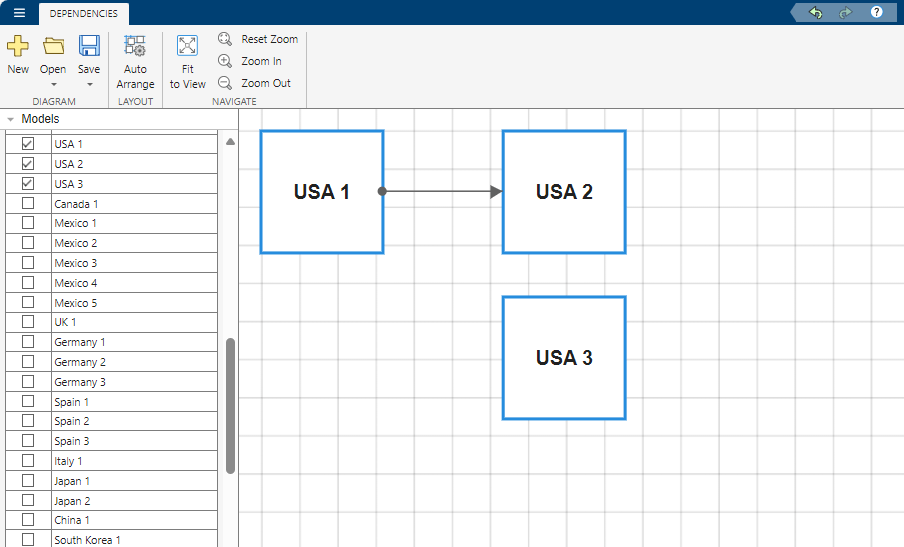
To add a dependency from USA 1 to USA 3, click the edge of USA 1 and drag the cursor to USA 3. Alternatively, hold Ctrl, then first click USA 1, followed by USA 3.
To remove the dependency of USA 2 on USA 1, right-click the arrow, then select Delete from the context menu. Alternatively, click the arrow, then press Delete on your keyboard.
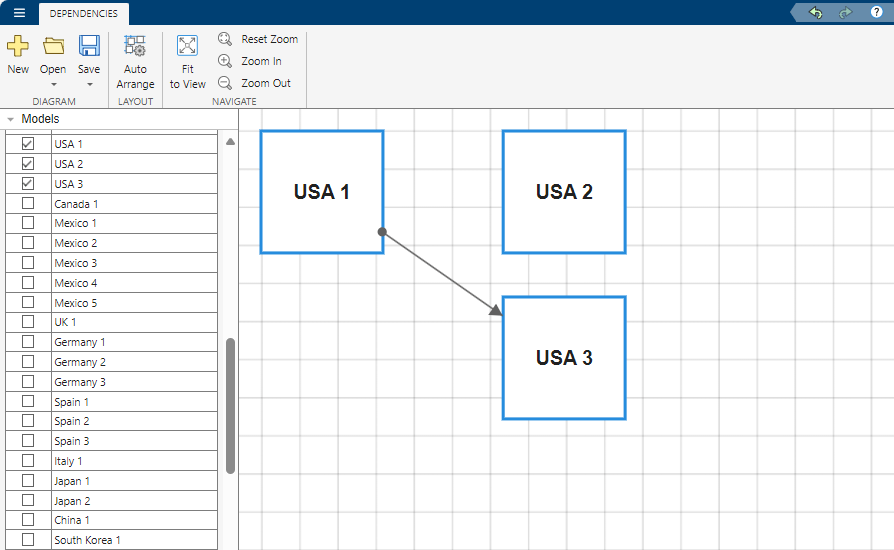
To save your changes, click Save.
To validate and review your models, use the Review Editor app.
To monitor your model performance, use Modelscape Monitor.
Version History
Introduced in R2025a