Create Custom Preprocessing Algorithm with Lidar Viewer
This example shows how to create and import a custom preprocessing algorithm in the Lidar Viewer app.
The Lidar Viewer app is a tool to visualize, analyze, and preprocess lidar data. You can use this app to process your lidar data for processes such as labeling, segmentation, and calibration. You can either use the built-in preprocessing algorithms or create a custom algorithm.
In this example, you:
Read and import point cloud data into the Lidar Viewer app.
Create, import, and apply a custom preprocessing algorithm to radially crop the point cloud.
Load Point Cloud Data into Lidar Viewer
In this example, you first read point cloud data into the MATLAB® workspace using the pcread function.
% Read point cloud data
ptCloud = pcread("HDL64LidarData.pcd");
To open the Lidar Viewer app, enter this command in the MATLAB Command Window.
lidarViewer
Alternatively, you can select the app from the MATLAB Toolstrip, on the Apps tab. In the Apps gallery, under Image Processing and Computer Vision, select Lidar Viewer.
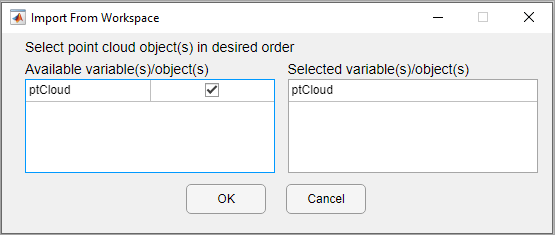
On the Lidar Viewer app toolstrip, select Import > From Workspace. In the Import From Workspace dialog box, select
ptCloud and click OK.
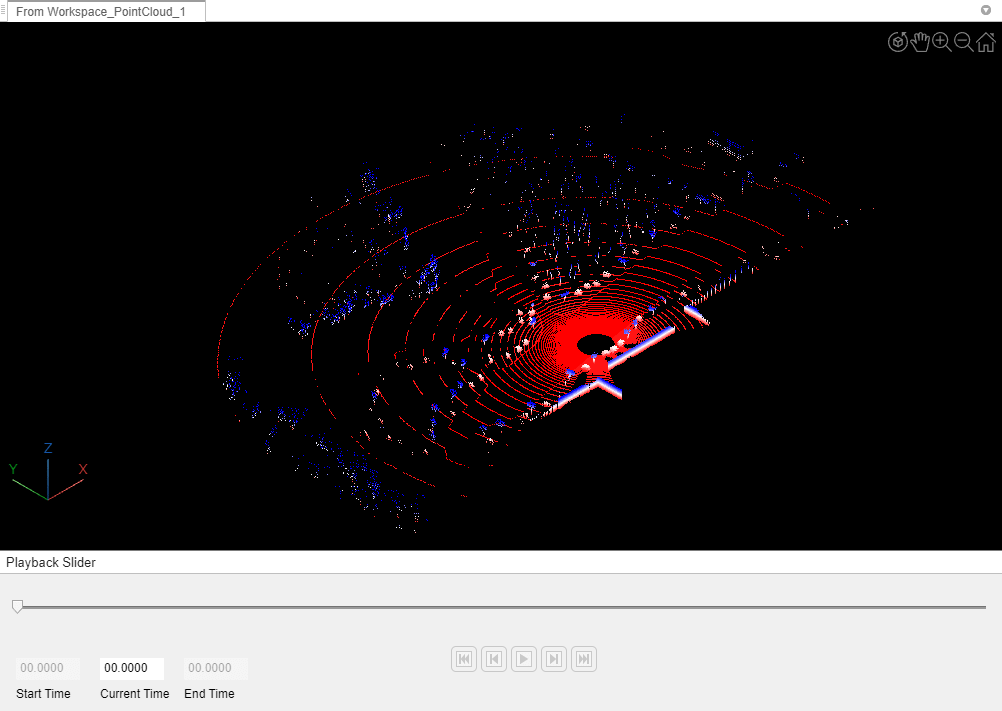
The app loads the point cloud data ptCloud from the
workspace and displays it in the Point Cloud Display pane.
Create Custom Preprocessing Algorithm
On the app toolstrip, select the Edit tab. Then, follow these steps to create a custom algorithm using a MATLAB function and import it into the app.
Click Create Algorithm. The app opens a new MATLAB function in the MATLAB editor. The default name of the function is
myAlgorithm.The
myAlgorithmfunction contains sample code for editing the input point cloud. Replace the function with this code, which crops the point cloud by discarding points outside a spherical region with the specified radius.function ptCloudOut = radialCrop(ptCloudIn) % radialCrop Crop point cloud radially % ptCloudOut = radialCrop(ptCloudIn) radially crops the input point cloud % ptCloudIn and returns the output point cloud ptCloudOut. % Specify a query point and a radius to crop the point cloud radially % around the query point. point = [0 0 0]; radius = 25; % Find indices of neighbors within the radius of the query point croppedLocations = findNeighborsInRadius(ptCloudIn,point,radius); % Crop the point cloud ptCloudOut = select(ptCloudIn,croppedLocations); end
Save the function in your desired folder as
radialCrop.m.
Import and Use Custom Preprocessing Algorithm
To import the algorithm into the app, on the Edit tab of the app toolstrip, click Import Algorithm. Then, browse to the location of
radialCrop.m, select the file, and click Open.After you import the algorithm, the app adds it to the gallery of algorithms in the Algorithm section.
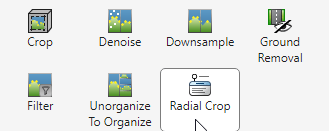
To apply the custom algorithm to the input point cloud, select the
radialCropalgorithm from the Algorithm section.Note
If the input point cloud contains multiple frames, the app opens the Confirm dialog. Select Yes to confirm that you want to apply the custom algorithm to all frames. Otherwise select, No.
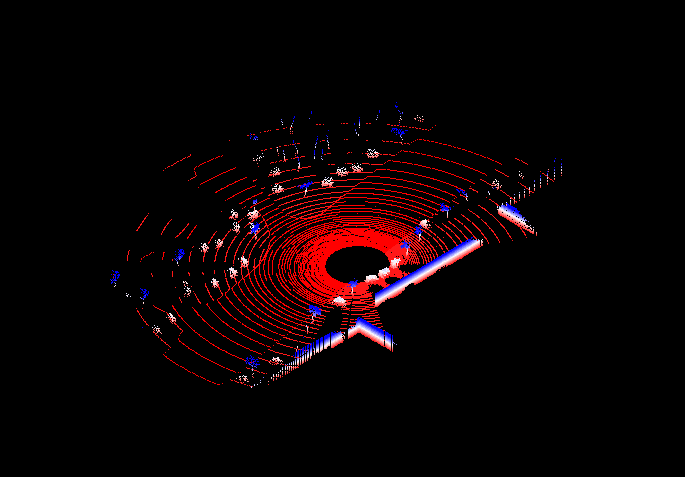
This image shows the resulting point cloud after applying the
radialCrop algorithm to the imported point cloud data.
Export Point Cloud Data from Lidar Viewer
You can export point clouds as PCD, PLY, LAS, or LAZ files. After processing the point cloud, on the app toolstrip, in the Viewer tab, select Export Point Cloud. In the Export Point Cloud dialog box, select the preprocessed point cloud. Then, specify Provide path to the destination folder as a destination file path, or click Browse and navigate to your destination folder. Select the desired Export format, and click OK to export the point cloud to the specified destination.