Display Interior Labels by Clipping Volume Planes
This example shows how to interactively clip a quadrant of a volumetric image to expose a surface within the volume. For an example that shows how to view interior labels by adjusting the transparency of the volume, see Display Interior Labels by Clipping Volume Planes.
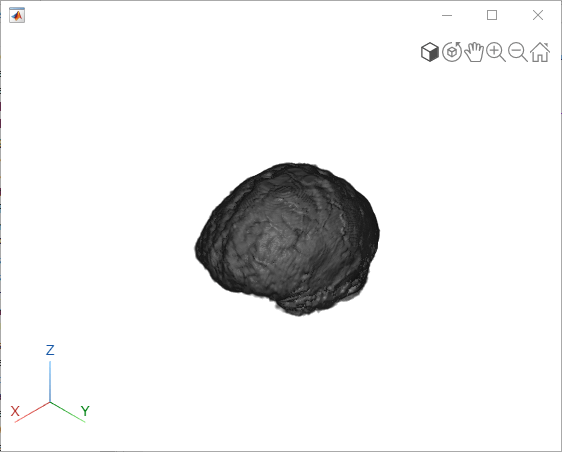
Display Volumetric Image in Scene
Load a volumetric image and corresponding labels.
dataDir = fullfile(toolboxdir("images"),"imdata","BrainMRILabeled");
load(fullfile(dataDir,"images","vol_001.mat"));
load(fullfile(dataDir,"labels","label_001.mat"));
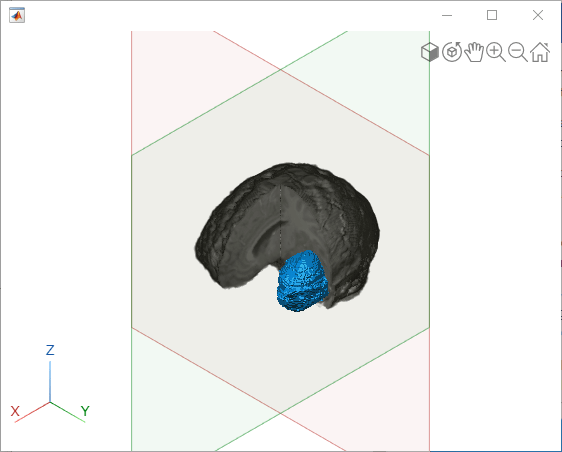
Create a 3-D viewer with a white background color. Display the volume in the viewer. This example parents the viewer to a uifigure object, which opens the viewer in a new window outside of the Live Editor. The images in this example reflect the appearance of the figure window as you run the code and follow the interactive steps in each section.
viewer = viewer3d(BackgroundColor="white",BackgroundGradient="off",Parent=uifigure);
hVolume = volshow(vol,Parent=viewer);
Display Quadrant of Volume
To interactively add a clipping plane, in the viewer toolbar, click the Augment data icon ![]() and select the Add clipping plane icon
and select the Add clipping plane icon ![]() . The viewer window adds the clipping plane in a default location and orientation in the center of the scene.
. The viewer window adds the clipping plane in a default location and orientation in the center of the scene.
You can manipulate the location of the plane using the context menu of the plane, or by interacting directly with the plane on the screen.
Translate the plane along the normal vector by clicking and dragging the plane.
Rotate the plane by clicking and dragging on the push pin on the plane. While rotating, you can hold down Shift to snap to 45 degree angles.
Interactively remove a clipping plane by clicking "Remove Plane" in the context menu.
All interactive controls can be restricted using the ClippingInteractions property. You can turn off clipping interactions entirely using the Interactions property.
Add another clipping plane by clicking the add clipping plane icon ![]() in the toolbar again. The colors of the planes indicate that the planes are aligned with a particular axis. Oblique planes are black and white. You can add up to six planes in the scene.
in the toolbar again. The colors of the planes indicate that the planes are aligned with a particular axis. Oblique planes are black and white. You can add up to six planes in the scene.

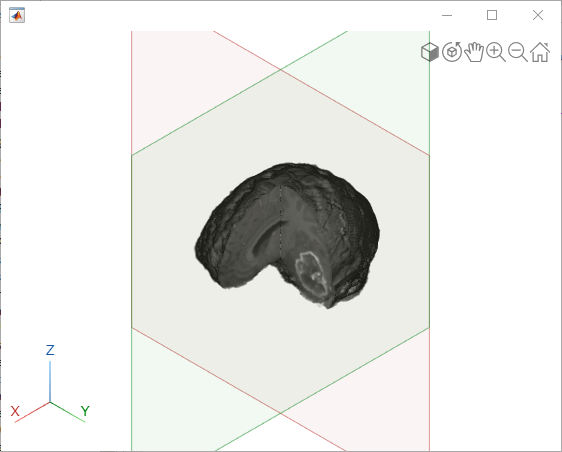
Remove Quadrant of Volume
By default, the viewer window hides all regions that are clipped by any clipping plane. The two perpendicular clipping planes cause the scene to display only a quadrant of the volume.
To hide only regions that are clipped by all clipping planes, set the ClipIntersection property of the Viewer object. For these two perpendicular clipping planes, the scene removes the quadrant of the volume that intersects both planes.
viewer.ClipIntersection = "on";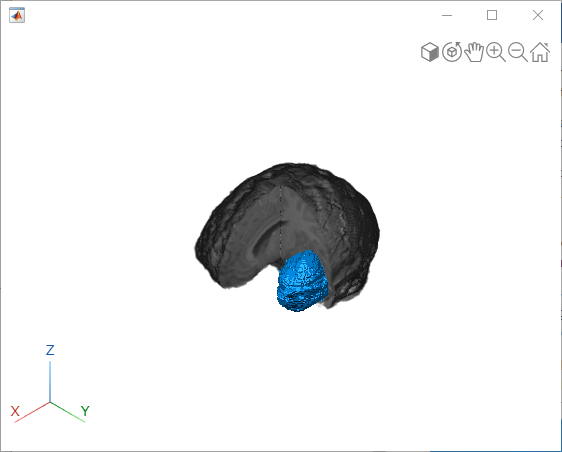
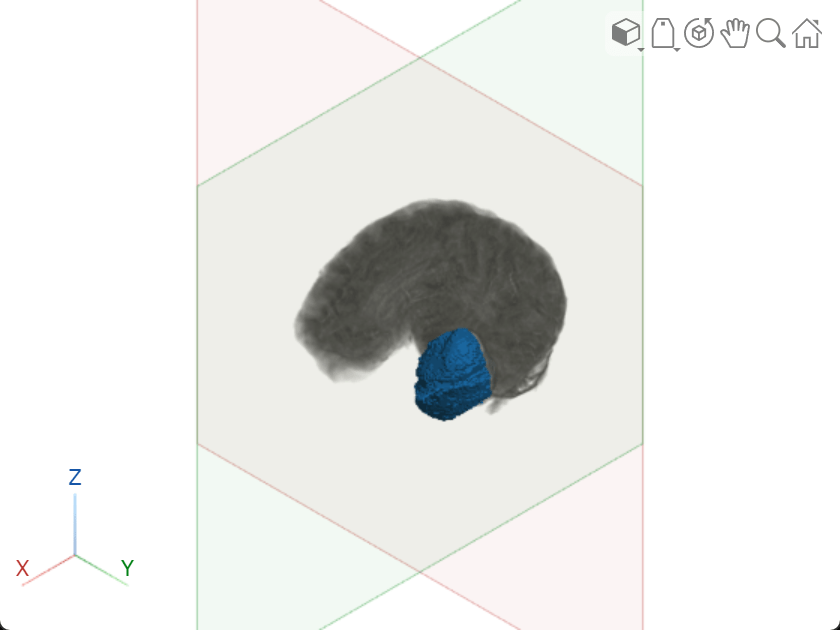
Add Surface Representing Labeled Object
Create a binary mask for the class with numeric label 3.
label3 = label==3;
Create a Surface object encompassing the binary mask and display the surface in the scene. The scene applies the clipping planes to the surface.
surf = images.ui.graphics.Surface(viewer,Data=label3);
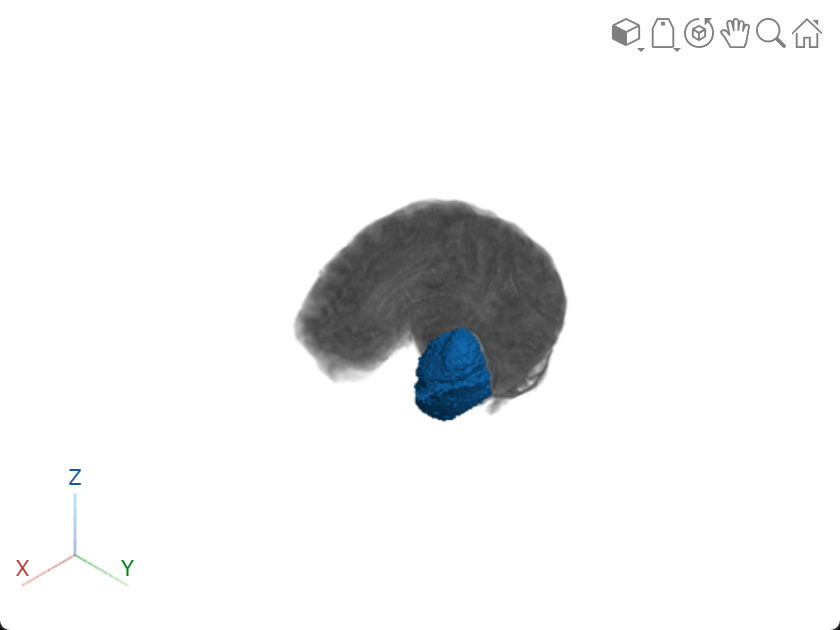
Remove Clipping Planes from Surface
By default, the Viewer object applies clipping planes to all objects that are children of the viewer. To apply different clipping planes to different children, set the GlobalClipping property of the viewer to "off". The volume and the surface no longer appear clipped because their ClippingPlanes property is empty.
viewer.GlobalClipping = "off";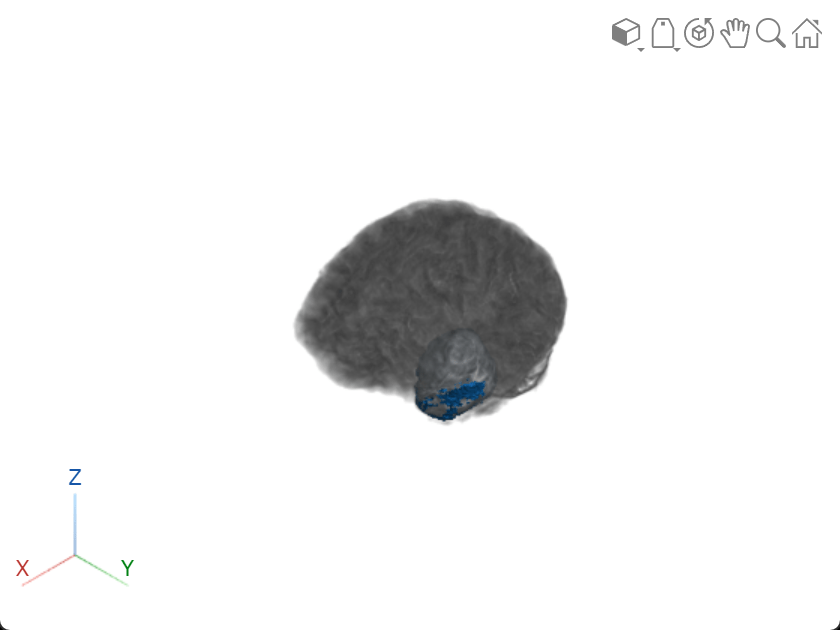
The ClippingPlanes property of the viewer stores the position and orientation of the global clipping planes. Copy these values to the ClippingPlanes property of the volume. The volume is clipped, but the surface object remains intact.
hVolume.ClippingPlanes = viewer.ClippingPlanes;
Refine Volume Clipping Planes
Notice that the two interactive planes are no longer visible. When GlobalClipping is turned off, you can interactively manipulate the clipping planes for only one object at a time. The active object for interactive clipping planes is the object specified by the CurrentObject property of the viewer. By default, the current object is the most recent object added to the scene, which in this case is the surface.
To continue modifying the clipping planes of the volume interactively, set the CurrentObject property of the viewer as the volume. Interacting with the clipping planes impacts the volume and not the surface.
viewer.CurrentObject = hVolume;