Customize Generated SystemVerilog Code
Set Up Model for Customized Code Generation
Open your model, and on the Apps tab, click HDL Verifier. Then, on the HDL Verifier tab, click C Code Settings. The Configuration Parameters dialog box opens on the Code Generation pane.
For System target file, click Browse and select
systemverilog_dpi_grt.tlc.If you have a license for Embedded Coder®, you can select target
systemverilog_dpi_ert.tlc. This target enables you to access its additional code generation options (on the Code Generation pane in Model Configuration Parameters).For Toolchain, in the Build process section, select the toolchain you want to use from the list. See Generate Cross-Platform DPI Components for guidance on selecting a toolchain.
You can optionally select flags for compilation. For Build configuration, select
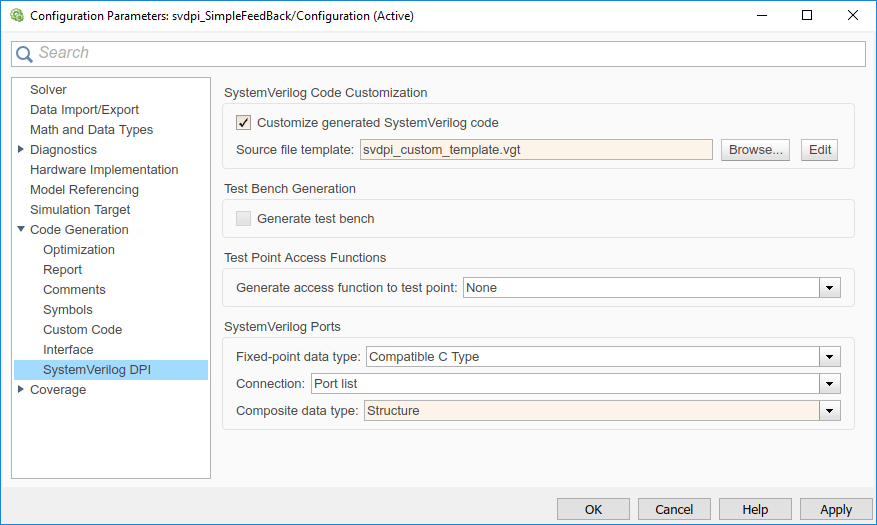
Specify. Click Show Settings to display the current flags.In the left pane, expand Code Generation and select SystemVerilog DPI.
Select Customize generated SystemVerilog code.
Specify the SystemVerilog template you want to use by setting Source file template.
Select Edit to see the contents of the specified Source file template. This example shows the content of the template file provided with HDL Verifier™,
svdpi_grt_template.vgt: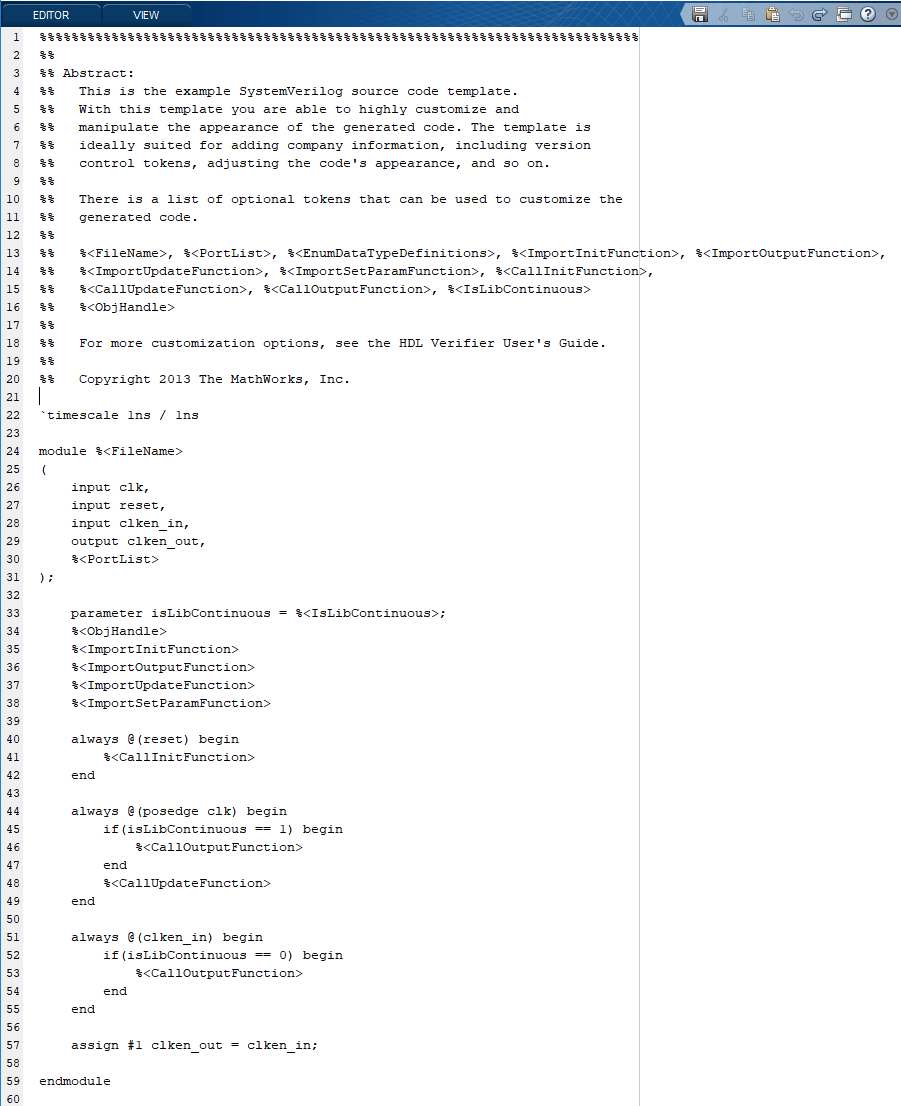
For more about the customized template, see Customization.
Click OK to accept these options and close the Configuration Parameters dialog box. Next, go to Generate Customized SystemVerilog DPI Component.
Generate Customized SystemVerilog DPI Component
In the HDL Verifier tab on the Simulink® toolstrip, select Generate DPI Component.
You can alternatively use the
slbuild(Simulink) function from the MATLAB® command line.If you built the component for the host machine, you can now use the component. If you intend to port the component to another machine with a different operating system, see Generate Cross-Platform DPI Components.