Import PyTorch Model Using Deep Network Designer
R2026bThis example shows how to import a PyTorch® model interactively by using the Deep Network Designer app. Model import converts a PyTorch model into a native MATLAB network, giving you access to the full range of MATLAB and Simulink tools. The imported model runs in MATLAB without a Python environment at run time.
Import Exported PyTorch Model
Import a PyTorch exported program (.pt2) model. Exported programs are the recommended format for import because they store tensor sizes and produce better networks with fewer unsupported operations.
To import the network, use the Deep Network Designer app.
deepNetworkDesigner
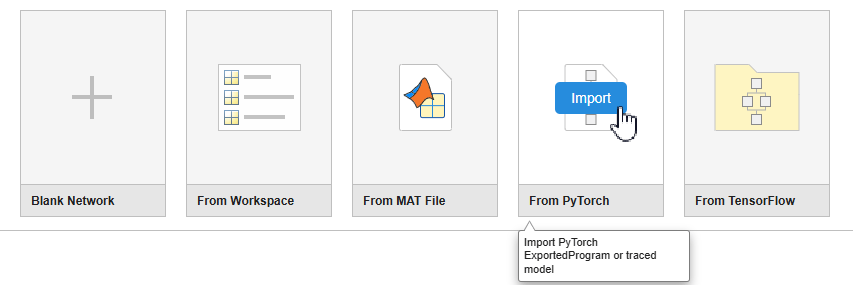
On the Deep Network Designer Start Page, under From PyTorch, click Import.
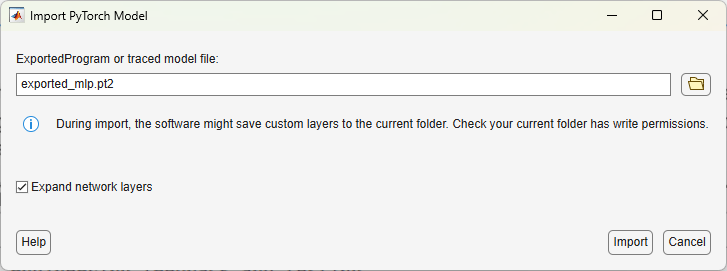
The app opens the Import PyTorch Model dialog box. Set the location to your model file. For this example, check the box to expand network layers. Expanding layers ensures that all nested layers are editable and visible on the canvas. If the network is very large or you do not need to edit the layers, you do not need to expand the layers.
During import, the software saves any custom layers to the current folder. Before importing, check that you have write permissions for the current working directory. To import the model, click Import. Importing the network can take some time.
Specify Input Formats
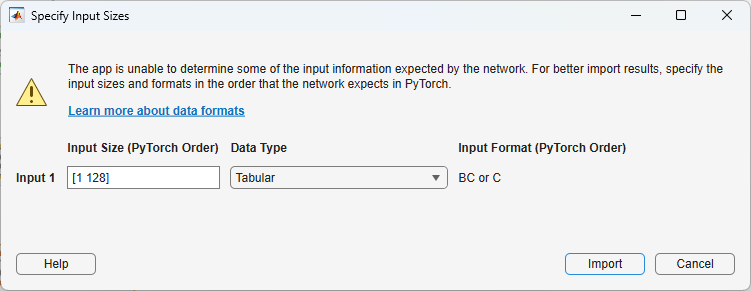
Because the model is an exported program, the app knows the input sizes and you do not need to specify them. However, specifying input formats can significantly improve the import. Formats tell the importer which dimension corresponds to batch, channel, spatial, and other data types. This information allows the software to produce more built-in layers.
For this network, the input has two dimensions: batch and channel (features). Choose the data type "Tabular", which corresponds to the format BC (Batch, Channel).
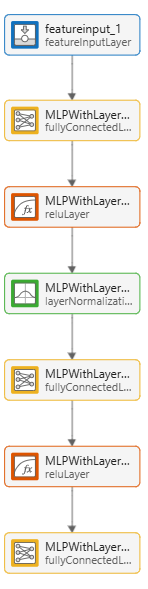
Click Import. The app displays the imported network in the Designer canvas. In this example, the network imports into the app with all built-in layers, including a layerNormalizationLayer. Without specifying the input data type, the importer would not know that the second dimension represents channels in order to produce a built-in layerNormalizationLayer.
Analyze Network
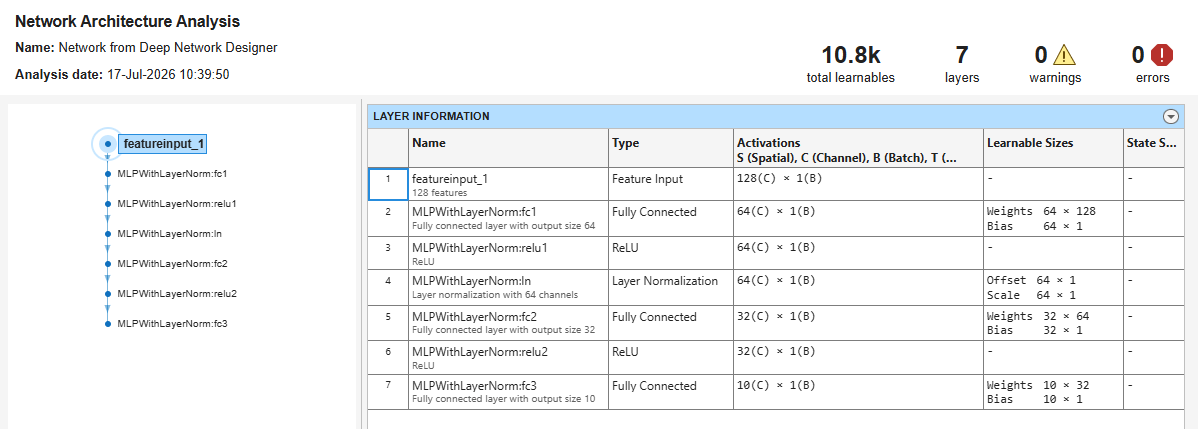
To verify that the imported network is valid, click Architecture Analysis. The app runs the network analyzer and displays the results.
Export to Simulink
After verifying the network, you can export it to Simulink for use in a Simulink model. In Deep Network Designer, on the Designer tab, click Export and select Export to Simulink.
You can choose to export the network as a single Simulink block, or as multiple blocks. Choose Multiple Layer Blocks to get one block per layer in the network.
After exporting the network to Simulink, double-click my_model_1 to view the individual layer blocks.

Resolve Placeholder Functions
When you import some PyTorch models, in particular .pt files, the importer may be unable to convert some operations into built-in MATLAB layers. In these cases, the importer creates custom layers with placeholder functions that you must complete before you can use the network.
This section demonstrates how to resolve placeholder functions using the traced model dNetworkWithUnsupportedOps.pt.
Import Model
On the Deep Network Designer Start Page, under From PyTorch, click Import. Set the model file to dNetworkWithUnsupportedOps.pt.
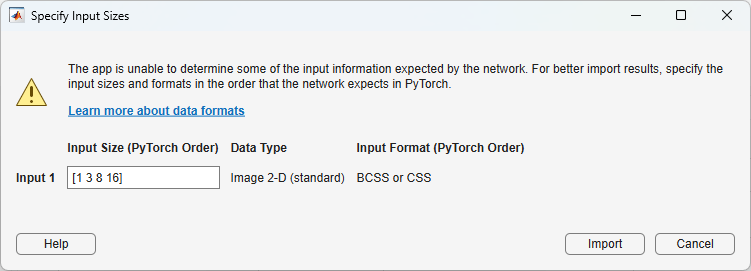
Because traced models do not store input sizes, you must specify them. Set the input size to [1 3 8 16] in the order expected by PyTorch. For more information about PyTorch input sizes, see Tips on Importing Models from TensorFlow, PyTorch, and ONNX.
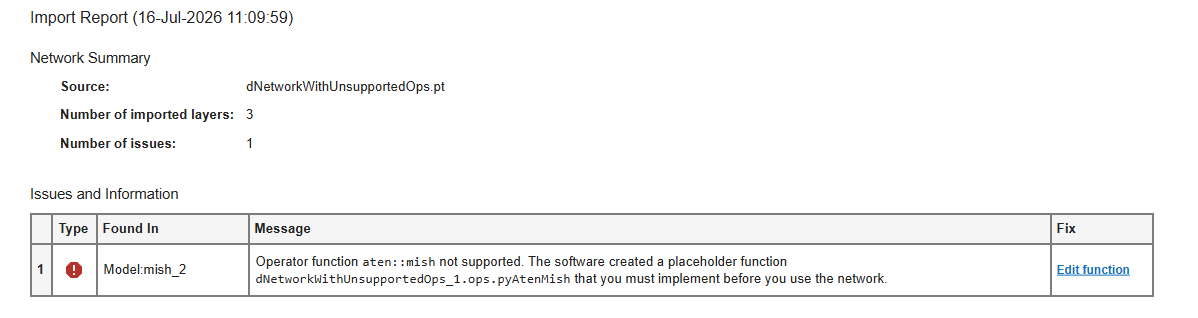
The app generates an import report listing any issues found by the software during import. You can see that there is a placeholder function that requires action. When the software is unable to convert a PyTorch layer into a built-in MATLAB® layer or generate a custom layer with associated MATLAB functions, the function creates a custom layer with a placeholder function. You must complete the placeholder function before you can use the network.
Edit Placeholder Function
To fix the issue, click Edit function to open the placeholder function.
The function contains placeholder text that you must replace with a function implementing this layer. The order of dimensions is different in Deep Learning Toolbox™ and PyTorch. For the placeholder function, the software generates helper code to make sure the inputs and outputs are in the right format.
The function inputs and outputs have this structure:
Inputs — The inputs cell array contains:
inputs{1} ... inputs{n}— Operator input values as unformatteddlarrayobjects in PyTorch dimension order.inputs{n+1}— A vector ofnumdims(number of dimensions) for each of theninputs.
Outputs — You must assign to the outputs cell array with
2nelements:outputs{1} ... outputs{n}— Output values as formatteddlarrayobjects.outputs{n+1} ... outputs{2n}— The correspondingnumdimsscalar for each output.
In this example, the mish operator has one input, so inputs{1} is the input dlarray and inputs{2} is the number of dimensions.
To complete the placeholder function, you must:
Extract the data and
numdimsfrom the inputs.Implement the core functionality of the layer.
Convert the output to a
dlarrayobject, assign the outputs in the required format, and disable the error.
The next sections go through each of these steps in detail. To see the completed function, see Complete Function.
Extract and Inspect Function Input
Start by extracting the values from the input structure array. Set a breakpoint so that you can view the structure array. For more information about using breakpoints to examine values, see Set Breakpoints.
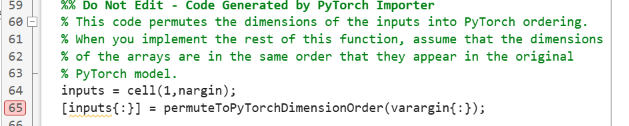
In Deep Network Designer, click Architecture Analysis. The software analyzes the network and stops when it hits the breakpoint in the pyAtenMish layer. In the Command Window, call inputs to inspect the input to the function.
inputs =

  1×2 cell array

    {5-D dlarray}    {[5]}
The order of dimensions is different in Deep Learning Toolbox™ and PyTorch. For the placeholder layer function, the inputs are in PyTorch® order. The expected output of the function is reverse PyTorch order. For more information, see Input Dimension Ordering.
Implement Mish Function
Next, implement the mish activation function. The mish function maintains the shape, size, and rank of the input.
For more information, consult the PyTorch documentation.
function varargout = pyAtenMish(varargin)
% Function for the PyTorch operator named aten::mish.

% Extract the value and numdims of X from the input. The dimensions
% are indexed in PyTorch order.
Xval = inputs{1};
Xnumdims = inputs{2};
Xrank = Xnumdims(1);

% Softplus function
Yval = log(1+exp(Xval));

% Mish function
Yval = Xval .* tanh(Yval);

% Determine numdims and dimension format of the output.
Yrank = Xrank;
Yfmt = repmat('U',1,Yrank);

% Convert the output to a dlarray.
Yval = dlarray(Yval, Yfmt);

% ...
end
Complete Function
Finally, convert the output of the mish function to the output type expected by the layer and disable the error. The function must assign a formatted dlarray object to outputs{1} and the corresponding numdims scalar to outputs{2}. For more information about data formats, see fmt. Set the numdims of the output equal to the numdims of the input. Disable the error in the function by commenting it out or deleting it.
The completed function is:
function varargout = pyAtenMish(varargin)
% Function for the PyTorch operator named pyAtenMish.

import dNetworkWithUnsupportedOps.ops.*

%% Do Not Edit - Code Generated by PyTorch Importer
% This code permutes the dimensions of the inputs into PyTorch ordering.
% When you implement the rest of this function, assume that the dimensions
% of the arrays are in the same order that they appear in the original
% PyTorch model.
inputs = cell(1,nargin);
[inputs{:}] = permuteToPyTorchDimensionOrder(varargin{:});

%% Do Not Edit - Code Generated by PyTorch Importer
% This code creates a cell array for the outputs.
outputs = cell(1,nargout);


%% To Do - Implement Function
% Each entry in "inputs" corresponds to an input to the original PyTorch operator in the same order as PyTorch inputs.
% An additional, last input argument specifies a vector of input numdims.

%% Implement Mish Function
% Extract the value and numdims of X from the input. The dimensions
% are indexed in PyTorch order.
Xval = inputs{1};
Xnumdims = inputs{2};
Xrank = Xnumdims(1);

% Softplus function
Yval = log(1+exp(Xval));

% Mish function
Yval = Xval .* tanh(Yval);

% Determine numdims and dimension format of the output.
Yrank = Xrank;
Yfmt = repmat('U',1,Yrank);

% Convert the output to a dlarray.
Yval = dlarray(Yval, Yfmt);

% Assign outputs: first n values, then n numdims.
outputs{1} = Yval;
outputs{2} = Yrank;

%% Do Not Edit - Code Generated by PyTorch Importer
% This code permutes the dimensions of the outputs back into reverse-PyTorch
% ordering.
varargout = cell(1,nargout);
[varargout{:}] = permutePyTorchToReversePyTorch(outputs{:});
end
Check Network
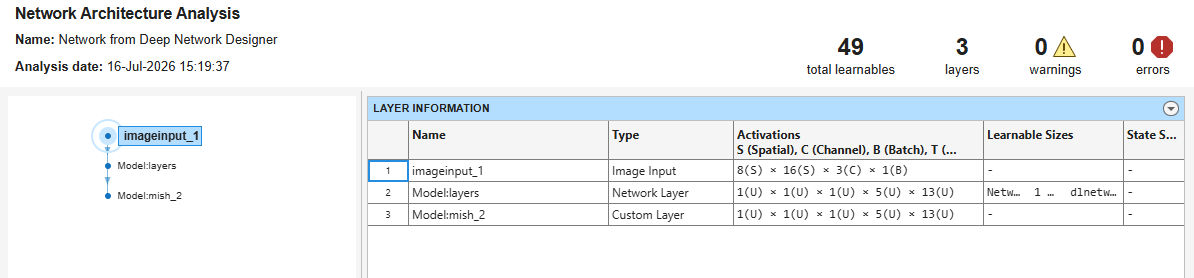
To check that your network is complete, click Architecture Analysis. The network analyzer reports zero errors.
See Also
Deep Network Designer | importNetworkFromPyTorch

