Link from Polyspace Test Elements
If you have a Polyspace® Test™ license, you can create links from C or C++ code and tests to requirements by using the Requirements Editor. You can link to requirements from:
Tabular test cases
Individual steps in multi-step test cases
xUnit tests
Functions in source code
When you create a link from a tabular test case, an individual step in a multi-step test
case, or an xUnit test, Requirements Toolbox™ creates a Related to type link. When you create a link from
a function in your source code, Requirements Toolbox creates an Implement type link. For more information about
built-in link types, see Link Types. For more about
verification and implementation status, see Review Requirements Verification Status and Track Requirement Links by Using Implementation Status.
Note
To create links from Polyspace Test elements, you must open the Requirements Editor or Traceability Matrix window from the Polyspace Platform toolstrip. You cannot programmatically create links.
For more information about enabling linking features between Requirements Toolbox and Polyspace Test, see Link C/C++ Sources and Tests to Requirements in Requirements Toolbox (Polyspace Test).
Link from Tabular Test Cases and Test Steps
To create a link from a tabular test case or test step to a requirement:
In the Project tab of the Polyspace Platform toolstrip, in the Tools section, click Requirements Editor.
In the Polyspace Platform, open a tabular test.
On the left side of the test case editor, select the test or test step.
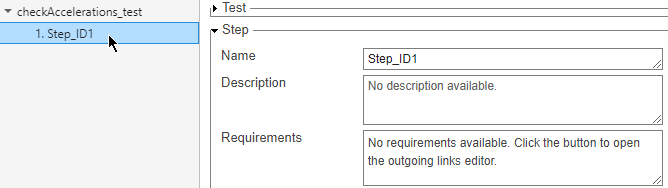
In the Requirements Editor, select a requirement.
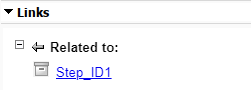
In the Links section of the toolstrip, click Add Link > Link from selected Polyspace Test element. In the right pane, in the Links section, the Related to section displays the linked item.
Link from xUnit Tests
You can link to requirements from these Polyspace Test xUnit API macros:
PST_SIMPLE_TESTPST_SIMPLE_TEST_BODYPST_TESTPST_TEST_BODY
To create a link from xUnit test to a requirement:
In the Project tab of the Polyspace Platform toolstrip, in the Tools section, click Requirements Editor.
Open an xUnit test. Then, select a line of code to link from.

Tip
Lines that you can select for linking display the requirements icon
 on the left.
In the Requirements Editor, select a requirement to link to.
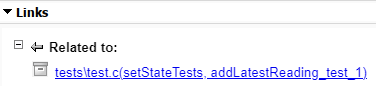
In the Links section of the toolstrip, click Add Link > Link from selected Polyspace Test element. In the right pane, in the Links section, the Related to section displays the linked item.
Link from Functions in Source Code
To create a link from a function in the source code:
In the Project tab of the Polyspace Platform toolstrip, in the Tools section, click Requirements Editor.
Open a source file. Then, select a function entry point to link from.
Tip
Lines that you can select for linking display the requirements icon
on the left.In the Requirements Editor, select a requirement to link to.
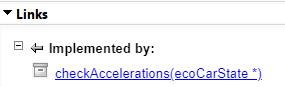
In the Links section of the toolstrip, click Add Link > Link from selected Polyspace Test element. In the right pane, in the Links section, the Implemented by section displays the linked item.
For more information about implementation status, see Track Requirement Links by Using Implementation Status.
Modify the Link Type for Tests
Requirements Toolbox creates a Relate type link when you create a link from
these test elements:
Tabular test cases
Individual steps in multi-step test cases
xUnit tests
To run tests from the Requirements Editor or include links in the
verification status metric, set the link type to Verifies. You must
set the link type by using the Requirements Editor. You cannot change the
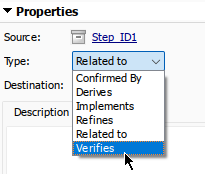
link type by using the Requirements Toolbox API. To change the link type, in the Requirements Editor, click
Show Links. Then, in the right pane, expand the
Properties section, and, in the Type
drop-down menu, select Verifies.
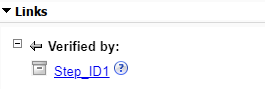
In the View section of the toolstrip, click Show Requirements. In the right pane, in the Links section, the test element appears in the Verified by section.
After you set the link type to Verify, you can run tests and view
verification status by using the Requirements Editor. For more information
about running tests and viewing verification status, see Verify Requirements by Running Tests or Analyses and Display Verification Status.
Navigate to Polyspace Test Elements
You can navigate from the requirements in the Requirements Editor to the linked Polyspace Test elements. In the Requirements Editor, in the View section of the toolstrip, click Show Requirements and select a requirement. In the right pane, expand the Links section and click the hyperlink.