Comparison Tool
Diff and merge changes between Simulink models
Description
The Comparison Tool in Simulink® is an interactive tool for visualizing and merging differences between two Simulink models.
In a collaborative environment, you typically compare models:
When you require a peer review of your changes
Before you share or submit a version of your code to source control
When you want to pinpoint when an issue was introduced
When you want to examine your own local changes in detail
Using the Comparison Tool, you can:
Compare and review changes in SLX and MDL model files from any version of Simulink. If needed, the Comparison Tool resaves the models in the current release using the SLX format before opening the comparison report.
Visualize and highlight changes in the Simulink Editor.
Export the comparison results to send for peer review.
Use merge mode to port or restore changes in different models.
Open the Comparison Tool
You can select files and folders on disk to compare using one of these methods:
Simulink Editor — To compare a model that is open in the Simulink Editor to another model on disk, on the Modeling tab, in the Evaluate & Manage section, click Compare To.
Files or Project panel — To compare two files on disk, select both files. Then, right-click and select Compare Selected Files/Folders. The Comparison Tool opens both files, with the file you selected first on the left.
Alternatively, right-click a file and select Compare To. Then, select the file you want to compare to.
Command Window — Use the
visdifffunction.
For files under source control, you can open the Comparison Tool to understand differences between revisions using one of the following methods.
Files or Project panel — To compare a file to its ancestor, right-click the file and select Source Control > View Changes. To compare the file to a different revision, right-click the model file and select Show Revisions. In the Log dialog box, select the revision and click Compare to Local.
Source Control panel — To compare a file to its ancestor, in the Modified Files section, right-click the file and select View Changes. To compare the file to a different revision, right-click the file and select Show Revisions. In the Log dialog box, select the revision and click Compare to Local.
Branch Manager — To inspect changes in a file between two Git™ revisions, open the Branch Manager. Right-click and select Source Control > Branch Manager. In the Commit Differences pane, right-click a file and select Show Differences.

Examples
To simplify the comparison report and focus on a subset of changes, use the Quick Filters pane. In the toolstrip, in the Filter section, click Filter.
By default, the Comparison Tool hides nonfunctional changes, such as repositioning of items, label positions, font and color settings for blocks and lines, and system print and display settings.
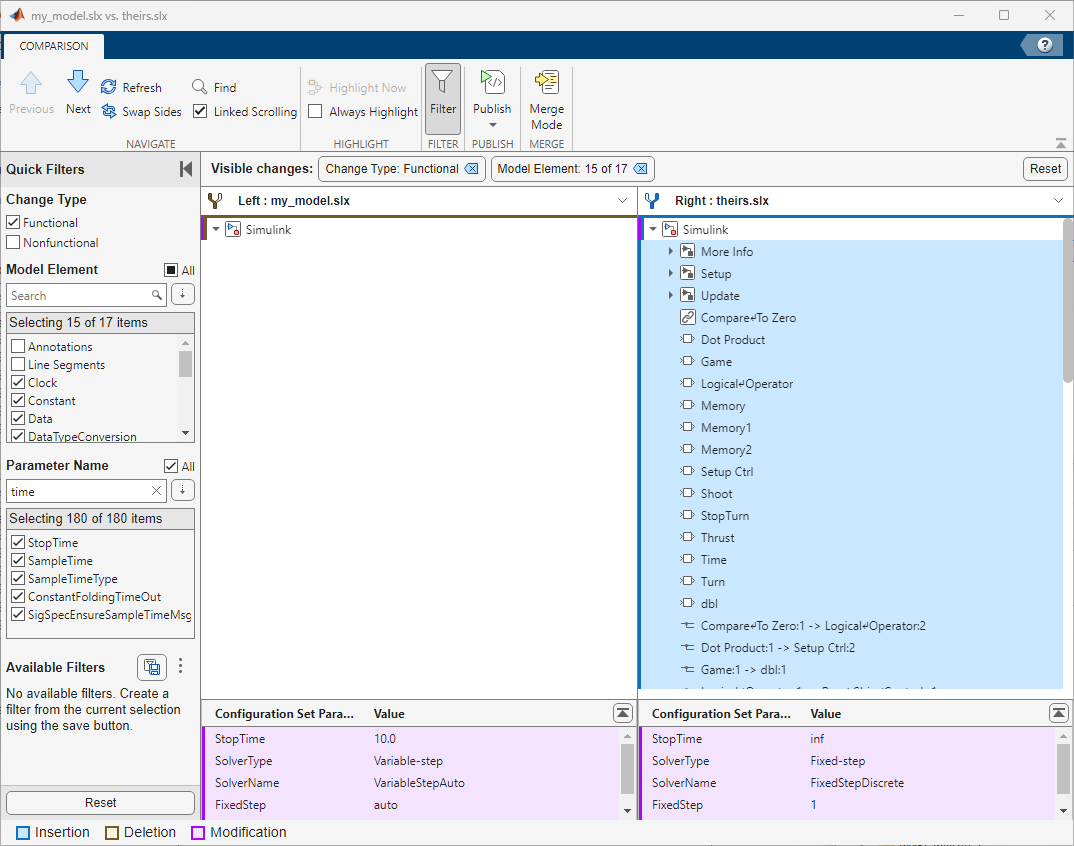
To see all changes including the nonfunctional changes, click the filters listed next to Visible changes to clear them.
You can reset the filters to default any time using the Reset button.

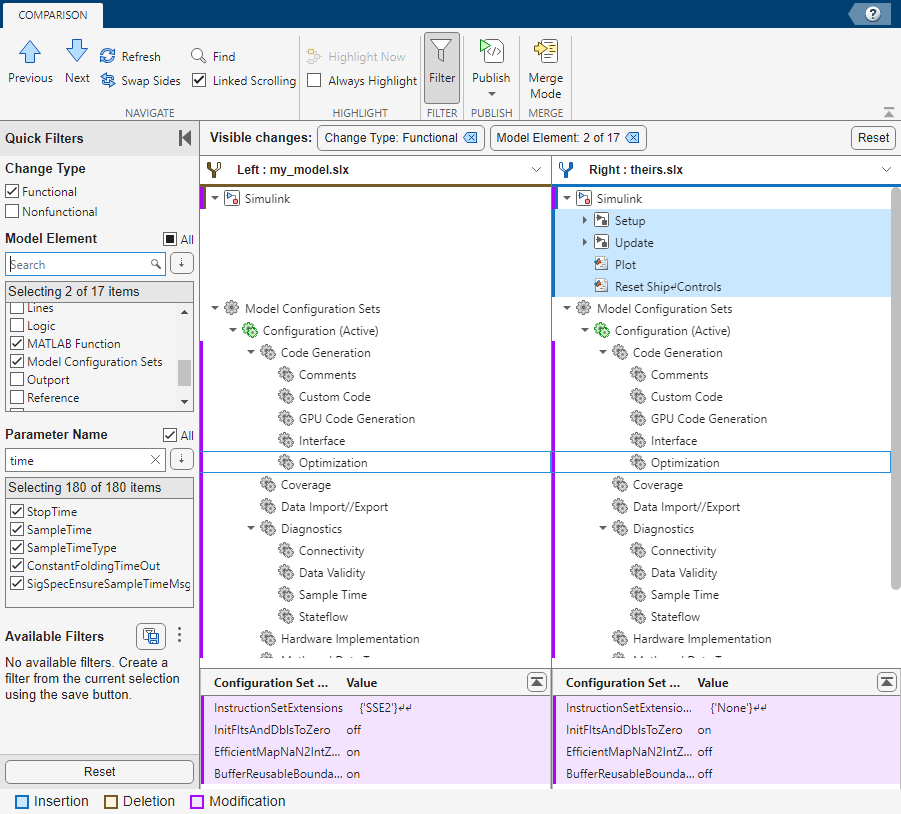
You can simplify the report to show only specific model elements or parameters.
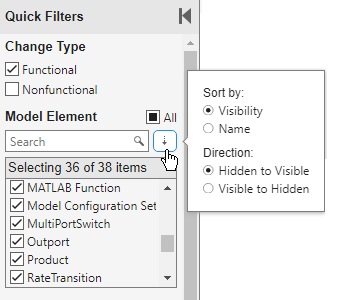
To show only changes to MATLAB® Function blocks and model configuration sets, in the Model Element section, clear the All checkbox. Then, select the MATLAB Function and the Model Configuration Sets checkboxes.
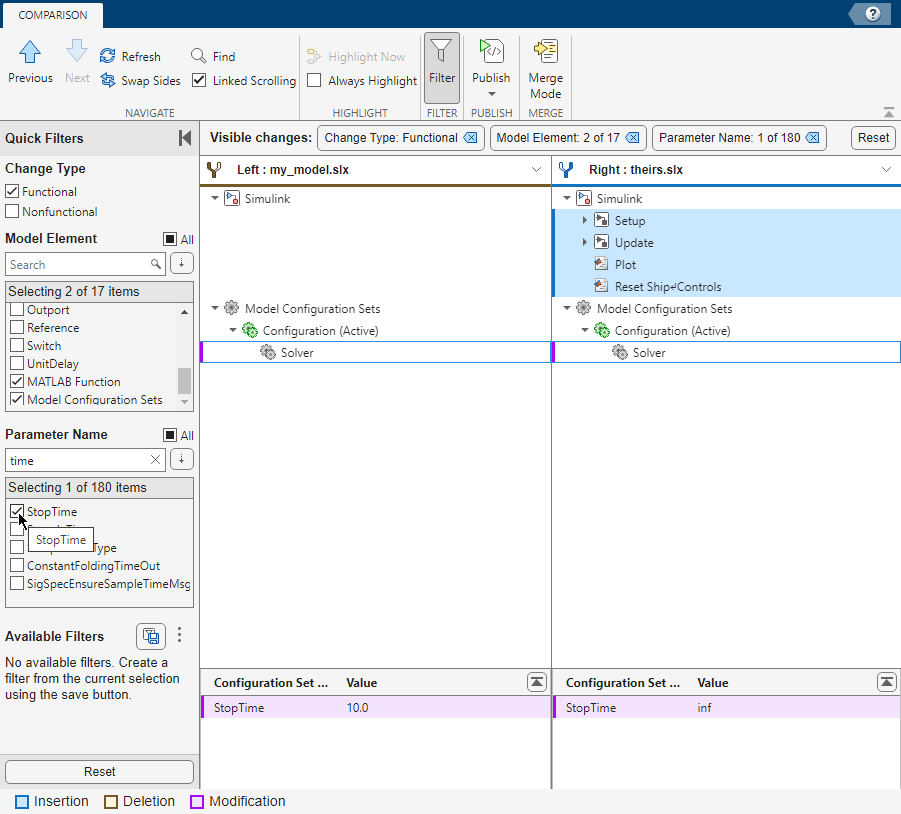
To show only changes related to a specific parameter, for example the Stop Time parameter, in the Parameter Name section, clear the All checkbox. Then, select the Stop Time checkbox.
To hide changes related to a specific model element, in the comparison report, right-click the item you want to hide and select Hide all model elements of type
type.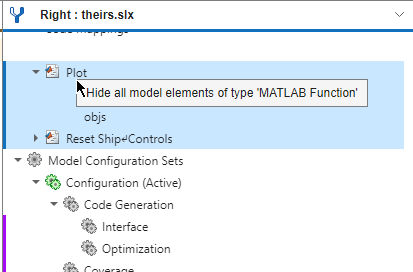
To hide changes related to a specific parameter name, in the detailed comparison table, right-click the parameter name you want to hide and select Hide all parameters with name
name.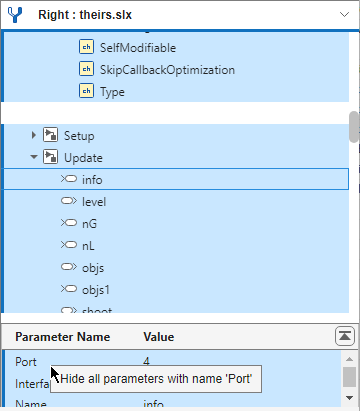
Tip
Use the Search fields to look for the required checkbox faster.
You can also sort the checkboxes by name or visibility using the arrow buttons next to the search fields.
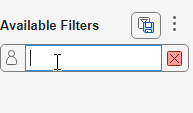
To create a filter from the current selection, click the button next to the Available Filters section.
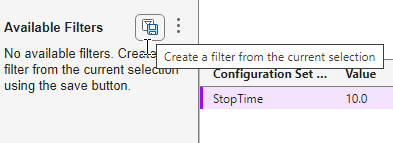
Then, specify the filter name in the field that appears.
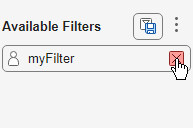
To rename a filter, right-click the filter you want to rename and select Rename.
To delete a filter, point to the filter you want to delete and click the red cross that appears.
To apply a filter, click it.
You can reset all filters to default any time using the Reset button.
You can export your filters to share with others. In the Available Filters section, click the vertical ellipses and select Export. Then, select the filters you want to export and click Export.
After sharing, another user can import the filters by selecting Import under the vertical ellipses.
When comparing certain file types, you can manipulate the comparison report at the command line by specifying an output argument. Supported files include Simulink models, Simulink data dictionaries, requirement and link set files, plain text files, MATLAB scripts, MATLAB apps, MAT files, and text-based source code files.
For example, compare two Simulink model files and return a comparison object.
comparison = visdiff(modelname1,modelname2);
You can disable all filters from the model comparison report.
filter(comparison,"unfiltered");To publish a comparison report to a file, use publish on the comparison object. The default format of the published report is HTML. publish saves the file in the current folder as filename1_filename2.html.
file = publish(comparison);
web(file)
Create a PDF comparison report named myreport. Save the report to the comparisonresults folder.
file = publish(comparison,format="PDF",Name="myreport",OutputFolder="comparisonresults");
web(file)
Supported report formats are HTML, PDF, PDF/A, and DOCX.
Note
PDF/A comparison reports are not supported on Linux®.
For instructions on how you can use visdiff to generate reports in your continuous integration workflows, see Attach Model Comparison Report to GitHub Pull Requests.
Related Examples
Parameters
Navigate between differences in the model comparison report.
Swap sides of the two models being compared and run the comparison analysis again.
By default, the Comparison Tool places the first file you select in the Left pane and the second in the Right pane. To view the full path of a file, expand the Show file details down arrow next to each filename.
If the files are under source control, the tool shows source control information including the branch name and tags.

When the models are not up to date, save or discard changes in the modified models and click Refresh to run the comparison analysis again.
Opens the Find dialog box where you can search for items in the comparison report.
Enabling Linked Scrolling synchronizes the scrolling between the Left and Right models.
Tip
If the report contains items that moved location from one model to another and they appear in very different parts of the comparison report, clear Linked Scrolling to make viewing these changes easier.
By default, the two models being compared display to the right of the comparison report, with the model corresponding to the left side of the report on top and the model corresponding to the right side appearing below. The tool highlights the currently selected comparison report node in the models in the Simulink Editor or in the model Configuration Parameters dialog box.
To control highlighting in models, clear Always Highlight and use the Highlight Now button instead.
Click Highlight Now to highlight the currently selected comparison report node in the models in the Simulink Editor or in the model Configuration Parameters dialog box.
Simplify the comparison report and focus on items of interest using quick filtering.
By default, the report shows only functional changes. The report hides nonfunctional
changes, such as repositioning of items, label positions, font and color settings for
blocks and lines, and system print and display settings. To explore all differences,
including nonfunctional changes, clear the filter ![]() .
.
Save your comparison results in a printable report (HTML, WORD, PDF, PDF/A) or as a workspace variable.
PDF/A comparison reports are not supported on Linux.
Note
Generating a PDF report on a cloud drive, such as MATLAB Drive™ or Microsoft® OneDrive™, can cause file contention between the report generation software and the cloud drive synchronization software resulting in a version of this error:
Error closing document package: Could not commit changes: removeAll failed: fl:filesystem:AccessDenied:
C:\Users\jdoe\OneDrive\Documents\MATLAB\reports\temp_FO\stylesheets: Permission denied.
Clicking Merge Mode opens a third pane called Target. The pane provides option buttons to allow you to pick changes from Left and Right models to save in the Target file.
Programmatic Use
More About
This table explains the different terminology that the comparison report uses.
| Task | Terminology | Explanation |
|---|---|---|
| Compare two files on disk | Left | One of the model files you are comparing, placed on the left side of the report. |
Right | The other model file you are comparing, placed on the right side of the report. | |
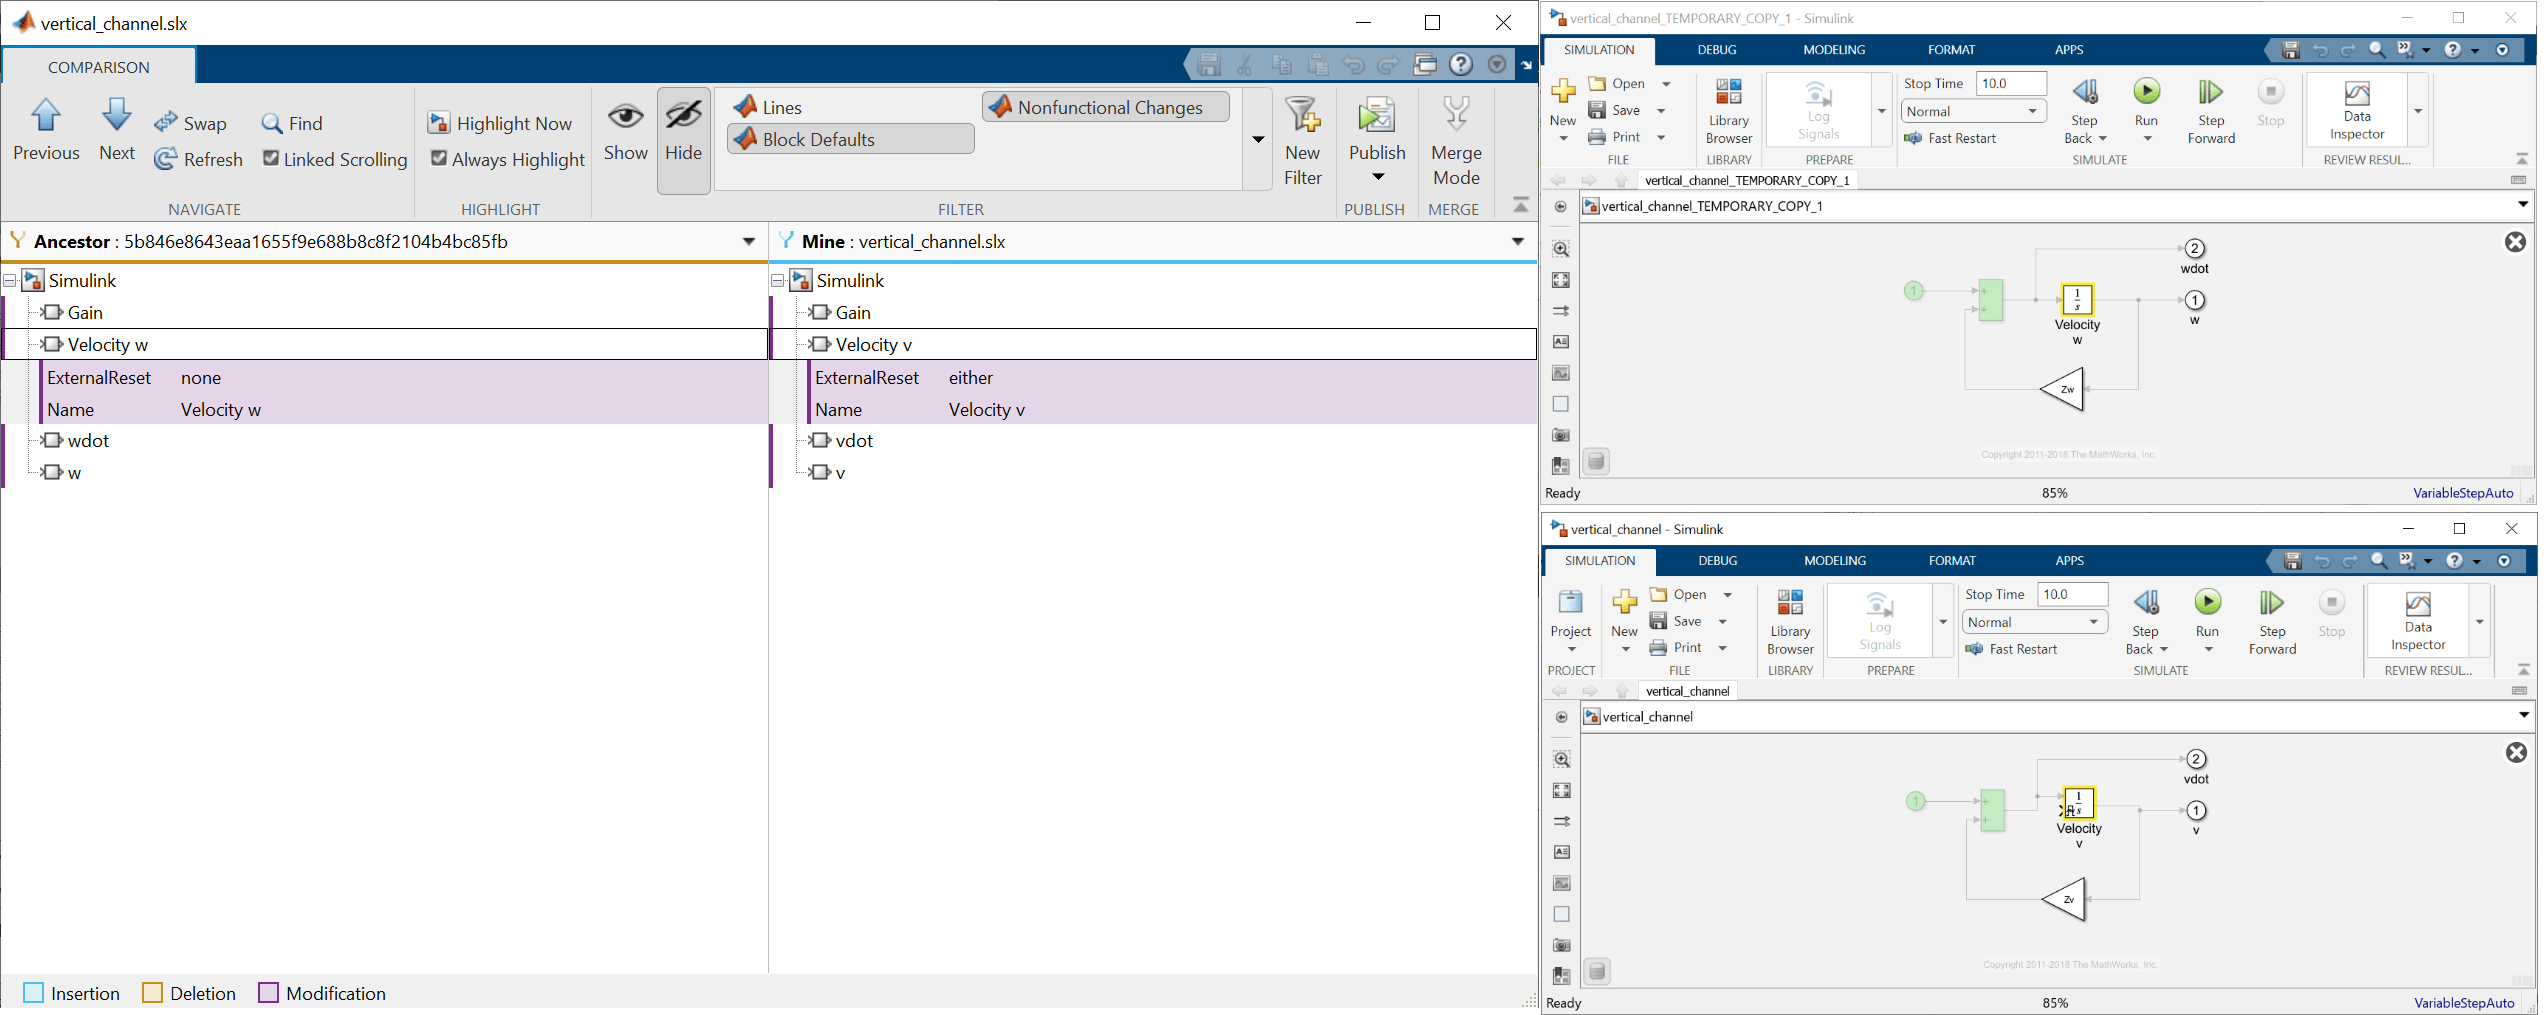
| Compare a file under source control to its ancestor | Ancestor | The original version of your model file, before you made local changes. |
Mine | The current version of your model file that includes local changes. | |
| Combine or restore changes in compared model files | Merge mode | Mode in the Comparison Tool that enables you to combine individual changes between the models you compare. When merge mode is enabled, a third Target pane opens with option buttons to allow you to make choices. |
Target | A temporary file that opens in the Target pane where you decide if you want to take changes from the left (ancestor) or the right (mine) file. | |
Option buttons
| Buttons next to individual rows in the Target pane. These buttons let you choose between changes in the left (ancestor) or the right (mine) file. If no buttons appear next to a row, then making individual merges is either not recommended or not possible. |

Algorithms
To match items between one Simulink model and another, the Comparison Tool uses a heuristic algorithm that relies on various model properties, including block and line connectivity, location, and parameters. A heuristic algorithm decreases the cost of computationally expensive model comparison analysis by proposing a match that balances efficiency and accuracy.
Note
The analysis might not be able to detect matches between previously corresponding sections of files that have diverged.