Inspect Bottle Fill Level During Live Image Acquisition
This example shows how to detect an anomaly in a bottle fill level during live image acquisition using the caliper tool.
The example follows this workflow:
Connect to the camera, configure it, and capture a reference image.
Choose a template region in the reference image or image alignment and find the excepted fill line as shown in the example Perform Metrology Edge Measurements and Alignment (Computer Vision Toolbox).
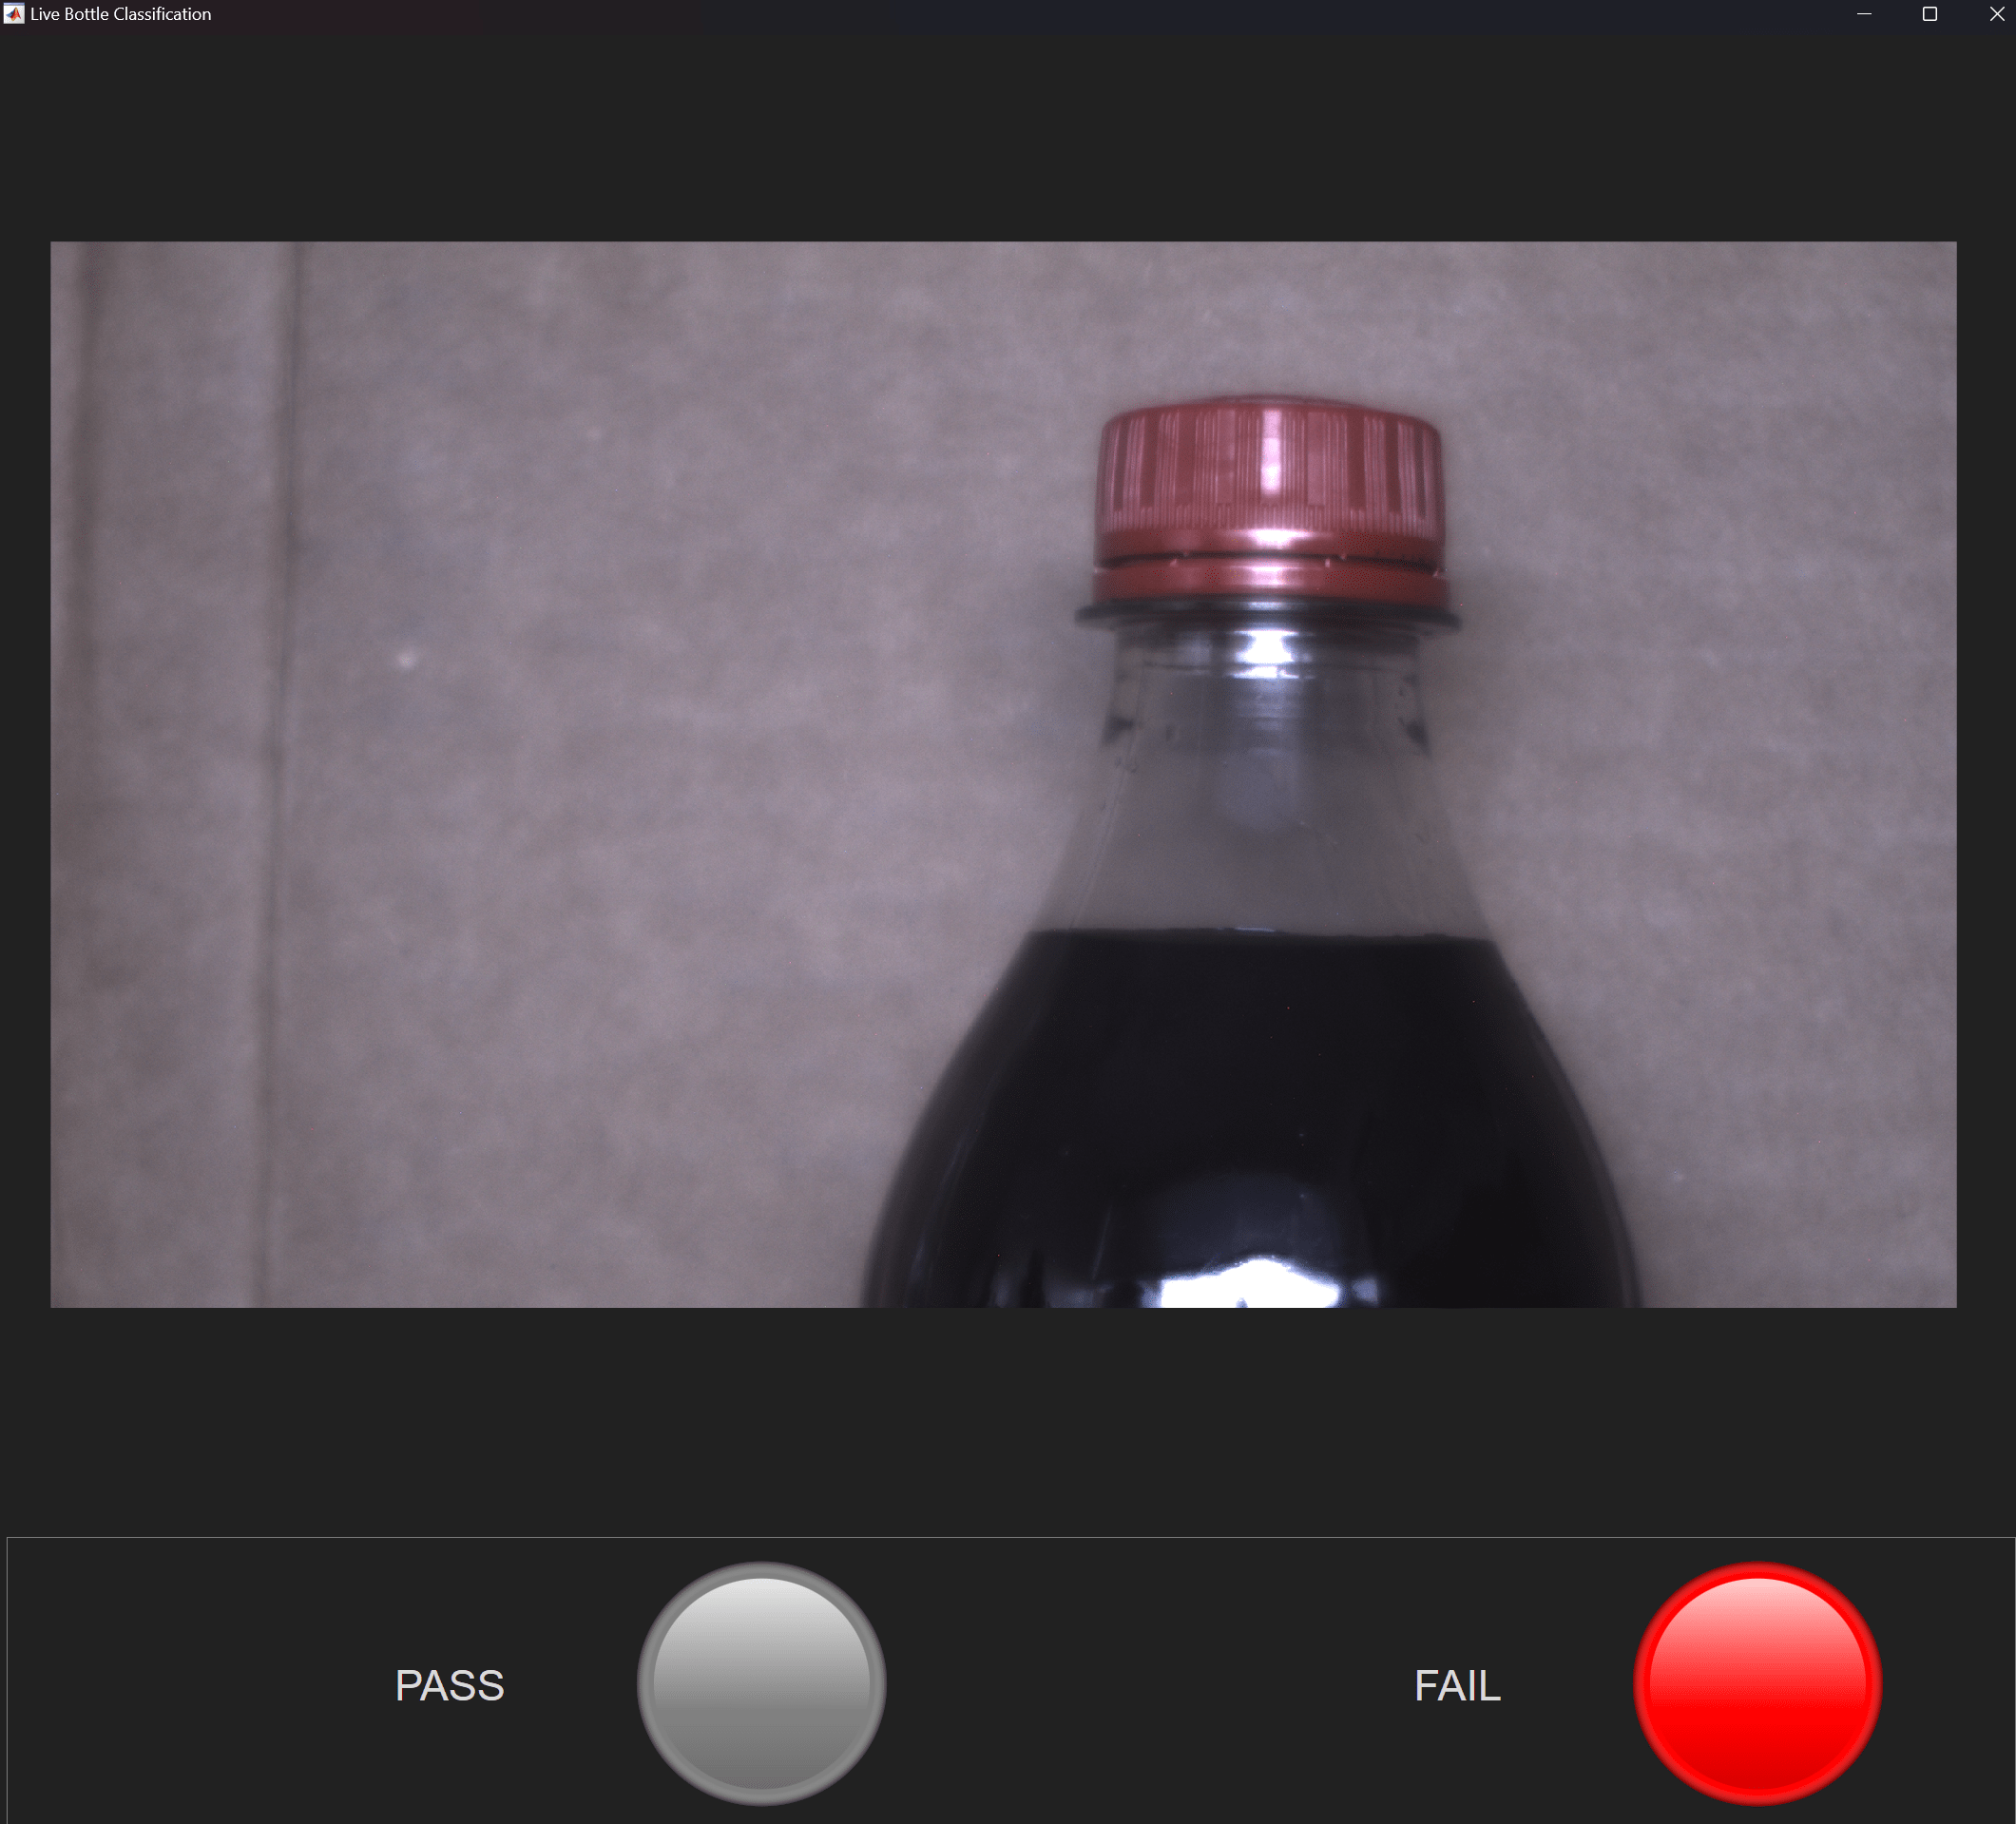
Capture live images of bottles and pass them to the algorithm to determine if fill level is correct. The live image preview also displays a green and red light for indicate if the bottle under inspection passed or failed.
Optionally deploy the trained anomaly detection model and live image acquisition using MATLAB® Compiler™. When the script is deployed as a standalone executable, you can launch it on any machine without a MATLAB license.
This example uses a USB3 Vision camera to stream live images. However, you can run this example using any supported device included on Hardware Support from Image Acquisition Toolbox.
The following add-ons are required to run this example.
Image Acquisition Toolbox
Image Acquisition Toolbox Support Package for GenICam™ Interface
Computer Vision Toolbox™
Automated Visual Inspection Library for Computer Vision Toolbox
Connect to the Camera and Configure videoinput Properties
Connect to the camera by creating a videoinput object with the gentl adaptor. The example selects the first device and BGR8 pixel format to acquire images from an Allied Vision Alvium USB3 Vision camera. You can view all the available devices with imaqhwinfo.
v = videoinput("gentl",1,"BGR8");
Set the ReturnedColorspace property to "rgb".
v.ReturnedColorspace = "rgb";Configure the ROIPosition best suited for the application.
v.ROIPosition = [0 0 2448 1370]; % [XOffset, YOffset, width, height]Configure Device-Specific Properties
Retrieve the videosource object.
src = getselectedsource(v);
Set the AutoModeRegionHeight property with the height provided in the ROIPosition.
vidRes = v.ROIPosition;
src.AutoModeRegionHeight = vidRes(4);
Set the camera exposure properties. The values of these properties depend on factors such as light source available and ambient light.
src.ExposureAutoMax = 8.489939e+05;
src.ExposureAutoMin = 3.670500e+01;
src.ExposureTime = 4.327557e+04;
Prepare Data for Inspection
This function inspects the bottle fill level. To learn how this function was created, see the example Perform Metrology Edge Measurements and Alignment (Computer Vision Toolbox).
function TF = isFillLineDistanceInRange(capTemplate,templatePos,inspectionImage,referenceMeasurementPos,expectedDistance)
    % Setting tolerance threshold to 3%
    threshold = 0.03;

    % Align bottle in the inspection image with respect to reference image.
    tform = referenceImageToInspectionImageMapping(capTemplate,templatePos,inspectionImage);
    equivalentPos = transformPointsForward(tform,referenceMeasurementPos);

    % Measure distance from bottle cap to the fill level.
    measurementData = caliper(inspectionImage,equivalentPos,MeasurementMode="single-edge",...
        GradientThreshold = 0.01,EdgeTransition="both");

    % No bottles detected scenario.
    if isempty(measurementData.Distance)
        TF = false;
        return
    end

    % First edge to the last edge distance.
    measuredDist = measurementData.Distance(end) - measurementData.Distance(1);

    % Calculate if the bottle in the image is good or anomaly.
    TF = abs(measuredDist-expectedDistance) < threshold * expectedDistance;

    % The overall logic necessary to form a geometric transformation that aligns points
    % in the reference image with points in an inspection image is
    % summarized with the following function.
    function tform = referenceImageToInspectionImageMapping(capTemplate,templatePos,inspectionImage)
        tform = imregcorr(capTemplate,inspectionImage,"translation");
        tform.A(1:2,3) = tform.A(1:2,3) - templatePos(1:2)' + 1;
    end
end
Use these steps to prepare for the inspection function.
Acquire a reference image.
Choose a template region in the reference image for image alignment.
Use
uicaliperto find the expected bottle fill distance.
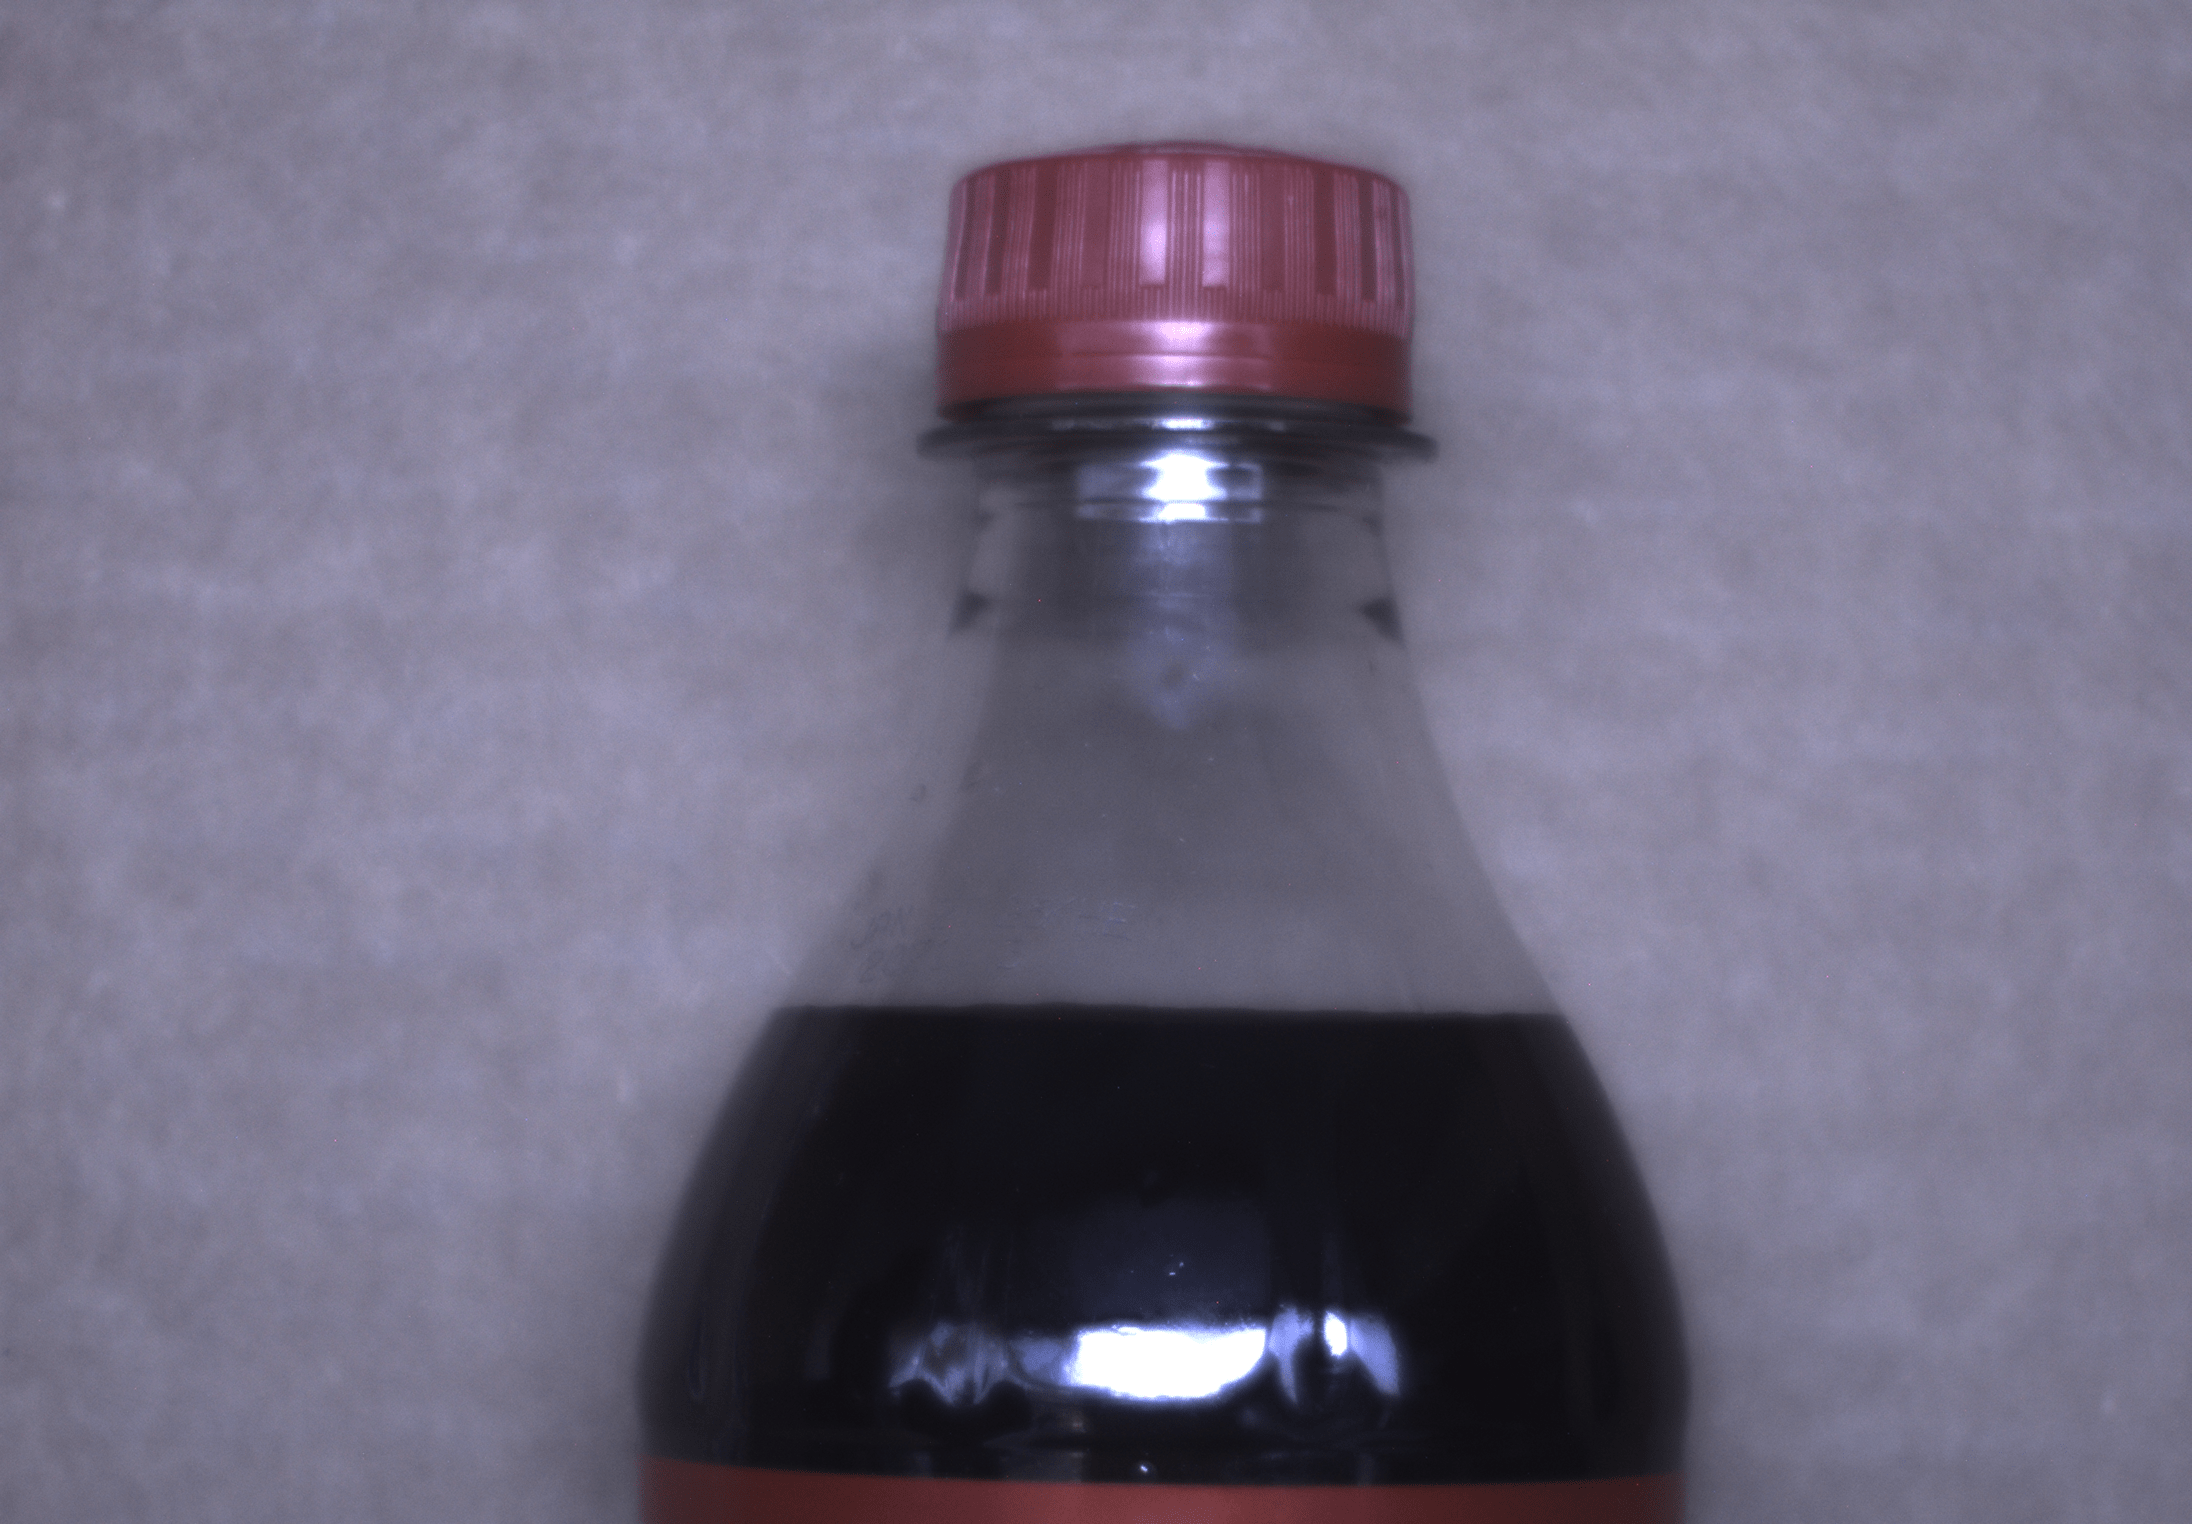
Acquire a Reference Image
goodImage = getsnapshot(v);
imageshow(goodImage);
Choose a Template Region in the Reference Image for Image Alignment
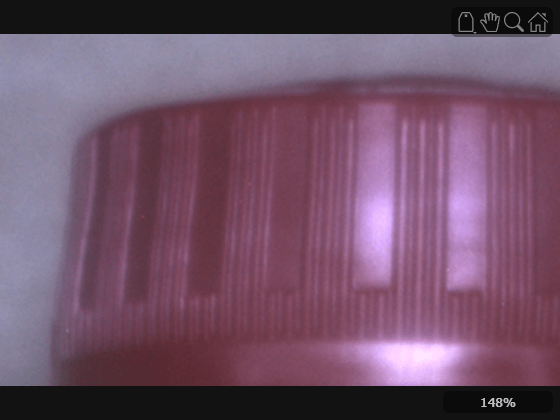
For bottle inspection, choose the bottle cap as the template region. This is used to align the bottles in the inspection image to the reference image, helping the algorithm to correctly apply caliper on the new image.
templatePos = [902 114 377 237];
capTemplate = imcrop(goodImage,templatePos);
imageshow(capTemplate);
Use uicaliper to Find the Expected Bottle Fill Distance
hIm = imageshow(goodImage);
referenceMeasurementPos = [1173.2, 106.7; 1167.5 1057.8];
hCal = uicaliper(hIm,Position=referenceMeasurementPos,MeasurementMode="single-edge",...
    GradientThreshold = 0.02,EdgeTransition="both");
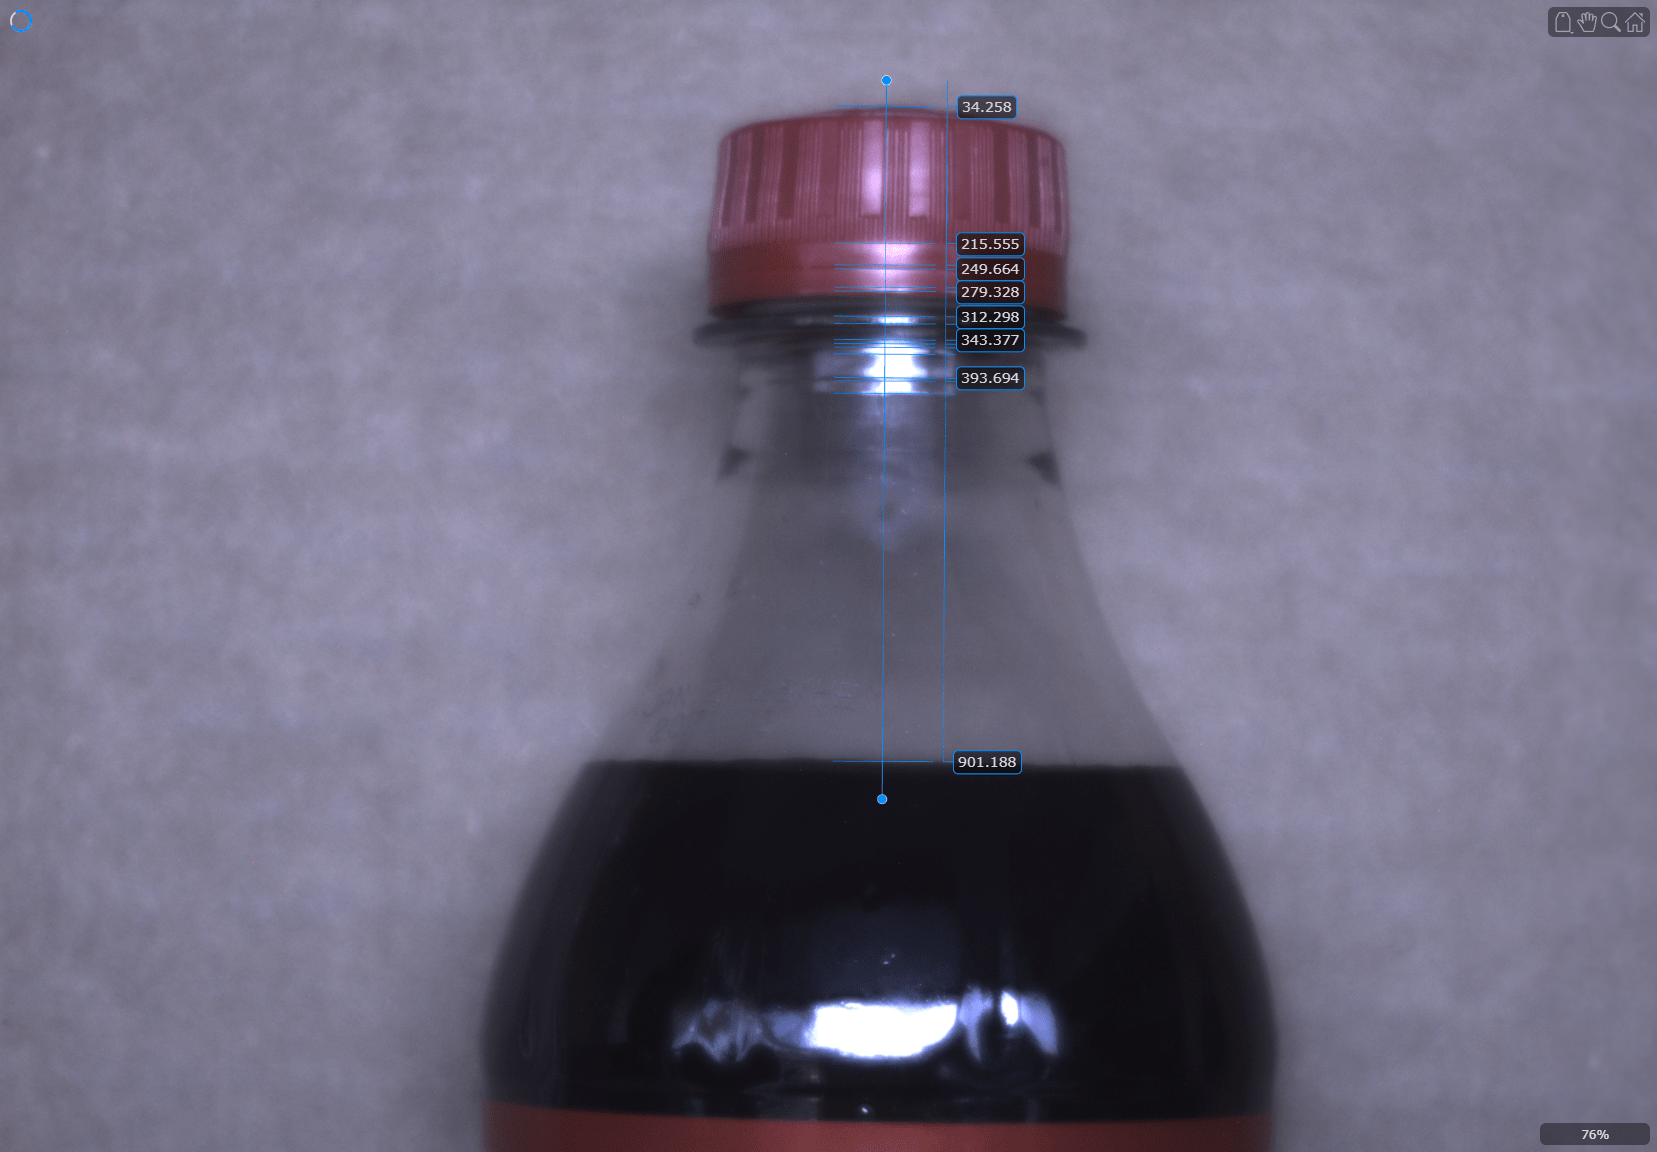
expectedCapToFillLineDistance = hCal.Distance(end) - hCal.Distance(1);
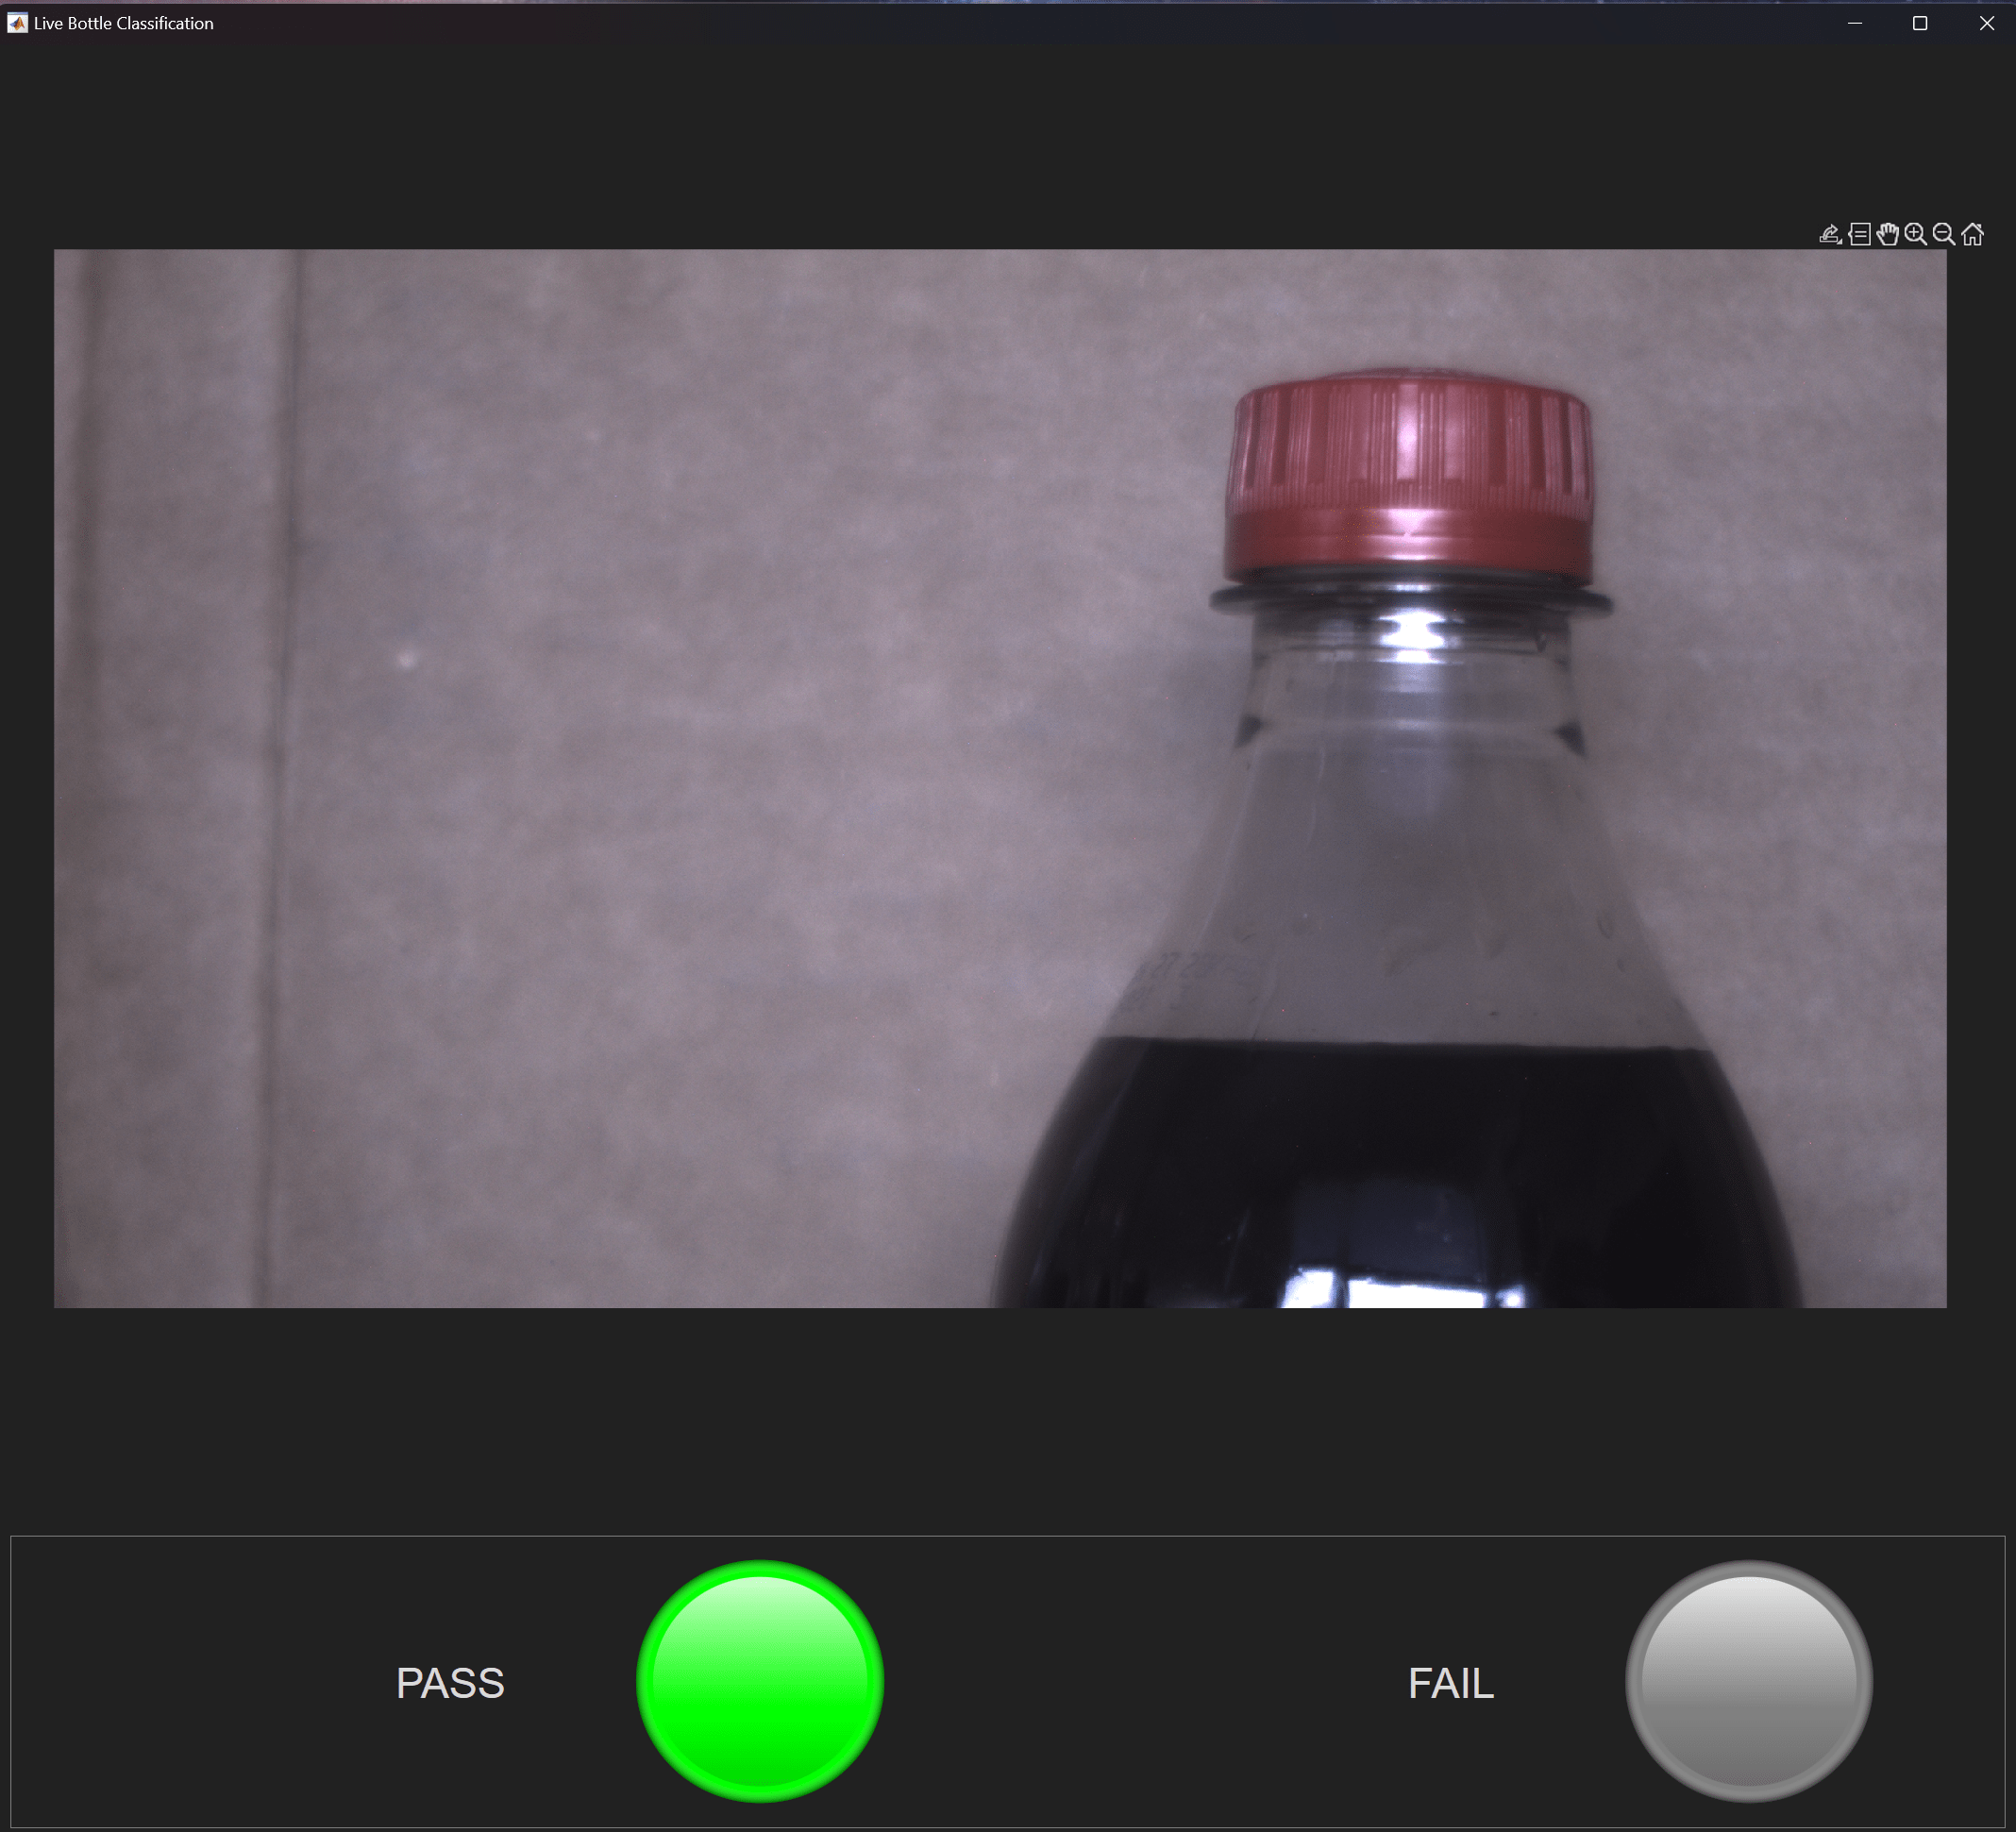
Create Custom Preview for Live Inspection of Bottles
Create a figure window for a custom preview.
hFig = uifigure("Toolbar","none",...
       "Menubar", "none",...
       "NumberTitle","Off",...
       "AutoResizeChildren","off",...
       "Name","Live Bottle Classification");
Set the figure position according to the application needs.
hFig.Position = [0 0 1500 1500];
Create the main grid layout to organize the entire display.
hGrid1 = uigridlayout(hFig);
hGrid1.ColumnWidth = {"1x"};
hGrid1.RowHeight = {"5x","1x"};
Create a panel.
hPanel = uipanel(hGrid1);
hPanel.Layout.Row = 2;
hPanel.Layout.Column = 1;
Create another grid layout called hGrid2, used as a background for the pass and fail indicator panel.
hGrid2 = uigridlayout(hPanel);
hGrid2.ColumnWidth = {"1x","1x","1x","1x"};
hGrid2.RowHeight = {"1x"};
Create pass label.
goodBottleLabel = uilabel(hGrid2);
goodBottleLabel.HorizontalAlignment = "right";
goodBottleLabel.Layout.Row = 1;
goodBottleLabel.Layout.Column = 1;
goodBottleLabel.Text = "PASS";
goodBottleLabel.FontSize = 30;
Create a uilamp to signal bottle pass.
goodBottle = uilamp(hGrid2);
goodBottle.Layout.Row = 1;
goodBottle.Layout.Column = 2;
goodBottle.Color = [0.502 0.502 0.502];
Create fail label.
badBottleLabel = uilabel(hGrid2);
badBottleLabel.HorizontalAlignment = "right";
badBottleLabel.Layout.Row = 1;
badBottleLabel.Layout.Column = 3;
badBottleLabel.Text = "FAIL";
badBottleLabel.FontSize = 30;
Create a uilamp to signal bottle fail.
badBottle = uilamp(hGrid2);
badBottle.Layout.Row = 1;
badBottle.Layout.Column = 4;
badBottle.Color = [0.502 0.502 0.502];
Create the image object in which you want to display the video preview data. The size of the image object must match the dimensions of the video frames.
numBands = v.NumberOfBands;
hAxis = uiaxes(hGrid1);
hAxis.Layout.Row = 1;
hAxis.Layout.Column = 1;
hImage = image(zeros(vidRes(4), vidRes(3), numBands), Parent=hAxis);
axis(hAxis,"image");
Create the custom preview callback function. This function processes each frame and identifies whether a bottle is filled to the correct level. This function uses the isFillLineDistanceInRange function to distinguish passing and failing bottles.
function mypreview_fcn(obj,event,hImage)
    % Information needed for isFillLineDistanceInRange function.
    persistent capTemplate
    persistent templatePos
    persistent referenceMeasurementPos
    persistent expectedCapToFillLineDistance

    if isempty(capTemplate)
        capTemplate =  getappdata(hImage,"CapTemplate");
    end

    if isempty(templatePos)
        templatePos =  getappdata(hImage,"TemplatePos");
    end

    if isempty(referenceMeasurementPos)
        referenceMeasurementPos =  getappdata(hImage,"ReferenceMeasurementPos");
    end

    if isempty(expectedCapToFillLineDistance)
        expectedCapToFillLineDistance =  getappdata(hImage,"ExpectedCapToFillLineDistance");
    end

    % Handle to bottle pass lamp.
    goodBottle =  getappdata(hImage,"GoodBottle");
    % Handle to bottle fail lamp.
    badBottle =  getappdata(hImage,"BadBottle");

    % Image to inspect and then preview.
    inspectionImage = event.Data;

    % Inspect the incoming image for fill line distance
    isGood = isFillLineDistanceInRange(capTemplate,templatePos,inspectionImage,referenceMeasurementPos,expectedCapToFillLineDistance);

    if isGood
        % Set bottle fail lamp to gray
        badBottle.Color = [0.502, 0.502, 0.502];
        % Set bottle pass lamp to green
        goodBottle.Color = [0.00,1.00,0.00];
    else
        % Set bottle pass lamp to gray
        goodBottle.Color = [0.502,0.502,0.502];
        % Set bottle fail lamp to red
        badBottle.Color = [1.00,0.00,0.00];
    end

    hImage.CData = inspectionImage;
end
Set the custom preview callback function.
setappdata(hImage,"UpdatePreviewWindowFcn",@mypreview_fcn);Set all the data required in the custom preview function.
setappdata(hImage,"TemplatePos",templatePos);
setappdata(hImage,"CapTemplate",capTemplate);
setappdata(hImage,"ReferenceMeasurementPos",referenceMeasurementPos);
setappdata(hImage,"ExpectedCapToFillLineDistance",expectedCapToFillLineDistance);
setappdata(hImage,"GoodBottle",goodBottle);
setappdata(hImage,"BadBottle",badBottle);
Start the preview.
preview(v,hImage);
The following previews show "Pass" and "Fail" cases.
Pass:
Fail:
Deploy Live Image Classification as Standalone Application
You can deploy the live image classification of bottles as a standalone application using the Standalone Application Compiler (MATLAB Compiler) app. You must have a license for MATLAB Compiler. Once you create the standalone application, you can deploy it to multiple machines without additional MATLAB licenses.
See Also
Topics
- Perform Metrology Edge Measurements and Alignment (Computer Vision Toolbox)