P-H Diagram (2P)
Libraries:
Simscape /
Fluids /
Two-Phase Fluid /
Utilities
Description
The P-H Diagram (2P) block plots a p-h diagram of the pressure with respect to the specific enthalpy of a thermodynamic, two-phase fluid. A p-h diagram indicates the fluid state at key points during a thermodynamic cycle.

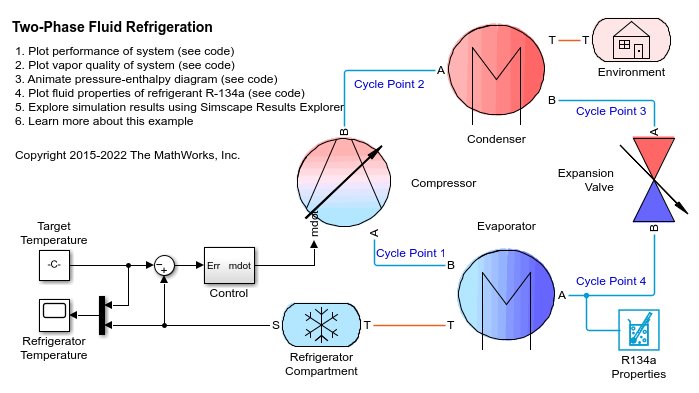
Each numbered point on the diagram indicates the fluid state after a dynamic process in the refrigeration cycle:
Cool vapor at low pressure
Hot vapor at high pressure
Hot liquid at high pressure
Mixed vapor and liquid at low pressure
To use the P-H Diagram (2P) block:
Place a Thermodynamic Properties Sensor (2P) and a Pressure, Temperature & Internal Energy Sensor (2P) block at each location you want to monitor.
Note
The Pressure & Internal Energy Sensor (2P) block measures a differential pressure. Connect port A to the monitor point and port B to an Absolute Reference (2P) block.
Convert the Simscape physical signals to Simulink signals with a PS-Simulink Converter block.
Use a Mux block to combine the pressure signals. Connect the output signal to the P-H Diagram (2P) p port.
Use a Mux block to combine the converted specific enthalpy signals and connect the output signal to the h port.
Before running the simulation, double-click the P-H Diagram (2P) block, then click the Select fluid properties button
 to set the network fluid properties.
If you do not select the fluid properties, the block uses the default two-phase network fluid, which is water.
Settings
Click the Settings button ![]() to specify the pressure, specific enthalpy, and
temperature units and the element order. Clear the Array element order of
inputs p and h with closed loop check box to use the Array
indices of inputs p and h parameter to specify the order in which the
block connects the cycle points.
to specify the pressure, specific enthalpy, and
temperature units and the element order. Clear the Array element order of
inputs p and h with closed loop check box to use the Array
indices of inputs p and h parameter to specify the order in which the
block connects the cycle points.
P-H Diagram Playback
You can also replay the animation from the most recent simulation. After running the model, double-click the block and use the buttons at the top of the window to control the animation. Use the drop-down menu to the right of the Time field to control the rate of the playback. The replay controls are disabled before you run a simulation, when the model is loaded, and when the simulation is running.
Use the playback slider or Time field to control the simulation cycle. If you enter a time that is not a model time step, the block displays the next closest time step.
To save the current iteration of the plot, point to the plot area. From the icons in the
top-right corner of the plot, click the Export icon ![]() and select the Save As button
and select the Save As button ![]() to save the plot.
to save the plot.


