Update Project in Polyspace Desktop User Interface
This topic shows how to update a project in the user interface of the Polyspace® desktop products.
If using the Polyspace Server products, see Set Up Bug Finder Analysis on Servers During Continuous Integration.
If using Polyspace as You Code, see Set Up Polyspace Analysis in IDEs.
To analyze your C/C++ source files with Bug Finder or Code Prover in the Polyspace user interface, you create a Polyspace project. During development, you can simply update this project and rerun the analysis for updated results. This topic describes the updates that you can make.
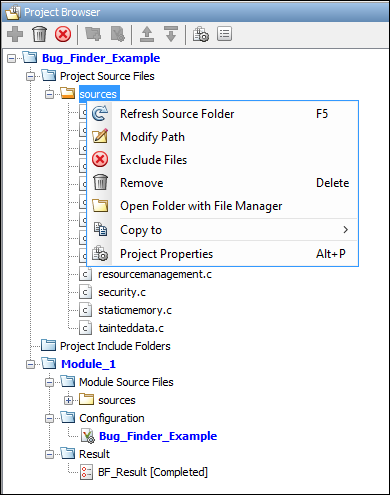
To begin updates, right-click your project on the Project Browser pane. You see a different set of options depending on the node that you right-click.

Change Folder Path
If you have moved the source folder that you added to your project, modify the path in your Polyspace project. You can also modify the folder path to point to a different version of the code in your version control system.
In the Project Browser, right-click the top sources folder
![]() and select Modify
Path.Change the path to the new location.
and select Modify
Path.Change the path to the new location.
To resync the files under this source folder, right-click your source folder and select Refresh Source Folder.
Refresh Source List
If you made changes to files in a folder already added to the project, you do not need to re-add the folder to your project. Refreshing your source file list looks for new files, removed files, and moved files.
Right-click your source folder and select Refresh Source Folder. The files in your Polyspace project refresh to match your file system.
Refresh Project Created from Build Command
If you created your project automatically from your build system, to update the project later by rerunning your build command, right-click the project folder and select Update Project.
You see the information that you entered when creating the original project. Click Run to retrace your build command and recreate the Polyspace project.
Add Source and Include Folders
If you want to change which files or folders are active in your project without
removing them from your project tree, right-click the file or folder and select
Exclude Files. The file appears with an ![]() symbol in your project indicating it is not
considered for analysis. You can reinclude the files for analysis by right-clicking
and selecting Include Files.
symbol in your project indicating it is not
considered for analysis. You can reinclude the files for analysis by right-clicking
and selecting Include Files.
If you want to add additional source folders or include folders, right-click your project or the Source or Include folder in your project. Select Add Source Folder or Add Include Folder.
Before running an analysis, you must copy the source files to a module. Select the
source files that you want to copy. To select multiple files together, press the
Ctrl key while selecting the files. Right-click your selection.
Select Copy to > Module_n. n is the module number.
Manage Include File Sequence
You can change the order of include folders to manage the sequence in which include files are compiled.
When multiple include files by the same name exist in different folders, you might
want to change the order of include folders instead of reorganizing the contents of
your folders. For a particular include file name, the software includes the file in
the first include folder under Project_Name > Include.
In the following figure, Folder_1 and
Folder_2 contain the same include file
include.h. If your source code includes this header file,
during compilation, Folder_2/include.h is included in preference
to Folder_1/include.h.

To change the order of include folders, in your project, expand the
Include folder. Select the include folder or folders that
you want to move. To move the folder, click either ![]() or
or ![]() .
.